How to Shoot Birds (Still and In-Flight): Step-by-Step Tutorial on Bird Photography
Bird photography is perhaps the most practiced form of wildlife photography. It’s a form of photography that, on the face of it, looks pretty simple, but actually presents challenges that can push a photographer to their limits, both technically, physically and sometimes even financially.
Equipment Needed
Camera
You need a DSLR camera with an acceptable ISO capability, which is usually not offered by absolute entry level cameras. However, if done in plenty of light and with the right lens, bird photography can be done very well with entry level cameras too.
Lens
The more the reach the better for obvious reasons. I would say anything below 300mm and you’ll really have a hard time getting close enough to birds that are really worth capturing.
One of my favourite lenses for bird/wildlife photography is the Tamron 150-600mm.
Another option you have is to use a teleconverter on your zoom lens/ prime lens, which basically enhances the focal length of your existing lens. For example, using a 2X teleconverter will multiply the focal length of your lens by 2 times. So using it on a 55-200mm lens will give you a maximum focal length of 400mm (200 x 2).
However, using a teleconverter has its cons, the main one being that you end up losing light as your f stop increases too depending on the multiplying factor of the teleconverter. For example, on a 2X teleconverter, the f stop would increase by 2 stops. So on a 55-200mm f.5.6 lens, your minimum f at 200mm would be f11, and not f5.6. So you would be losing 2 full stops of light, which means you will have to compensate this by either lowering the shutter speed or increasing the ISO, both of which are undesirable for wildlife photography.
Using a teleconverter with a premium lens like the 300mm f4 is more advisable as even with a 2X tele, your minimum f stop would only be f8.
If you want to use a teleconverter, it should mainly be because of the fact that the weight of your equipment reduces. For example, using a 300mm f4 lens with a teleconverter is lighter than using a bigger telephoto lens.
Tripod
I personally don’t like using a tripod. It restricts your movement, which is vital is bird photography, especially when you are shooting birds in flight.
If at all you have to use a tripod, make sure you get yourself a tripod with a Gimbal head. It’s designed to make all sorts of movement hassle-free.
Capturing Still Birds vs Birds in Flight
There’s little surprise that the latter is more challenging and can really test your photography skills. Let’s have a look at both:
Shooting Still Birds

Shooting Mode
Use manual mode and set ISO to Auto. Auto ISO is very important because taking quick shots is very essential as birds are very restless creatures. Spend too much time playing with the settings and you’ll be left staring at an unoccupied branch.
Another reason you should be using the manual mode is because unlike Aperture priority, Shutter priority, Program and Auto modes, both the shutter speed and aperture are fully under your own control, something that is extremely important as we’ll soon be seeing.
Burst/ Continuous Mode
Though this is more important when capturing birds in flight, use it even for still birds, as sometimes it’s tough to focus accurately on far-away birds, so taking multiple shots increases your chances of getting the desired result.
Time of the day
Do bird photography at day time when the light is more. Since you’ll be using high shutter speeds, you’ll need to that extra light to keep the ISO down.
Direction of Sun
Avoid shooting birds when the sun is behind them. This throws the bird into shadows and you’ll have to increase the exposure to illuminate the bird, which generally means an increase in ISO.
Background
Always be on the look out for birds that are against a background that is far away from them. This will ensure that you get a nice clean bokeh and minimalize distractions.
Aperture
Ideally you want to shoot wide open to blur the background by achieving a shallow depth of field and also to get in as much light as you can.
But the problem with a shallow depth of field is that you can easily mis-focus and end up not getting the head and eyes sharp enough. But this is where the burst mode helps. Taking multiple shots at once increases your chances of getting one shot that has the eye sharp enough.
But if the light is plenty and the background is a little far away from the bird, then you can afford to shoot birds at f8. This will still make sure that the background gets blurred and make sure the deeper depth of field captures more of the bird, thereby increasing the probability of getting a sharp shot.
Another advantage of using f8 is that many lenses are at their sharpest at around f8 as compared to when they are wide open.
Shutter Speed
Shutter speeds for capturing still birds can be a tricky affair. Ideally, you want to use as less a shutter speed as possible to save on the ISO.
The problem is that many birds make quick and sudden movements of different parts of their bodies even when they are just perched onto a branch.
It’s best to wait for a moment when the bird is very still and then take a shot at a lesser shutter speed.
What the shutter speed is depends on the focal length you are using. For instance, if you are shooting at 600mm, you should ideally be at 1/600, but since you’ll have your Vibration Reduction (VR)/ Image Stabilization (IS) function switched on your lens, you can afford to use that extra stability to reduce the shutter speed by a couple of stops. I find that it is fine to use a shutter speed somewhere around half the focal length. So at 600mm, it’ll be fine to use shutter speeds around 1/300. The lower you go, the more still you will have to be.
Just make sure of one thing which is VERY important – IF THE BIRD IS NOT MOVING, REMEMBER TO DECREASE YOUR SHUTTER SPEED BEFORE YOU TAKE A SHOT. If you don’t do this, the camera will bump up the ISO and you’ll unnecessarily end up with a noisy shot. In fact, this requires a certain amount of presence of mind. But it’s fairly easy to execute as all you have to care about is rotating the command dial. The ISO is taken care by the auto-ISO feature and your aperture is already set.
Again, the burst mode will help you here in increasing your chances of getting the right shot.
Exposure compensation
When you are shooting on the manual mode with Auto-ISO, exposure compensation is your best friend when it comes to adjusting your exposure to get the shot with the correct exposure.
There are two instances in particular when you have to increase the exposure:
- When the sun is behind the bird: As discussed before, this will throw the bird into a silhouette. So you’ll have to deliberately overexpose the shot to get the optimal illuminance. Raising your exposure compensation basically means you are increasing the ISO so it’s best not to shoot against the sun, unless a silhouette is what you are actually looking for.
- Shooting darker birds: Shooting darker birds is always a challenge because they have be illuminated slightly more to get all the details on their feathers. So in most cases, you have to increase the exposure compensation by a certain degree. The more the direct light that is falling on the bird, the less the exposure compensation required.
Shooting Birds in Flight
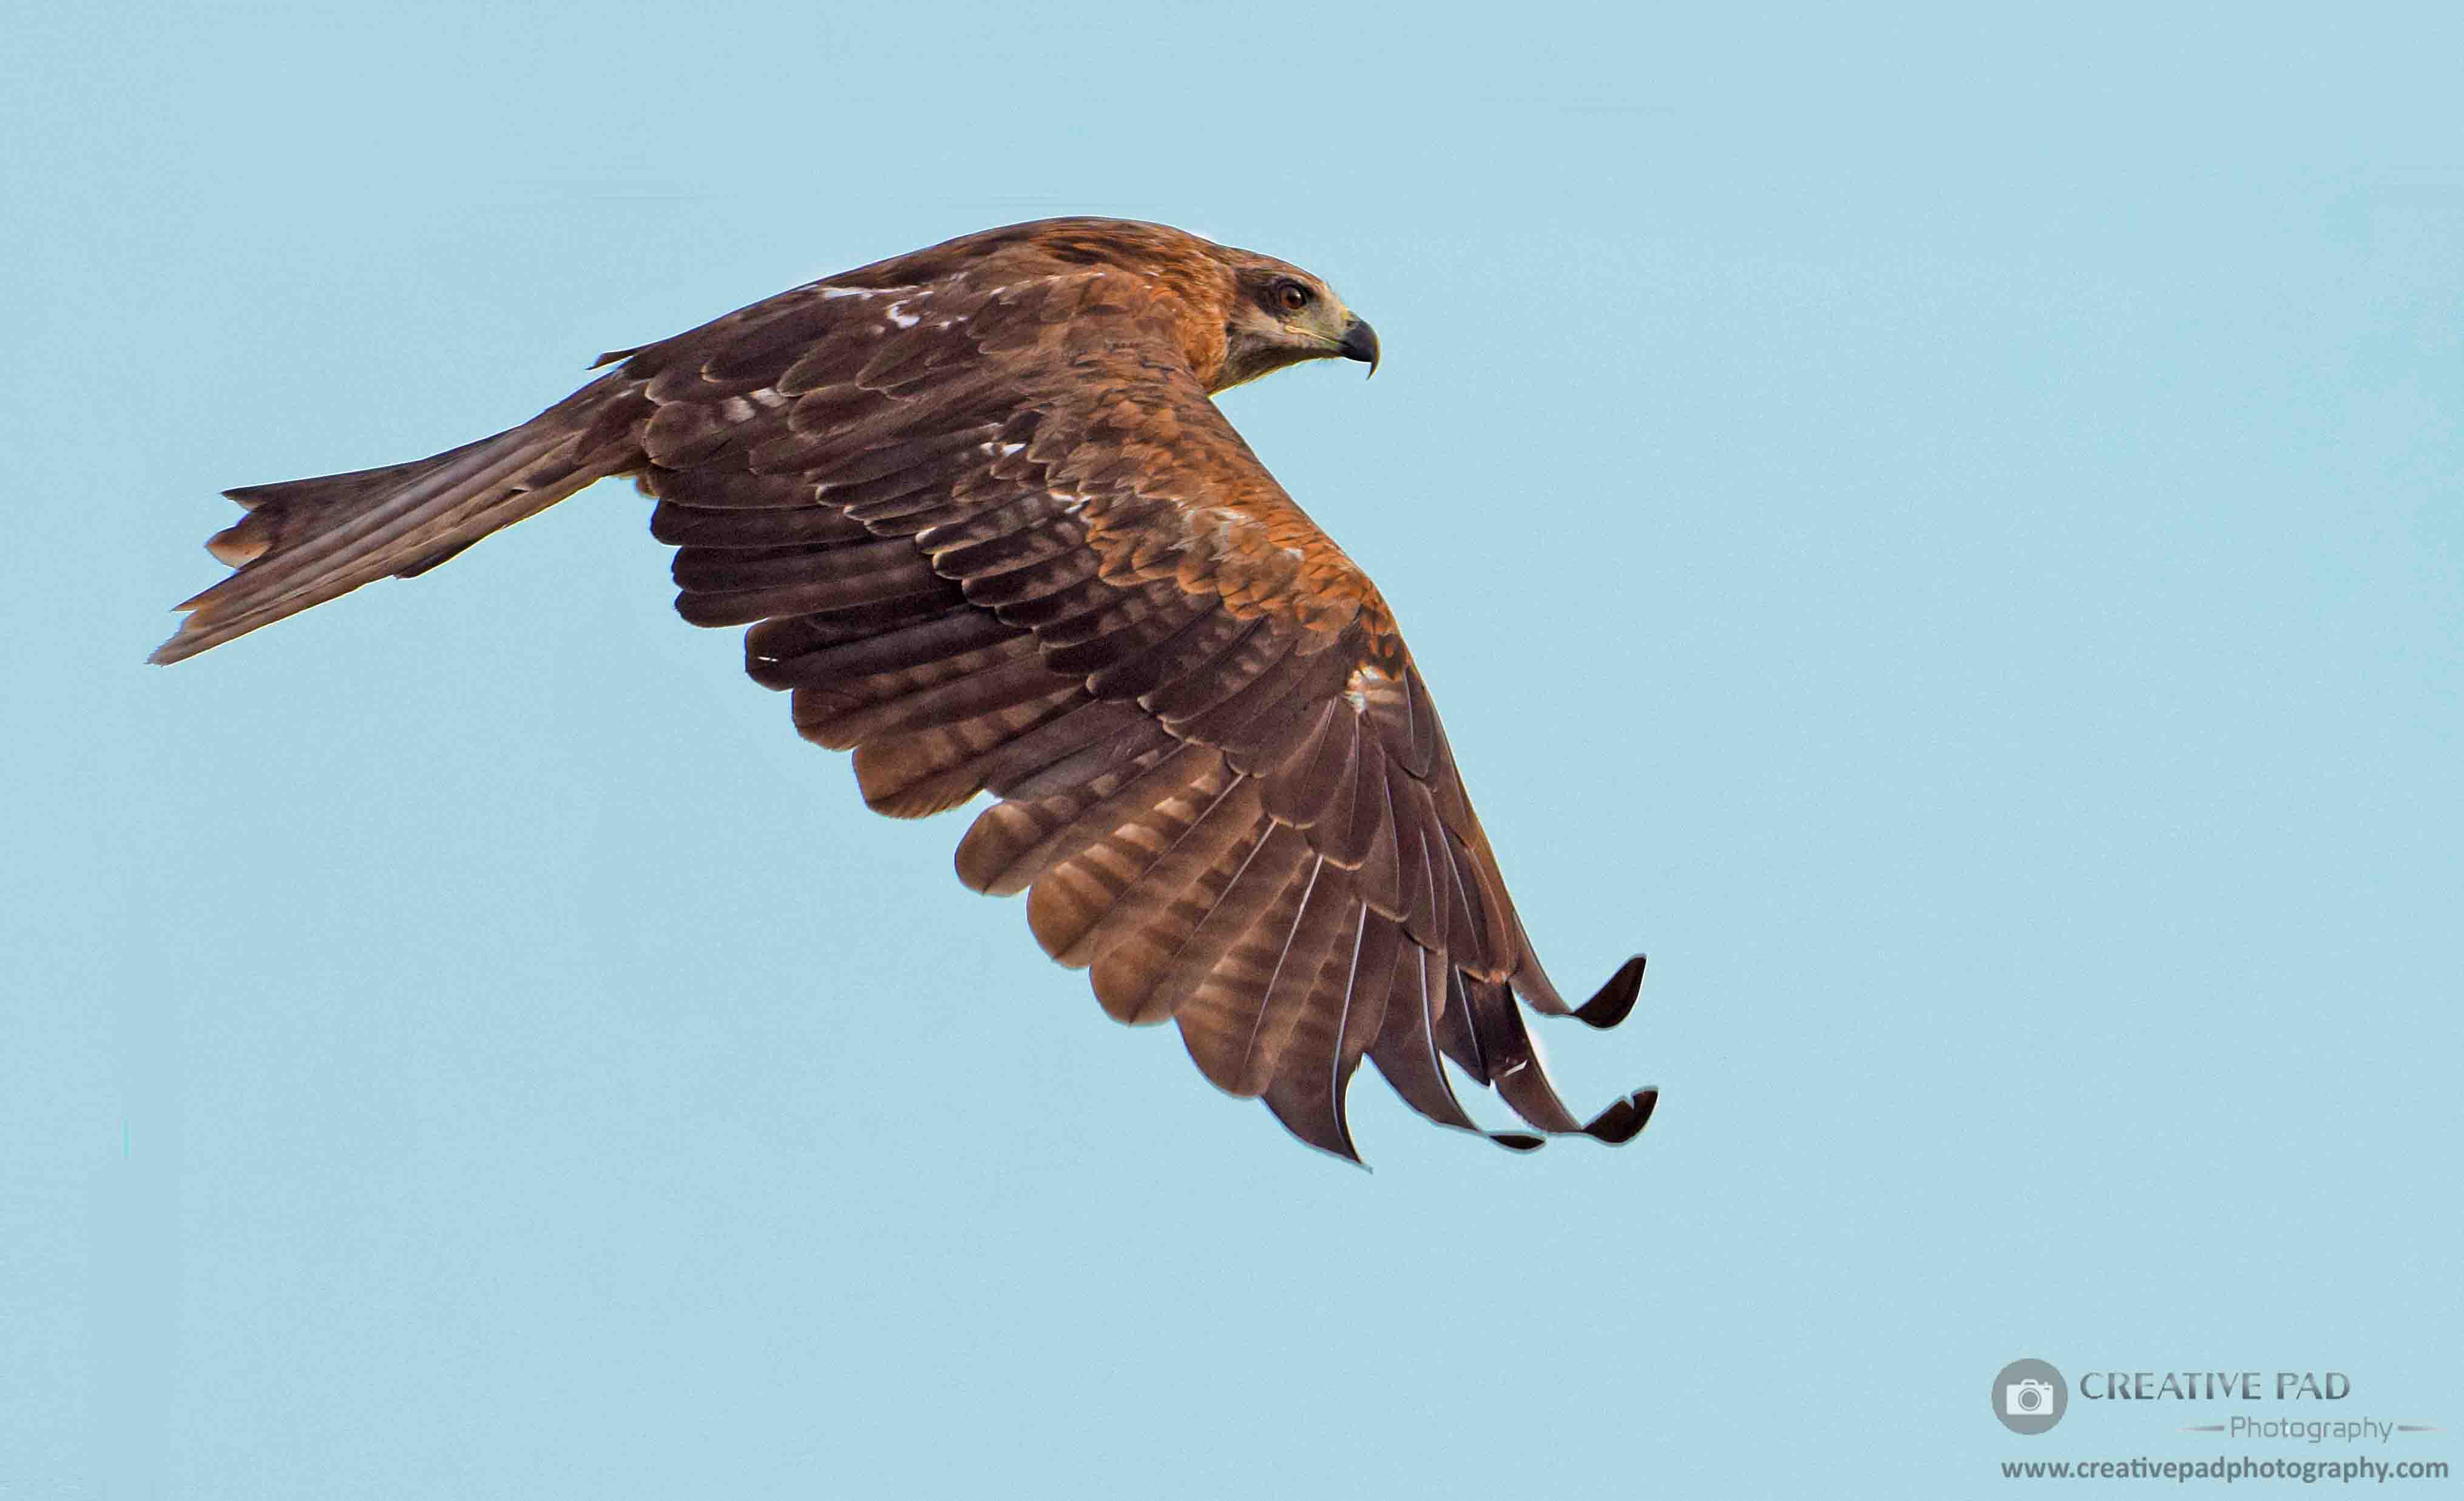
A mentioned before, capturing birds in flight can be a bit of a challenge as everything is about speed.
Shooting Mode
Same as before. Manual mode with auto-ISO. Here the auto-ISO is almost a must as you just won’t have the time to adjust anything manually once the bird is in motion and you’re trying to capture it.
Burst/ Continuous Mode
Again, a must.
Time of the day
Now it’s even more important that you are capturing flying birds in proper daylight because you’ll be using very high shutter speeds.
Direction of Sun
Again, avoid shooting birds when the sun is behind them. It’s even more important in case of flying birds as you would have already lost light due to the high shutter speeds.
Background
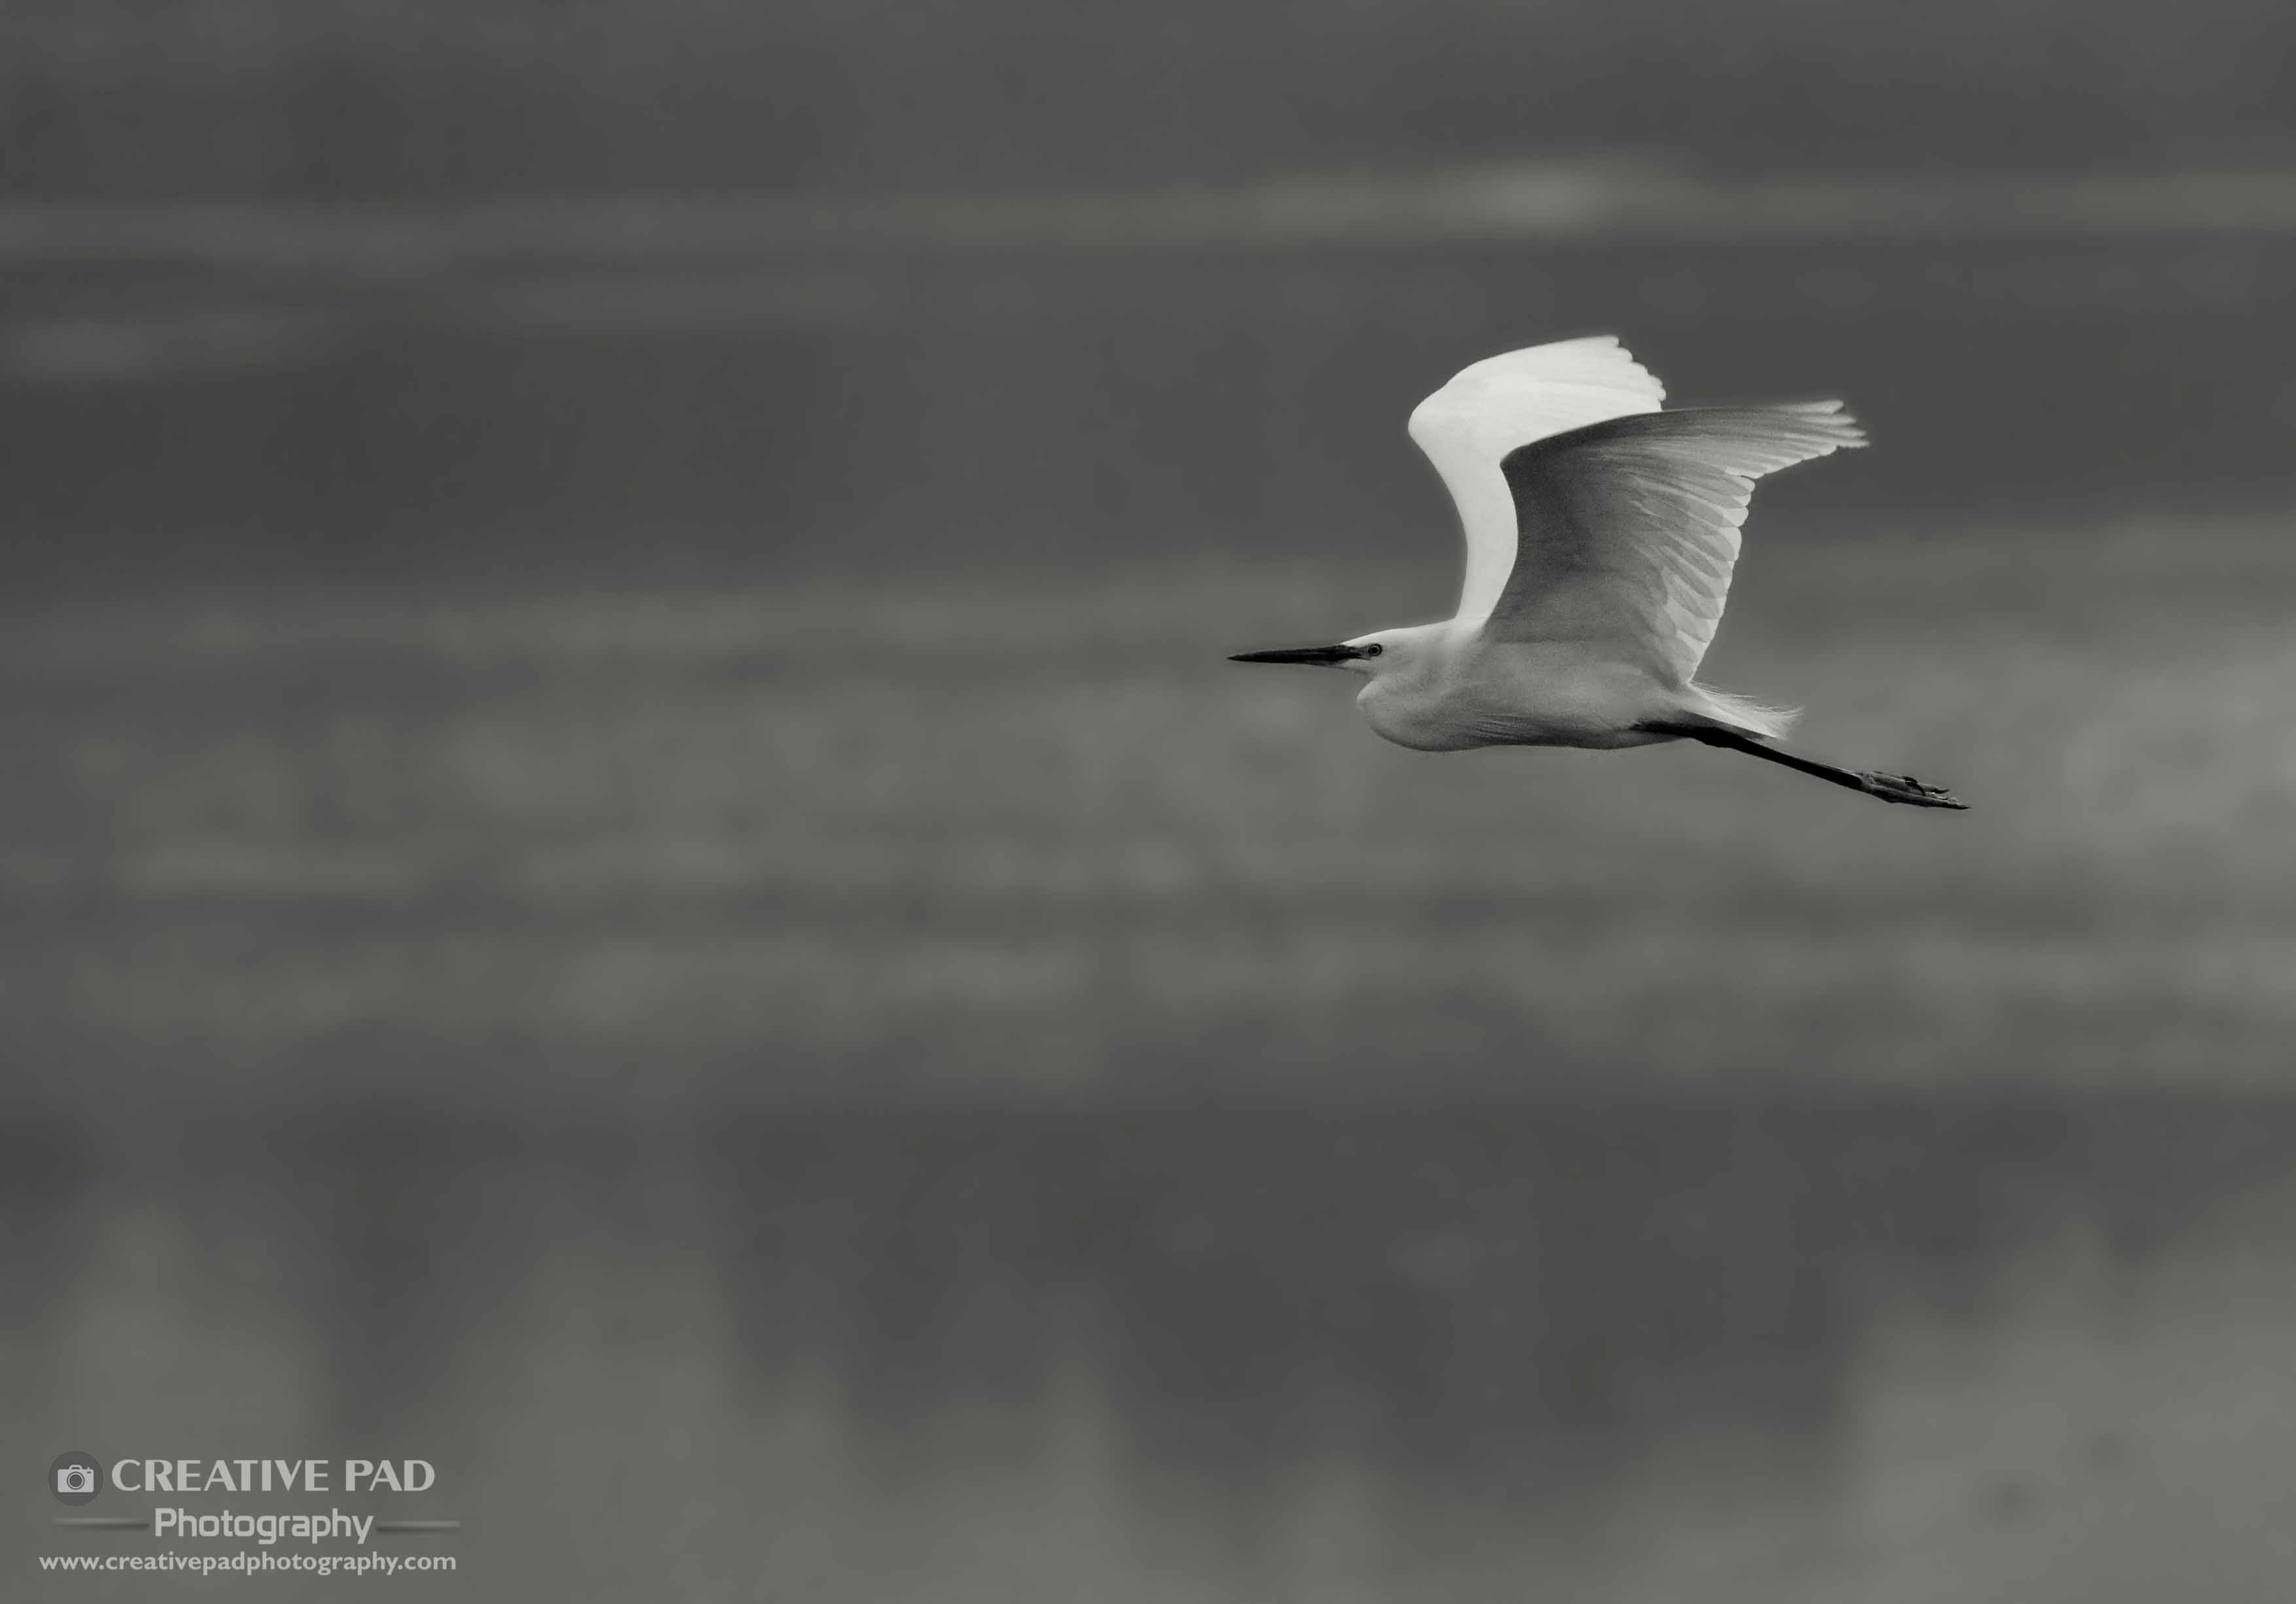
Look for bird flying against a relatively cleaner and minimal background. Also, it’s better if the distance of the background is more. If the background is too near and contains too many distractions, not only can the shot look poor, but you can have a hard time finding focus and the camera can find it very convenient to focus on something in the background.
Aperture
It’s best to keep aperture a little closed, something like f8, because focusing on a certain part of the bird can be a bit tricky and you want to ensure that the slightly deeper depth of field will keep the entire bird in focus.
Shooting at wider apertures can save you light, but can cause cases of misfocusing. For example, you can focus on the wing by mistake and this can render the head of the bird out of focus. This is another reason that you want to capture flying birds when the light is maximum.
Shutter Speed
It’s best to use shutter speeds upwards of 1/1000. A combination of a high shutter speed and a narrower aperture make it a must to do flight photography in abundant light.
If the bird is smaller, it’s likely to flap its wings at a faster rate. So you may need a higher shutter speed for smaller birds.
Technique, Focus and Focal Length
The focal length required for capturing flying birds is generally longer as birds move away the moment they feel human presence.
So on an average, expect the birds to be flying at a considerable distance from you.
When it comes to your focal length, here is something you should avoid doing in my case. Don’t zoom in fully when you see a bird approaching towards you. It becomes incredibly tough to get the bird in frame when you are fully zoomed in.
So when you see a bird approaching, zoom out a bit to see it in the frame.
Then zoom in a bit so that it’s a little closer to you. Even if you don’t zoom in all the way, it’s fine. Just get close enough to be able to see it well so you can focus on it.
Use a single focus point and half press your shutter once the focus is on it.
You’ll be panning your camera along with the bird so this can take a bit of practice.
A lot of times you’ll find that the camera loses focus or focuses behind on the background. Keep practicing.
When you do manage to lock focus, half press the shutter to lock the focus and the keep it pressed so that the burst mode fires multiple shots.
Your panning motion should be smooth and you should follow through a bit even after the bird has gone from the frame just to avoid any risk of a shake.
Preview your shots and zoom in to see if you’ve got the bird sharp. The head and the yes should be reasonably sharp.
Exposure compensation
- When the sun is behind the bird: As discussed before, this will throw the bird into a silhouette. When shooting birds in flight, it’s best to avoid a scenario where the sun is behind the flying bird. Your shutter speed is already high so bumping the exposure compensation will introduce lot of noise.

- Shooting darker birds: To shoot darker birds, you have to raise the exposure compensation in most cases to get the details on their body. So for birds in flight, it’s a must that at least some amount of light is falling on the body as you’ve already lost light on account of the high shutter speed. If you find yourself shooting darker bords at a time when the light is low, then make sure there is something in the shot that takes away the focus from the noise in it. For instance, in the shot above, I found myself in such a situation and hence resorted to taking a shot in which I could catch the reflection of the bird in the sunset lit lake.
I hope this article helped you.

