What is the Use of Color Balance in GIMP? What Does It Do?
In this video, we’ll explore the Color Balance tool in GIMP and how it helps bring life back to your images. Color Balance lets you adjust the shadows, midtones, and highlights to correct color tones or add creative effects. Using a flat-looking portrait as an example, I’ll show you how to restore natural skin tones, making the image look vibrant and true to life. Let’s dive in and transform dull images into stunning ones!
These videos are from our GIMP Photo Editing Course.
In this GIMP tutorial, the instructor moves into the final stage of color correction before beginning the skin retouching process. The focus is on restoring natural skin tones that were “flattened” by previous automated adjustments and preparing the canvas for detail work.
Video Summary
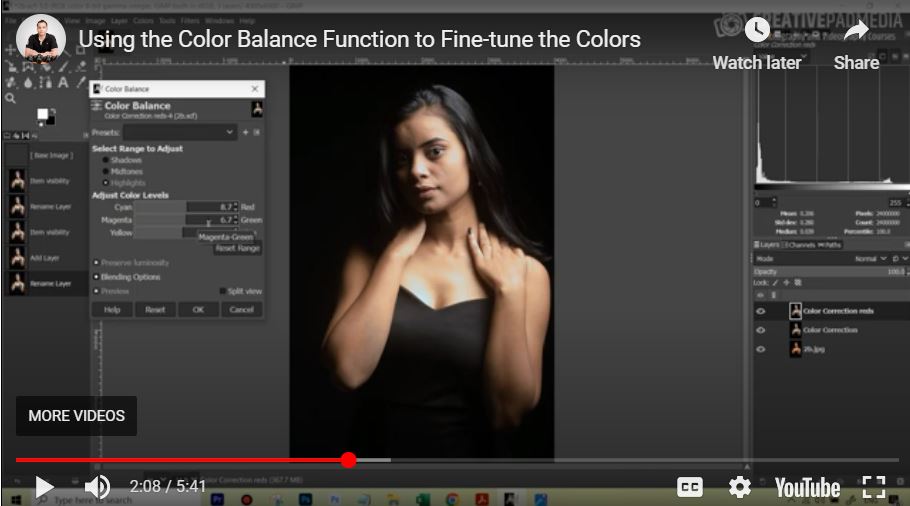
The instructor demonstrates how to use the Color Balance tool on a dedicated “Reds” layer to manually reintroduce warmth into the skin’s midtones and highlights. By comparing the edit to a reference image calibrated with a gray card, he explains how to achieve professional accuracy even when working with compressed JPEG files. The video concludes with the setup for the retouching phase, introducing the Healing Tool as the primary method for removing minor blemishes.
Time Stamps
- 0:00 – Reviewing the progress: from the original “yellow” cast to a corrected, albeit flat, image.
- 0:27 – Choosing the Color Balance tool over Hue-Saturation for manual skin tone refinement.
- 0:44 – Adjusting Midtones: Adding a subtle red boost to the primary skin areas.
- 1:35 – Adjusting Highlights: Correcting the brighter areas of the face that the midtone adjustment missed.
- 2:10 – Fine-tuning: Adding a touch of Green to balance out unintended Magenta shifts.
- 2:55 – Reference Comparison: Comparing the manual edit to a “perfect” in-camera gray card reference.
- 3:50 – JPEG vs. Raw: A brief note on why highlights are harder to recover in JPEG formats.
- 4:04 – Transitioning to the Retouching Phase: Creating a new layer for non-destructive editing.
- 4:50 – Professional Ethics: A note on making skin retouching “permission-based” for clients.
- 5:06 – Pro-Tip: The importance of cleaning your physical monitor before starting detail work.
- 5:18 – Introduction to the Healing Tool: Explaining how it differs from the Clone Stamp tool.


