
How to Import Photos Into Lightroom Classic
Trust me when I say this – Even some of the “pro photographers” out there get really confused with the user interface in Lightroom. And out of all the things that confuses them, knowing how to import photos into Lightroom classic has to be at the top of the list.
I know because I was one of them too. I basically used to “somehow” do “something” till the photo reached the Develop module. Because while I enjoyed the editing part in Lightroom, the whole importing and organizing stuff always seemed so stressful.
But once you do understand the process, you’ll actually fall in love with it. So let’s see how to do it.
So how do you import into Lightroom Classic like a pro?
Importing photos into Adobe Lightroom Classic is a fundamental skill for photographers and digital artists. This article provides a step-by-step guide to efficiently import your photos into Lightroom Classic, ensuring your workflow is smooth and organized.
Either you can watch the video below or if you prefer reading, then you’ll find the entire article below the video:
Step 1: Open the Import Dialog
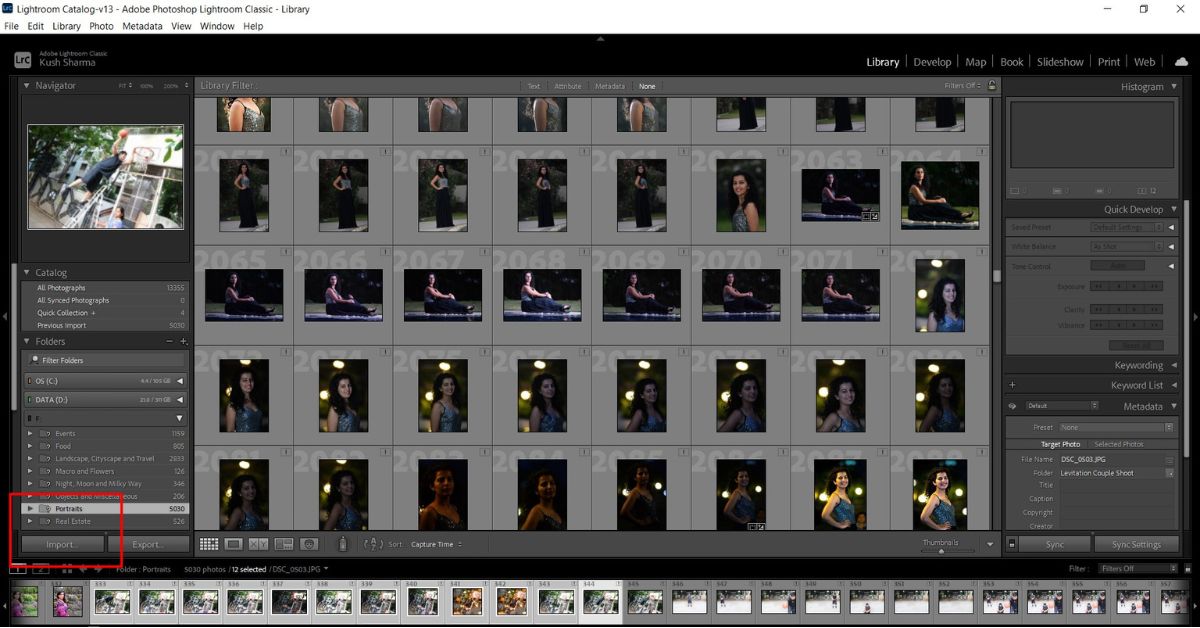
To begin importing photos, open Lightroom Classic and click on the ‘Import’ button located at the bottom left corner of the library module. Alternatively, you can go to ‘File’ > ‘Import Photos and Videos’ in the menu bar.
Step 2: Select the Source

In the import dialog box, the left-hand panel is where you select the source of your photos. You can import images from a hard drive, an external drive, or directly from a camera or memory card. Lightroom Classic can import a variety of file formats, including RAW, JPEG, TIFF, and PSD.
Most of the times, whenever you insert your SD card, this window will automatically open if you had Lightroom running.
Step 3: Choose Import Settings

On the top of the import dialog, you’ll find three options: ‘Copy as DNG’, ‘Copy’, ‘Move’, and ‘Add’. Choose the one that suits your needs:
- Copy as DNG: Converts RAW files into Adobe’s DNG format and copies them to a designated location.
- Copy: Copies the files to a new location without changing the format.
- Move: Moves the files to a new location.
- Add: Keeps the photos in their current location and adds them to the Lightroom catalog.
Most of the times, you’ll be choosing Copy as that’s the best and safest option.
Step 4: Apply Import Settings

In the right-hand panel, you can apply various settings as you import the photos:
- File Handling: Choose how Lightroom manages previews and duplicates.
- File Renaming: Rename files during import for better organization.
- Apply During Import: Add develop settings, metadata, and keywords.
To be very honest with you, I hardly use any of these settings. Anything I do to my photos like renaming, I usually do it at a later stage in my editing process.
Step 5: Choose Destination

Below the import settings, you can choose where Lightroom Classic should store your imported photos. You can select an existing folder or create a new one. Organizing your photos into folders by date, event, or subject can be very helpful for future navigation.
Most of the times, you will be transferring your photos to an external hard drive, as that’s where most photographers, including myself, like to store all the photos. That’s because storing photos on your computer can quickly eat up space.
Step 6: Import the Photos
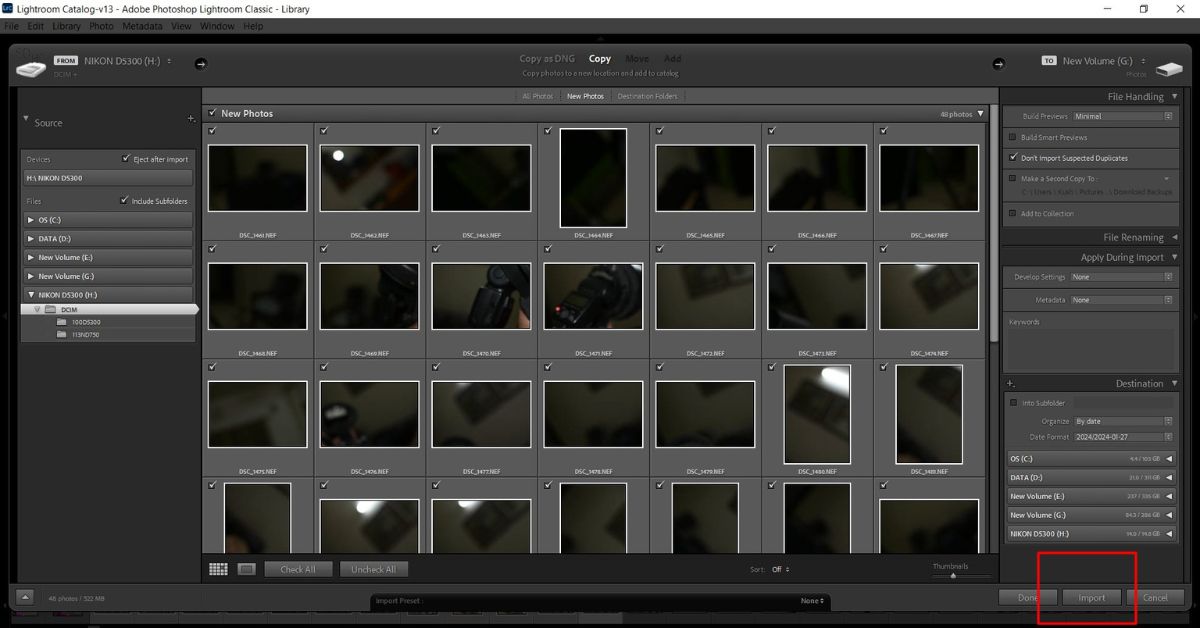
Once you’ve made all your selections, click the ‘Import’ button at the bottom right of the dialog box. Lightroom Classic will begin importing your photos according to your settings. You can monitor the progress in the top left corner of the screen.
Additional FAQ Related to Importing in Lightroom
Where does Lightroom store imported photos?
Lightroom does not store any photos. It merely syncs itself to the photos which have been imported. The actual photos are not moved. This is done by creating a Lightroom Catalog.
Can Lightroom import folders?
Yes, another way of importing is to simply drag and drop the entire folder into the Lightroom import window that we saw in this article. When you do that, make sure you check the option which says Include subfolders, so that it imports everything inside, because a lot of times, the images are within the category sub-folders.
What happens if I move around photos in my storage location after importing?
Since Lightroom only syncs to the original files, moving an image from its actual storage location will make Lightroom lose track of it. It will then show a missing icon next to the thumbnail of that image. You will then have to right click on that thumbnail and select the new location of that image for it sync it back to Lightroom.
Additional Tips
- Previewing and Selecting: Before importing, you can preview and deselect any photos you don’t want to import.
- Presets: Use import presets to save settings for future use, speeding up your workflow.
- Backup: Consider setting up a secondary location for backup during the import process. For this, you can choose the “Make a Second Copy to” option that you will be able to see under the Destination option.
Conclusion
Importing photos into Lightroom Classic is a straightforward process that, when done correctly, can greatly enhance your workflow efficiency. By familiarizing yourself with the import settings and options, you can ensure your photos are organized and easily accessible for editing and sharing. Remember, the key to a successful import is to keep your workflow consistent and organized.