How to Use Off-Camera Flash – Flash Photography Course

Hi there. This is Kush Sharma, your photography and videography mentor. Welcome to this Off-camera Flash Photography Course!
I have been teaching photography since 2013 and currently have over 30 online courses which have been downloaded by over 45,000 people from over 160 countries.
I’m glad that you want to learn the art of Off-Camera Flash or Speedlight Photography.
Learning how to use an off-camera flash is very important if you want to shoot events like weddings or do portrait related work, especially outdoor portraits, where using a flash can really add some dramatic effect as you are about to find out.
An off-camera flash also allows you to do studio photography on a budget. We have a section on that too later on.
Please note that through out this article, I’ll be using different terms for an off-camera flash like speedlight, external flash, flash etc. They all mean the same thing.
Alright then! Let’s get started!
Important note: Throughout this article, I’ll be mentioning the different equipment and tools you would be needing for speedlight photography. You can always go to our Recommended Photography and Videography equipment page where I have listed down all these with their Amazon links.
Basic Settings in an External Flash or Speedlight
In this lesson, we’ll cover some of the very basic settings that you should know of when it comes to using an external flash.
Flash Power or Flash Output
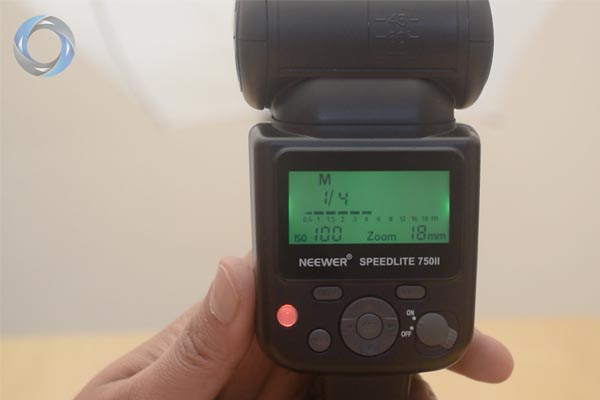
This is pretty straightforward. It refers to the power of the flash when you fire it. This value can be moved up or down. 1/1 represents full power and then most flashes will allow you to move all the way down to 1/128th power.
Increasing or decreasing the power of the flash is done in stops of light. For example, going from 1/1 to 1/2 to 1/4 and so on. Any time you increase or decrease the power of the flash by a stop of light, you are basically doubling or halving the power of the flash than what it was before.
Different Modes in the Off-Camera Flash
Though there are a lot different modes that modern day flashes allow you to use, we’ll be sticking to the three most popularly used modes which are available even on the most basic flashes. They are:
Manual Mode – This mode lets you change and adjust the power of the flash exactly to your liking and the flash will only fire at the power you set it at.

TTL (Through the lens) mode – In this mode, when you take a shot, the flash will first fire a quick burst of light (called as pre-flash) which goes and hits your subject and then rebounds back into the camera through the lens and commnicates to the TTL mtering system of the camera about things like the distance of the subject, the quantity of light in the environment, etc. The camera’s metering system then adjusts the flash power according to that data and the flash then fires the main burst of light which illuminates the subject.
If that sounded like Chinese, then here’s TTL in simple words – It’s an automatic way of firing the flash at the correct power instead of having to do the trial and error and then selecting the correct power as you would be required to do in the manual mode.
Later on, we’ll also briefly be talking about which mode is better (TTL vs Manual) and why.
In the TTL mode, it’s still possible to increase or decrease the power of the flash by using a setting called as Flash Exposure Compensation (FEC). So for example, let’s say you used TTL mode and took a shot. The flash and the camera performed their calculations and fired the flash at a particular power. You found that shot be a bit underexposed. In that case you can raise the FEC to a positive value. This means you are telling the camera to fire the flash at a higher power than what it thinks is the correct power, thereby resulting in a brighter shot than the last one. The opposite will be true if you choose a negative FEC value.

Slave Mode – In this mode, the flash can detect a pulse of light when another flash fires and then fire in sync with the other flash. This mode is used when you want to sync multiple flashes in a multiple light set-up. This is particularly helpful when you have flashes that are of different brands and you want to make them work together.

Zoom Function

The zoom function on the flash relates to the flash coverage, which basically means how concentrated or how wide the beam of light fired by the flash is.
It relates to the focal length of a lens. For example, when you zoom out on a lens and let’s say got to 18 mm, the field of view becomes wide. Similarly if the zoom of the flash is set to 20 mm or a lower number, the flash will spread the light wide. And if the number is high like 100 mm, it will throw the light like a concentrated beam.
Usually flashes will have the zoom function set to Auto, which means that whatever focal length (of the lens) you are shooting at, the flash will automatically set its zoom to that focal length and fire the flash. For example, I was shooting an event and I took the group shot below at 40 mm focal length on the lens:

In this case the flash automatically set its zoom to match the focal length and fired at 40 mm. This made sure the beam of light thrown by the flash was wide enough to cover all the subjects.
The opposite is the case when you are zoomed in at larger focal lengths because now you are away from the subject and the flash narrows down the beam and throws in a concentrated light so it can travel a larger distance and hit your subject, like in the shot below, which was shot at 120 mm:

Since the shots above are different, you may not be able to see the actual difference the zoom function produces. So let’s look at two identical shots shot at different zoom settings.
The shot below has been shot with the zoom set to 20 mm on the flash. You can override the auto-zoom function at any time and fire the flash at any zoom setting, irrespective of the focal length your using on your lens:

Here you can see that because the zoom is set to a wider focal length of 20 mm, it is throwing the light which spreading wide, as can be seen by the two walls on either side of me, both of which have been illuminated by the flash.
Now let’s look at the same shot with the zoom of the flash set to 200 mm:

This time you can see that most of the light is concentrated on me and it’s not spreading out on the sides.
Usually, you would just leave the zoom on the auto-zoom setting so it changes as you change the focal length on the lens.
But sometimes, you can set it to manual and take shots at larger zoom settings to restrict lighting on a specific area. This is helpful when you are trying to avoid the light spilling on to unwanted areas to create a more dramatic portrait.
But as a beginner, I would advise you not to experiment with the zoom setting too much initially. You can leave it on auto-zoom.
In the next part, we’ll be learning which mode is better to use and when – TTL or Manual.
TTL (Through the lens) vs Manual Mode: Which is better and when?
In the last part we had learned about some of the different modes the external flash or speedlight offers.
The two stand out modes are manual and TTL (Through the lens)
We learned that in manual mode, the flash will fire only at the flash output or power that we have set on the flash.
And in TTL, the flash determines the power on its own by firing a pre-flash which communicates with the TTL metering system of the camera and changes the power of the flash automatically to give the best exposure according to the environment that we are shooting in.
So the question is – Which mode is better and why?
The answer to that is that it depends.
Usually we would think that TTL is superior because the correct power is derived by the camera and the flash, thereby taking the burden of trial and error away from the photographer.
This is mostly true but this does not mean that manual mode is obsolete.
TTL is a better mode to use when the lighting conditions are changing rapidly, like shooting an event. It would be a tedious task to use manual mode here because every time your composition changes, you’ll have to change the power of the flash to expose your subject and scene correctly.
But in cases where the composition is not going to change rapidly, like in a portrait shoot, it’s perfectly fine to use manual because once you’ve determined the correct power and exposure for your subject, you can be rest assured that the flash won’t change anything on its own. It guarantees the same lighting for every shot, which can be important in a portrait shoot.
You can always TTL for those situations too but most photographers still use manual mode to have perfect control on the lighting and for consistent results between each shot.
Another point to note is that in a lot of flashes, the TTL function won’t work when you are using your flash off-camera. This will also depend on the type of transmitter and receiver set you are using to fire your flash. And since most portrait/still object shoots are done with the flash off-camera, that’s another reason why it’s always good to learn to shoot manual.
So basically, use TTL when the flash is mounted on the camera for situations where the subject/environment is rapidly changing like in events. And use manual where everything will remain constant because that’s the best way to get consistent results.
In the next part we’ll learn about an important feature about using an external flash, which is bouncing the flash. We’ll also be learning about the bounce card.
Bouncing an Off-Camera Flash to Create Softer Light
In this lesson we’ll be learning about bouncing the flash to turn hard light into soft light.
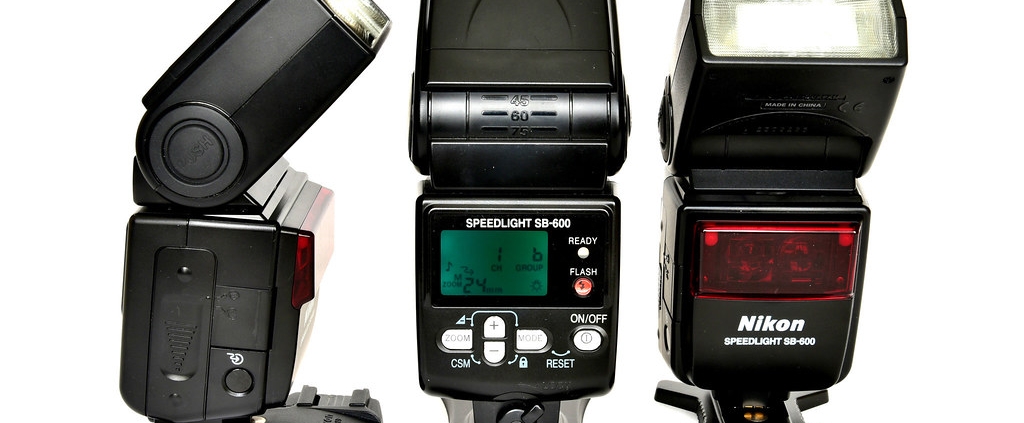
The head of an external flash can be tilted in any direction, like shown below:

This means that you don’t have to fire the flash in a straight direction directly at the subject which is the case when you use the in-built pop-up flash on a DSLR.
This makes a huge difference to the quality of light that falls on your subject. Let’s look at this with the help of the images below:

In the image on the left hand side, I’ve fired the flash with the head directly facing the subject. You can see the that this produces a very harsh lighting that doesn’t look good at all.
Hard light produces very defined looking shadows. You can see it under the mannequin’s chin and on the wall too. On top of that, hard light produces unpleasant looking specular highlights (bright spots) on shiny surfaces like on the lips in this case. All this gives our subject an uneven and unpleasant look.
Now let’s see what happens when I tilt the head upwards and fire the flash on to the ceiling so that the light first hits the ceiling and then bounces on to the subject.
This is the image on the right. You can see that this image looks way more pleasant. This is because when you bounce the light off the ceiling, you are increasing the size of the source of the light (in this case the ceiling). The bigger the source of light is relative to the subject, the softer the light is.
You can observe this in the neck area under the chin. Unlike the shot on the left, this time the transition from highlights to shadows is very smooth and not defined. Even the bright spot on the lips has smoothened out.
Soft lighting always results in pleasant looking subjects.
You can bounce the light from the ceiling, the walls, a reflector or any other object to create a better and more flattering lighting for the subject.
A lot of times when you bounce the light from the ceiling, the part under the neck and shadows can leave a lot of shadows. It’s still soft light but to get rid of the shadows, you can pull out the bounce card from the flash, like shown below:

The bounce card makes sure that when you are firing the flash in an upward angle, some of the light is also fired straight at the subject after bouncing from the card.
This tiny amount of light is enough to just fill in those shadows. The more you tilt the flash towards the subject, the stronger the effect of the bounce card.
For example, in the shots below you can see the effect of using the bounce card. In both the shots I have fired the flash with the head pointing at the ceiling but in the shot on the left, the bounce card was not used.

You can see that in the shot on the left, there is a prominent shadow underneath the neck. Then I opened up the bounce card which produced the shot on the right. Here you can see that the bounce card has eliminated majority of that shadow.
You can use the bounce card outdoors also because a lot of times even ambient light produces shadows on the subject. In that case you can point the flash upwards so majority of the light doesn’t impact the subject, but just a tiny bit reflects from the bounce card and hits the subject to fill the shadows.
There’s another important purpose that the bounce card serves. Which is that the reflected light from it produces catchlights in the eye. That’s why sometimes it’s also referred to as the catchlight panel. For instance, if you look at the two shots above closely, you’ll find that the shot on the right where the bounce card was used has resulted in a prominent catchlight in the eye. Here’s the close-up:

Catchlights make a portrait really stand out since they make the eyes more attractive.
So to sum up, you can use the bounce card for two reasons – to fill shadows and to produce a catchlight.
You can also soften light by using modifiers like soft-boxes that fit on the flash, like shown below:

Doing this may not generate as good results as bouncing the flash since the size of the source of light is increased but not to the extent that bouncing the light does.
But when you are shooting outdoors you may not have anything to bounce from and in that case, it’ll be better to use a modifier than firing the flash bare.
In the next part, we’ll be seeing how to fire the flash off-camera.
How to Trigger an Off-Camera Flash
To be able to create any kind of lighting in any type of environment, you need to know how to trigger an external flash off-camera. While it can be very satisfying to do so, it can be a bit tricky as it often involves the use of accessories beyond the external flash.
In this guide, we’ll make it easy for you to understand all the intricacies involved in doing so.
So first of all, let’s look at four different ways you can fire an external flash off-camera:
1. Triggering the Flash Optically
Out of all the methods, this one is the easiest and cheapest to execute. This basically means that you can trigger a flash using a pulse of light from your camera’s own built-in pop-up flash.
All you have to do is to set your external flash on slave/remote mode, like shown in the image below:

Once it’s on slave mode, it will fire the moment it detects another flash going off.
Some DSLRs even have a commander mode where in you can set the power of the pop-up flash to “–“, which means that the pop-up flash will almost have no effect on your image. It’s only job will be to trigger the external flash.
In case your camera doesn’t have the commander mode, you can still achieve similar results by lowering the power of the built-in flash to the minimum and then firing it to trigger the external flash.
The only problem with optical triggering is that you have to maintain the line of sight between the camera’s flash and the external flash. This is not a challenge indoors since the light from the built-in flash bounces off the ceiling and the walls to eventually reach the external flash. But outdoors it can be an issue.
2. Using a Sync Cord

Not too popular nowadays but if you’re looking for something very reliable, then a sync cord will never disappoint. One end of the sync cord goes into the camera and the other into the flash.
As you can guess, the problem with this is going to be the distance since it will be limited by the length of the cord.
3. Using Wireless Radio Triggers
This is perhaps the most popular and convenient way of triggering external flashes. You’ll need to purchase a set of transmitter and receiver combo, like shown in the image below:

The transmitter goes onto the camera hot-shoe, like shown in the image below:

The receiver goes on to the bottom of the external flash, like shown in the image below:

That’s it. Your camera and flash are now connected and the best part is that this system is not restricted by line of sight so you can even fire your flash if it’s in another room.
4. Using Dedicated Commander Units

If you are willing to shell out the money, then purchasing a commander unit for your camera system can be a very pain-free way of triggering your external flash.
Using a dedicated commander unit also means that you can use the TTL function of the flash, which may or may not be the case when using other options. Cheaper radio triggers only work in the manual mode of the external flash.
Other equipment and accessories you may require
Triggering the external flash is one thing but having the right set-up for it is also important.
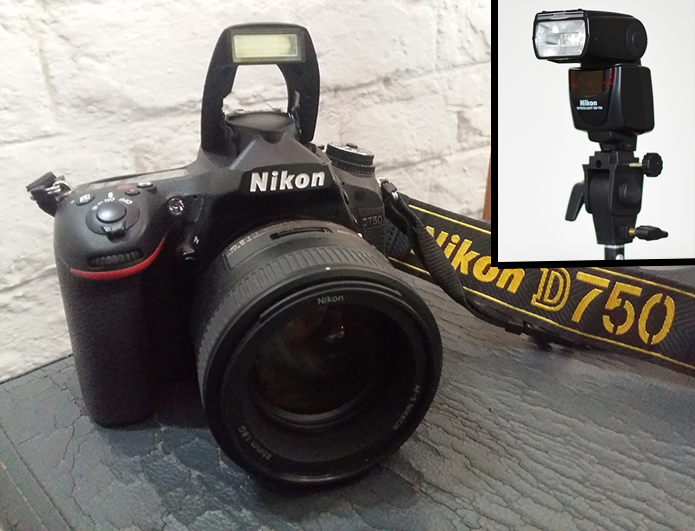
The easiest thing to do would be to attach the flash to a tripod. All external flashes come with a base which can be attached to the bottom of the flash, like shown in the image below:

This base in turn can be attached to the tripod, like shown in the image below:

The problem with using the tripod is that it occupies way more space since the legs of the tripod take up a larger space. Another big problem with using the tripod is when it comes to attaching a modifier like an umbrella to diffuse the flash light. Most flash brackets that can hold an umbrella don’t fit on a tripod.
This can be solved by purchasing a light stand, like shown in the image below:

Then you need to purchase a flash bracket that can hold an umbrella, like shown in the images below:

The flash goes on the bracket and the bracket goes on the stand, like shown in the images below:


You can then attach the umbrella to the bracket, like shown in the image below:

There are advanced brackets which allow you to not only attach the umbrella but a soft-box too.
So now that you know how to trigger a flash off-camera, go out there and create the type of lighting you desire.
In the next part, we’ll be seeing how to use off-camera flash to start shooting some outdoor portraits. But first we’ll be learning as to why flash is so essential in outdoor portraits. We’ll be learning about ambient and flash exposures.
Why do you need to use an off-camera flash? Understanding flash exposure and ambient exposure
Using an external flash is always at the top of many photographer’s to-do list.
But before you start using an external flash/speedlight, it’s important to understand its actual utility.
For this you have to understand the difference between the terms – flash exposure and ambient exposure.
Flash exposure refers to that part of the photo which was lit entirely by the light coming from flash. And ambient exposure refers to that part of the photo which was lit by the natural light in that area.
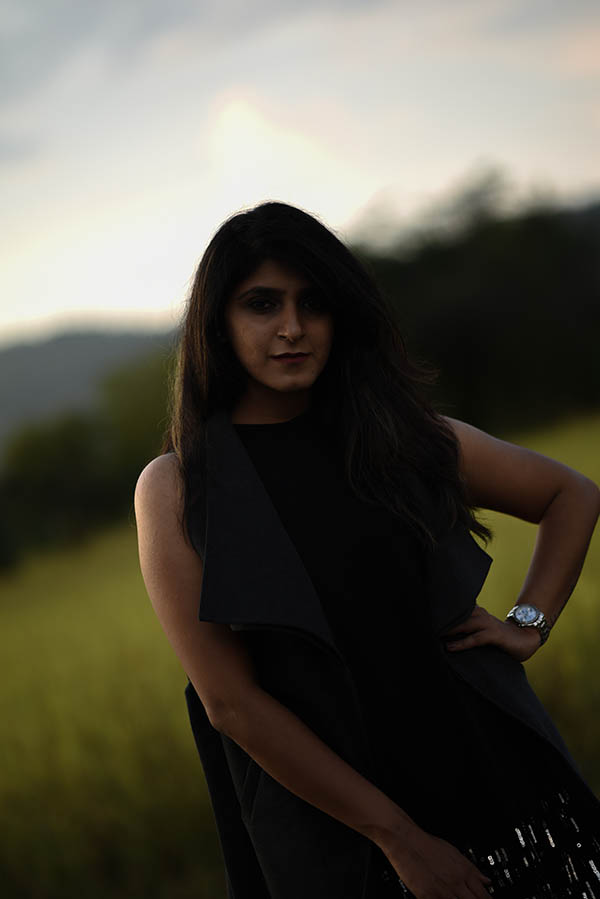
To understand this in more practical terms, let’s look at the image below.

I took this shot only using natural light. It’s an ok looking shot but the issue here is that since the sun was setting behind my subject, she was not being lit from the front side. Hence I had to change the settings to increase the overall exposure of the shot. This made her bright but the issue is that the background lost all the details since it became overexposed.
And this right here is the problem with only using natural light. Unless the light is falling directly on your subject, it can be tough to get the exposure correct for both the background and the subject. For instance, in this case, I can cut down the exposure to get the background but then I’ll end up losing the subject, like in the shot below:
Here you can see that I’ve lost the subject. This is where an external flash comes in. It helps you add flash to the ambient exposure in such a way that you get a good balance between both the subject and the background.
For instance, in the last shot we saw that we had started to see details in the background in our subject. Now if I simply add flash to this shot, we will be able to use the flash exposure to light up the underexposed subject. Here is the shot with the flash fired:

This time you can see that we have been able to get a good balance between ambient exposure (background) and flash exposure (our subject).
This is the main idea behind using an external flash or a speedlight. Getting a good balance between flash and ambient exposures helps us in achieving dramatic looking portraits where we don’t lose any element in our shot due to overexposure.
In the next part we will discuss how different settings like aperture, shutter speed and ISO affect ambient and flash exposures. This will help you understand what settings to dial in when you are using your flash.
How does ISO affect ambient and flash exposure?
ISO refers to how sensitive the camera sensor is in amplifying the incoming light signal. In simple words, as you increase the ISO value, your shots will become brighter.
The relationship of ISO and ambient exposure is therefore pretty straightforward. Higher the ISO, more the ambient exposure.
Similarly, when it comes to the flash exposure, it becomes more as you increase the ISO value. Because ultimately, flash exposure is only formed when the incoming light from the reflected flash light reaches the sensor. As the ISO value is increased, it also amplifies the flash light coming into the camera, thereby increasing the flash exposure.
So ISO affects both ambient and flash exposures in a similar way. Whenever you increase the ISO value, the overall brightness of the shot will go up because both parts, which are lit by ambient and flash exposures will become brighter, resulting in the overall shot becoming brighter.
To understand this practically, let’s take a look at four different shots which have been shot at different ISO values. In each of these shots, the aperture and the shutter speed have been kept constant. Only the ISO value has been changed, from 100 to 200 to 400 to 800. A flash was fired at the mannequin which was kept at the same power in all these shots. So the only variable is the ISO value. The background outside the window represents the ambient exposure and the mannequin which was mainly lit by flash represents the flash exposure. You can see that as we increase the ISO value, both the ambient and flash exposures become brighter, which basically means the whole shot gets brighter. Here are the shots:


Later on when we actually see how to balance ambient and flash exposures in a real portrait, we’ll be usually keeping ISO at the lowest value. That’s because increasing the ISO value also increases noise. But in certain situations, you may be forced to increase the ISO value especially in very low light environments like shooting late into the evening. Because here you’ll have to find a way to increase the ambient exposure and you don’t want to make the shutter speed too slow in order to achieve that since that can render your subject blurry.
Also, since ISO affects flash exposure, sometimes a lot of photographers increase the ISO a bit to save on the flash battery. For instance, instead of shooting at ISO 100, you can shoot at ISO 200. This won’t make almost any difference as far as noise is concerned especially in modern day cameras. But it will help you reduce the flash power by one stop, which can improve the recycle time of the flash (the duration of time between consequent firing of the flash) and save on some vital battery life.
Next, we’ll be understanding the relationship between Aperture and ambient and flash exposure.
How does Aperture affect ambient exposure and flash exposure?
Aperture refers to the opening in the lens which can be opened or closed by changing the f-stop number.
As the f-stop number is increased, the aperture opening narrows down and therefore restricts the amount of light coming in the camera. And as the f-stop number is made small, the opening becomes wider and therefore allows more light onto to the sensor.
Hence, when it comes to ambient exposure, the relationship is pretty straightforward. As you decrease the f-stop number or open up the aperture, the shot becomes brighter. And the other way round.
When it comes to flash exposure, the relationship again stays the same. Since flash exposure is formed from the light coming the flash, it’s relationship with aperture remains the same as that of ambient light. That is, if the aperture is wide open, more of the light from the flash (reflected from the subject) is allowed to go in, thereby increasing the flash exposure. And the other way round.
Hence, similar to what we learned in how ISO works, changing the value of aperture affects both ambient and flash exposures. Which means that if you make the f-stop number small, the entire shot will become brighter. And if you make the f-stop number bigger, the entire shot will become darker.
Again, let’s see this with the help of some sample images where, just like last time, the only variable setting is the aperture:


We can see that as we increase the f-stop number and gradually close down the aperture opening, both the ambient and flash exposures go down and our shot starts to become darker.
So ISO and Aperture affect both ambient and flash exposures.
But unlike ISO, when it comes to aperture, you also have to think of the effect on depth of field when you are taking a real shot. A smaller f-stop number will give you a shallow depth of field (blurred background) and a larger f-stop number will give you a deeper depth of field (background will be in focus).
The shallow depth of field look is definitely more preferable but as we’ll find out later, it can often involve the challenge of cutting down excessive light coming into the camera. There are a couple of ways around that like using ND filters, using high speed sync or simply shooting at a time when the ambient light is less.
But we’ll talk about all that later on. Right now our only job was to understand how aperture affects ambient and flash exposures.
In the next part we’ll talk about how shutter speed affects ambient and flash exposures.
How does Shutter Speed affect ambient and flash exposures?
In the last two parts, we learnt how ISO and Aperture affect flash and ambient exposures. And we saw that both these settings had a similar effect, i.e, they impacted both ambient and flash exposures equally.
Shutter speed is different.
Because it’s the only setting out of the three which only affects the ambient exposure and has no affect on flash exposure. Let’s try to understand why this happens.
First of all, what is shutter speed? It’s the duration for which the shutter opens and exposes the sensor to the incoming light during an exposure. For instance, if the shutter speed is 1/60, then the shutter exposed the sensor to the incoming light for 1/60th of a second and 1/60 was the shutter speed.
Now we know that when we make the shutter speed slower, the shutter remains open for a longer time and therefore it allows in more light. This means that as the shutter speed becomes slower, the amount of ambient light going into the camera increases, which makes the resulting shot brighter.
The other way round is the case when you make the shutter speed faster. That’s because now the shutter remains open for a lesser time and hence, it cuts down the amount of ambient light coming into the camera. Therefore, the resulting shot is darker.
Hence, when it comes to ambient exposure, shutter speed has a very simple relationship. Slower shutter speed increases the ambient exposure and a faster shutter speed reduces the ambient exposure.
But what about the flash exposure?
Let’s try to understand this by once again understanding how flash exposure is formed. When you take a shot, the flash hits the subject and reflects back into the camera. That light comes onto the sensor and forms the flash exposure.
Now when the shutter is open, it allows the rebounded flash light to come in and fall onto the sensor. But this light goes in so quickly that it does not really matter what the shutter speed is. For instance, whether the shutter speed was 1/100 or 1/160 or 1/200, it really doesn’t matter. All that matters is that the light from the flash went in and formed the flash exposure. Even if the shutter was open for a very long duration like 1 second, it still won’t matter because the light from the flash will just go in and form the flash exposure.
Therefore, shutter speed does not increase the flash exposure as you make the shutter speed slower. The light from the rebounded flash is too quick for the shutter speed to have any impact. Therefore, shutter speed has no effect on the flash exposure. It will only affect the ambient exposure.
To understand this, let’s take a look at a few different images which are taken at different shutter speeds, while the other settings are constant:

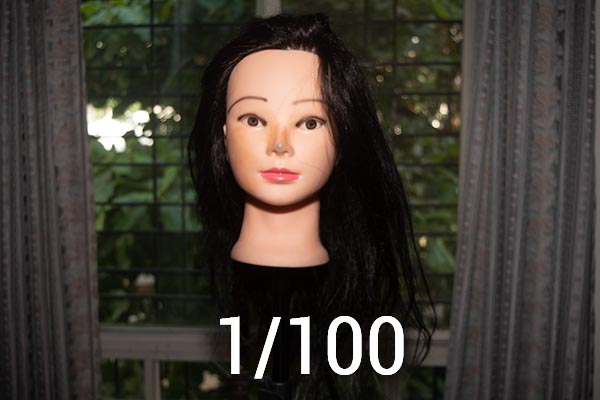


If you notice these shots closely, you’ll find that as we make the shutter speed slower from 1/200 all the way to 1/5, the main change in exposure comes in the background and not on the mannequin.
That’s because the background (the trees outside the window) is being lit solely by ambient light as the flash is not reaching it. Therefore, making the shutter speed slower starts to make it brighter considerably.
But the mannequin is mainly being lit by the flash that is firing. Therefore even when we change the shutter speed, it doesn’t have a great impact on its exposure and it pretty much stays the same. There is bound to be a minor increase in the mannequins brightness as we make the shutter speed slower because there is a bit of ambient light falling on it also. But it is not significant as the mannequin is mainly lit by the flash alone.
So what does this mean in practical terms?
What we just learned has a huge significance when you are shooting outdoor portraits using flash. That’s because it is shutter speed, that you will be changing to determine how bright or dark the background will be in the shot. This is because as we just learned, shutter speed is the only setting that impacts only the ambient exposure and the background in an outdoor portrait is usually always lit by ambient light since it’s usually far away from the flash. But we’ll understand this in more detail when we reach there.
There’s one more thing you need to know about the relationship between shutter speed and flash, which is the concept of Sync Speed. We’ll talk about that in the next part.
What is Sync Speed and how does it matter in off-camera flash photography?
Sync speed refers to the fastest shutter speed you can use on your camera which allows the incoming light from the rebounded flash to fully reach the sensor.
For instance, on most cameras the sync speed is either 1/200th of a second or 1/250th of a second. For the sake of discussion, let’s assume your camera has a sync speed of 1/200. So what does that mean?
This means that if you use a shutter speed faster than 1/200 when firing flash, the light from the flash won’t be able to fully go in and fall onto to the sensor since the curtains of the shutter would close faster than the time taken for the light from the flash to reach the sensor.
When this happens, you’ll actually see the shutter showing up in the shot in the form of black bands, like the shot below:

Here you can see that a part of the shot is appearing black. That’s actually the shutter of the camera. Since the incoming light from the flash was slower than the shutter speed, it hits the shutter as it’s closing down and therefore, the entire image is not exposed properly.
Sticking to the sync speed is usually not a problem as long as the flash is mounted on the camera’s hot shoe. That’s because your camera will not allow you go past the sync speed of the camera. In fact you can use this method to see what is the sync speed of your camera. Just mount a flash on the camera or simply open up the built-in flash of the camera and then try to make the shutter speed faster. The point where your shutter speed does not become faster is the sync speed.
But it becomes important to follow sync speed when the flash is being fired off-camera. Because then the camera has no connection with the flash and you have to be careful to not cross the sync speed of your camera.
Later on, we’ll be seeing a feature offered by certain flashes, which is called High Speed Sync. This is a feature which allows you to fire the flash even at a shutter speed which is faster than the Sync Speed. This has a huge advantage as we’ll be seeing later on.
In the next part we’ll get into actually taking outdoor portrait shots using our flash. We’ll be learning how to balance ambient and flash exposures.
How to balance ambient and flash exposures in outdoor portraits?
In the last few parts, we learned what is ambient and flash exposure. Then we learned how do different settings like Aperture, Shutter Speed and ISO impact flash and ambient exposures.
Our main takeaway was that both ISO and Aperture impact both flash and ambient exposures, whereas Shutter Speed only impacts the ambient exposure.
In this part we’ll see how to take outdoor portraits using flash.
For this we’ll use our current knowledge to understand how to balance flash and ambient exposures in an outdoor portrait.
The process basically involves two steps:
- Take a shot with the background (ambient exposure) in mind. We’ll dial in the settings in the camera that get us the desired exposure for the background. In this step, the subject is completely ignored and the flash is kept off.
- Once we have the desired background, we will switch on our flash and then adjust the power of the flash till we get a good exposure for our subject.
This way we’ll get a good balance between ambient exposure (the background) and flash exposure (the subject).
So let’s get into both the steps in detail.
First, let’s focus on the first step, which is getting the correct exposure for the background. To understand this, let’s take a look at a few images.
Remember, right now we are focusing only on the ambient exposure (the background) and the flash is off.
To start off things you can use the following settings –
- Shutter speed at sync speed (in this case 1/200). Though you can use any shutter speed slower than the sync speed, it’s best to start with the sync speed because more often than not, you’ll find that you are required to cut down excess light coming in the camera. We can always make the shutter speed slower if the ambient light is too less at the time when we are shooting in. But for the first test shot, there’s no harm in sticking to the sync speed.
- ISO at the lowest your camera can go to (ISO 100 in this case). This cuts down excess light and at the same time gives us the cleanest noise-free shot since the lowest ISO value is used.
- Aperture will depend on whether you are going for a blurred background or you want to keep the background in focus. Most of the times you’ll be going for a shallow depth of field since a blurred background looks much better and more professional than a background in focus. In the shots below, I’m using the 85 mm f1.8 lens. Hence I’ll be using f1.8.
So the settings used for the shot below are 1/200 f1.8 ISO 100

In this shot, we’re trying to focus only on the background. If you notice the yellow fields behind and the trees, they look ok but the sky is definitely blown out. This shot was taken close to sunset and we are unable to see any details or color in the sky.
So we need to reduce the exposure for the background.
Let’s see what we can do to achieve this.
Now we have to go back to what we had learned before. Which settings affect ambient light? All of Aperture, Shutter Speed and ISO do. Let’s go through them one by one.
Can we reduce ISO? No, because we are already using the lowest ISO.
Can we make the f-stop number larger? Yes we can. This is one option available to use. But if we exercise this option, we will lose the shallow depth of field and the background will become more in focus which can change the look of the shot.
Can we make the shutter speed faster? No, because we are already at the sync speed.
So from the settings point of view, if we have to cut down the light coming into the camera to reduce the exposure for the background, we only have Aperture to work with. But like I mentioned before, doing this won’t be very desirable since we’ll lose the shallow depth of field.
Then what can we do?
There are only three ways out of this. Let’s discuss all of them:
- Waiting till ambient light reduces further – This is the most natural option since all we have to do is wait till it’s darker. This would naturally cut down the light coming into the camera.
- Using a Neutral Density Filter – Using a ND filter will cut down light coming into the camera and in these cases it’s a very popular choice since you can use it any given time. You don’t have to really wait for anything.
- Using a flash that offers High Speed Sync – A flash that offers HSS (High Speed Sync) allows you to use a shutter speed that is faster than the sync speed.
How the flash exactly does that is pretty interesting in itself because during HSS, it actually fires multiple bursts of flashes instead of single burst of flash.
But don’t let that bother you right now. You can always read about that later on.
The main point is that using HSS allows us to use a shutter speed faster than the Sync Speed of the camera without any of that shutter banding issue that we saw before.
This allows us to make the shutter speed faster and cut down light to underexpose the blown out background.
And this is the best option because unlike Aperture, this doesn’t affect the depth of field.
The only issue with this approach is that you need to have a flash and camera that allow you to use High Speed Sync. The flashes we recommend (see the link for Recommended equipment at the starting of this article) offer this feature and to be frank most modern day flashes (not the super cheap ones) offer HSS.
So in this article, to continue things further, we will be using HSS to cut down light. In case you don’t have a flash that offers HSS, you can either make the f-stop number larger, wait till ambient light reduces or use a ND filter.
Out of all these options, most professionals always use HSS.
The flash I’m using here is the Godox V860II, which allows me to use the HSS feature.
So for the next shot, I have made the shutter speed faster to 1/400. This reduces the exposure of the shot and we get the shot below:

Now in this shot you can see that we start to cut down the ambient light and this has reduced the overall exposure in the shot and more importantly in the background. We can start to see a bit of details and colour in the sky now.
But I was still not happy with this as I wanted the sky to be even more dramatic. So in the next shot, I’ve made the shutter speed even faster. This time it’s 1/500. Let’s take a look at this shot:

Now you can see that we are really starting to see the details and color in the sky. The subject is of course becoming darker too but that’s a problem that will be solved when we fire the flash (flash exposure).
From now on, it becomes a subjective decision as to how dark you want the background to be. A really dark background increases the dramatic appeal of the shot. For that you can make the shutter speed even faster.
And the best part is that since shutter speed only impacts the ambient exposure and not the flash exposure, we can change it later on too after we have fired the flash.
I was happy with the background in the last shot so the first step is done.
Now comes the second step. Which is relatively easier.
You simply switch on the flash and fire it. I always like to start with the flash set to 1/2 power to start with and then make the changes from there on.
So after I switched on the flash and fired it at 1/2 power, this is the shot I got:

This time you can see that we’ve been able to light our subject well and at the same time not over expose the background. So we are getting the best of both the worlds.
From here on it’s a creative decision as to how you want to change things.
If you want the subject to be brighter or darker, you can increase or decrease the flash power.
If you want the background to be brighter or darker, you can make the shutter speed slower or faster.
For instance, in the next shot, I’ve made the shutter speed faster to 1/640 from 1/500. And you can see that this has made the background darker without having any significant impact on the subject since shutter speed only affects the ambient light:

At this point I should mention that when using the High Speed Sync feature, whenever you make the shutter speed faster, it decreases the flash range, which means the flash fires to a lesser distance. This can make the flash exposure on the subject go down a bit. If you experience that you can increase the flash power.
But for now these are the key points you have to take away from this whole methodology:
- Take the first shot with the flash off and expose for the background only.
- Once you’ve got the background to your liking, you can switch on the flash and adjust the power to your liking to light up the subject.
- From there on, change the shutter speed to change the exposure of the background since it will only affect the background mainly (a bit of the subject will also be affected since a bit of ambient light was also falling on the subject). And change the flash power to change the exposure on the subject.
In my premium course called External Flash for Beginners, I show you the video of this very shoot in a step by step manner. So do check it out.
In the next part we’ll learn how to use our flash for taking studio portraits. The method will remain pretty much the same as what you just learned, but with one major difference.
How to use an off-camera flash for studio photography?
In the last part we learned how to use an external flash to shoot outdoor portraits. This time we’ll be taking things indoors and learning about studio portraits using an external flash.
The first question is – Is it ok to use an external flash over a strobe light for studio photogrpahy?
The answer to that is – Yes, in most cases, it’s absolutely fine.
One of the major differences is that a strobe is more powerful than an external flash. So if you’re using a studio space that is large or shooting large groups of people using only one external flash, things may get a bit challenging.
But like most people, if you have a small studio space (like a room in your house) and you mainly shoot single portraits, it’ll be absolutely fine to use an external flash.
Strobe lights can be expensive because they are more powerful, consist of a modelling lamp (lets you light up your subject using continuous light so you can see the composition and lighting beforehand), don’t need battery and come with a plethora of complex but useful functions.
But whatever else they are, convenient and cheap they are not.
And that’s exactly what an external flash is – cheap, portable and convenient.
The basic point is that a strobe light is actually nothing but a much more powerful flash. So unless you really need it, you’re good to go even with an external flash/speedlight.
Now let’s get into how exactly to use the flash to take studio portraits.
In last part when we learned how to use flash for outdoor portraits, we learned that in the first step, we shot only for the ambient exposure where we paid attention to get the background to our liking.
This is the step where the major difference comes in when it comes to doing studio photography.
In studio photography, ambient exposure plays no part because whatever has to be lit (subject or backdrop) has to be lit by flash exposure only. This is done mainly because we don’t want the difference in color temperature from the ambient light and the flash light to mess up the white balance of our shot as that can give rise to unnatural looking skin tones on our subject.
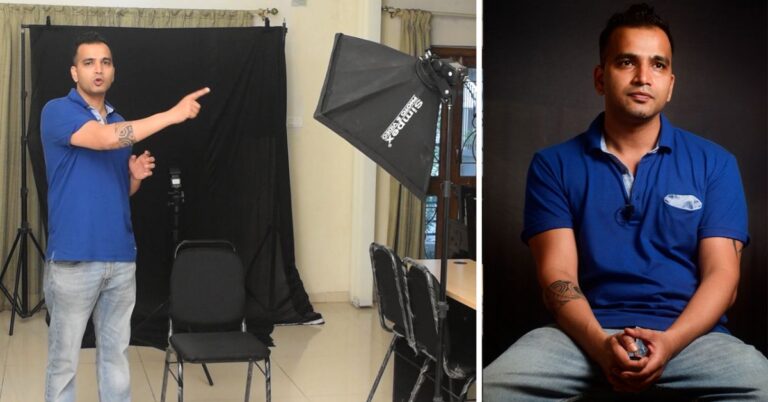
So the first step involves taking a shot with the flash off and achieving a shot in which everything is underexposed to the point that it is almost black and you can’t see anything. We’ll soon see the settings that we should be dialling in the camera to achieve this. But before that let’s quickly look at the set up that I’m using. It looks something like the shot below:
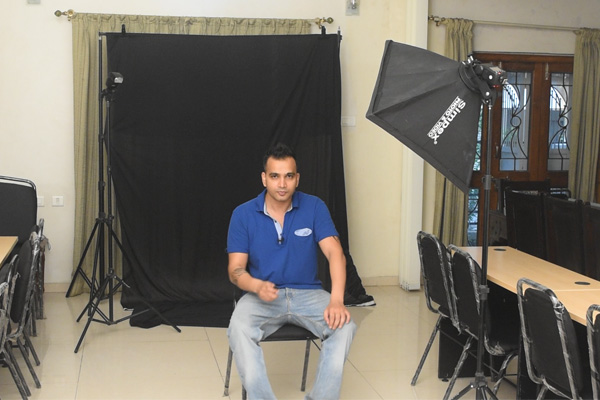
It will be a shot of myself sitting on a chair with a black muslin backdrop behind me. To the left of me is the Godox V860II flash mounted on a light stand firing through a 40 cm square soft box attached to the flash using a flash bracket. The flash is being triggered by a Godox X1-T transmitter which is attached to the hot shoe of the camera. So let’s get started.
Again, our first step will involve cutting down the ambient light so much that we get an extremely underexposed shot.
And this is pretty easy to achieve. Just set your shutter speed to the sync speed. In this case 1/200.
Set your aperture to something in between. I like to start with f8. In studio photography, most of the times, aperture is not as important as in outdoor photography because in studio photography, our main focus is not blurring the background. Using a moderate f-stop number like f8 cuts down a lot of ambient light coming into the camera and that is more important than depth of field.
Set you ISO to the lower ISO value. In this case I’m using ISO 100.
So for the shot below, I have used 1/200 f 8 ISO 100.

You can see here that you can barely see me. The settings here have cut down so much ambient light that our shot is severely underexposed and that’s exactly what we want at this point. If you find you have not been able to cut down enough ambient light at these settings, you can always make the f-stop number larger to cut down excess light.
For now we are good. So let’s move on to the next step, which is switching on our flash and firing it.
Just like for the outdoor portrait, I like to start off with the flash set to 1/2 power.
So the overall settings are – 1/200, f8, ISO 100 and flash on 1/2. Let’s see the shot we get with this:

You can see that we’ve got a decent looking shot that is completely being lit by our flash. For me this was slightly underexposed. So for the next shot I have increased to power of the flash to 1/1, which means full power. Let’s see the new shot:

You can see that now I’m properly exposed.
The best part about studio photography is that unlike outdoor photography, you can use Aperture also to change the power of the flash. That’s because depth of field does not really matter in this type of a shot. And we already know that Aperture affects flash exposure too.
So if we were to go from f8 to f11 (a change of 1 stop of light), it would be similar to cutting down light by changing the flash power from 1 to 1/2.
Similarly, if you make the f-stop number smaller, the flash exposure will increase.
This makes it very convenient and easy to experiment with different exposure levels and if you ever find that at full power of the flash the subject is still underexposed, you can always open up the aperture to increase the flash exposure.
You can also do this by raising the ISO, but that should always be the secondary option since raising ISO would also mean introducing noise. But to be frank, most modern day cameras can easily handle ISO values till even about 1600 without significant noise. In fact a lot of photographers use ISO values like 200 or 400 to start off with so they can reduce dependence on flash power alone and doing this means your flash works less and therefore conserves battery.
Whatever initial settings you use for the first shot, the main principle is that your first shot should be severely underexposed. And then you simply fire the flash.
You can get more creative if you have multiple flashes. For instance, in the next shot, I’ve used another flash that is firing from behind me and acting as the hair/rim light to separate me from the background.
This flash was set to slave mode, which means it will fire in sync when it detects the main flash (called the key light) going off. I set its power to 1/16. Let’s look at this new shot:

You can see that this time my hair and body are well separated from the background.
So that’s it. I hope this article helps you to purse off-camera flash photography because it’s really an amazing accessory and once you learn how to use it properly, it’s one of those things that will immediately separate you from amateur photographers and take your photography to the next level.