How to Use Selective Color Adjustment in Photoshop – Beginners Tutorial
In this video we will be seeing how to use the Selective Color Adjustment Layer to correct the color of a portrait. We will be first understanding the CMYK color model, on which the Selective Color tool is based upon. Once we understand this model, it will be very easy to use the different sliders to mix different colors to achieve the desired look. Here’s the video:
Video Summary
This tutorial by Creative Pad Media explains how to use the Selective Color Adjustment tool in Photoshop to remove unwanted color casts, particularly in portraits.
Key Summary Points
- Tool Purpose: Selective Color is ideal for neutralizing specific “bad” hues (like an unnatural yellow skin cast) without losing image vibrancy, unlike the Hue/Saturation tool which can make skin look dull [00:29, 01:03].
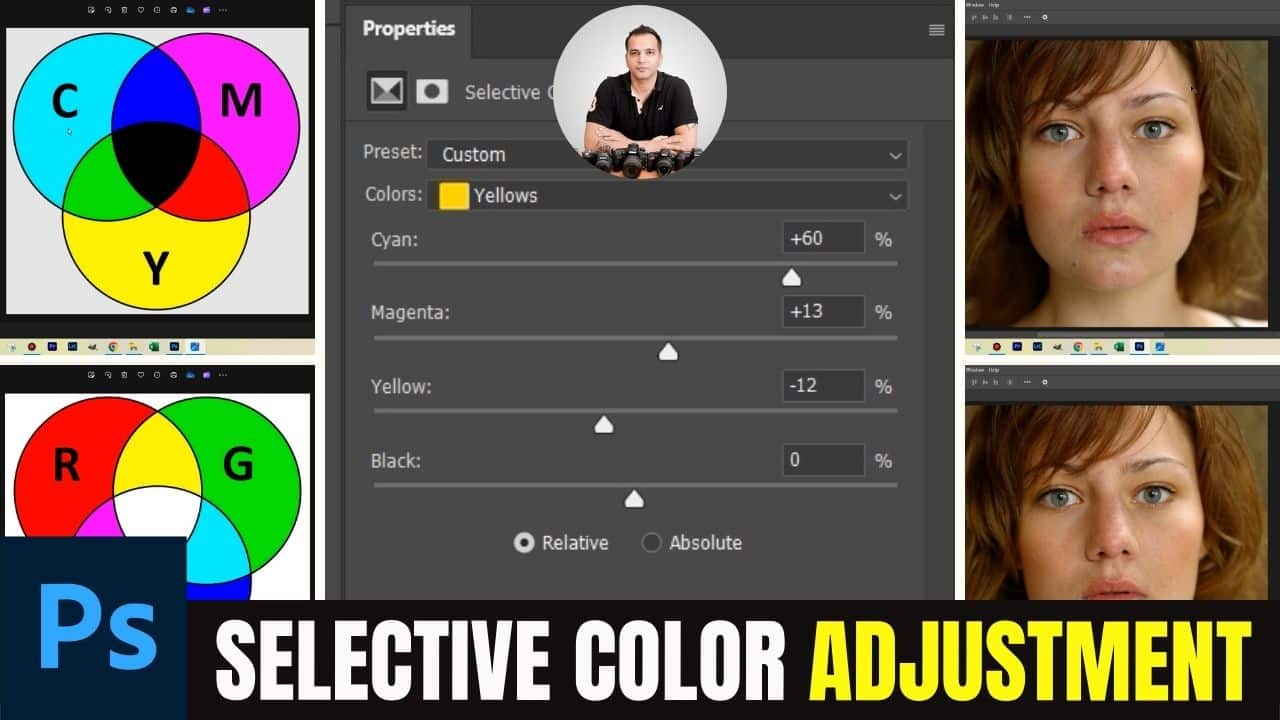
- CMYK Color Model: The tool operates on the CMYK (Cyan, Magenta, Yellow, Black) model. “K” stands for “Key” (black) to avoid confusion with Blue from the RGB model [01:51, 02:11].
- Neutralizing Colors via Sliders:
- Cyan Slider: Increasing cyan when the “Yellow” channel is selected moves the hue toward green, effectively neutralizing yellow casts [05:36].
- Magenta Slider: Adding magenta to yellows creates a warmer, reddish tone, while decreasing it moves the hue toward green [08:36, 08:59].
- Yellow Slider: Directly controls the saturation of the yellows. Decreasing it adds more blue/cyan/magenta characteristics to the selected pixels [09:36, 10:02].
- Black Slider: Controls the brightness or darkness of the specific color channel without causing a hue shift [11:18, 11:52].
- Relative vs. Absolute: The creator recommends sticking to the Relative setting (default) because it produces more natural, subtle transitions by calculating changes based on existing pixel percentages [12:14, 12:56].
Conclusion: By understanding the relationship between CMYK colors, photographers can precisely target and fix skin tone issues for more professional portraits [12:02].
Important Links
Link to download the image shown in the video:
This video is from our course called Change the Color of Any Object in Photoshop. Use the link below to access the full course via Udemy:
Change the Color of Any Object in Photoshop