How to Use the Color Balance (White Balance) Function to Correct Color Casts in Your Shots
Sometimes, due to the kind of lighting that we are shooting in, our images can have an unwanted colour cast in them. For example, look at the shot below:
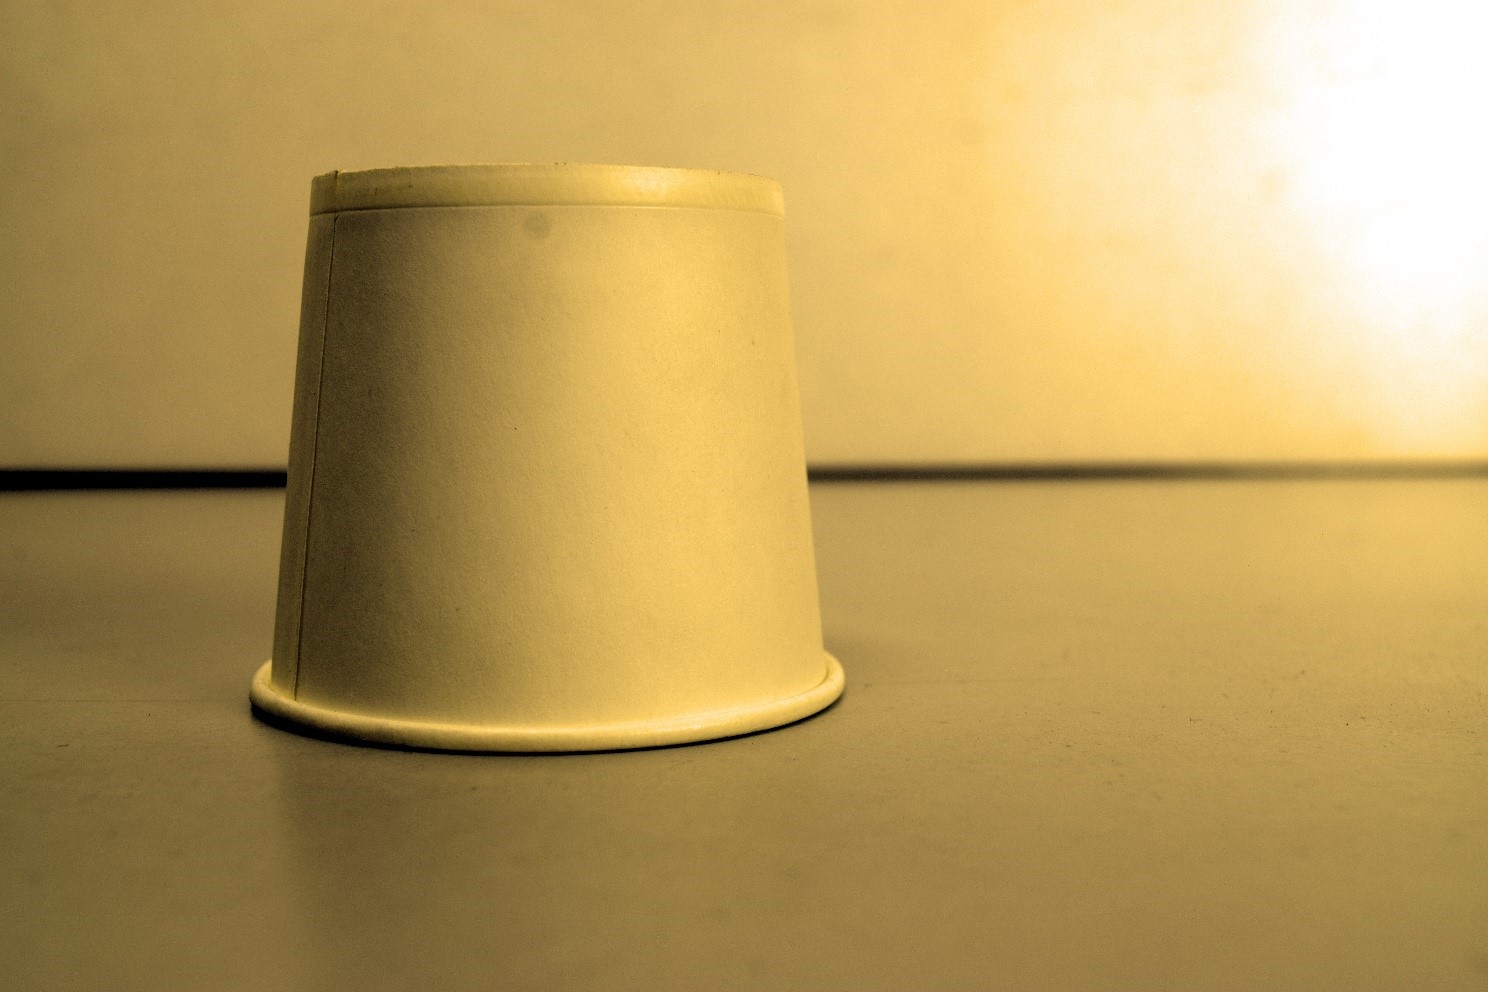
You can see that the shot appears very yellowish.
This is because it’s being shot under tungsten lighting, which produces a yellow looking warm light. Different lights with different color temperatures can produce a different type of color cast in your shots.
Color balance, also denoted as White Balance (WB), refers to an option on the camera that helps you to remove an unwanted color cast in a shot so it can look normal again, like the shot below:

Let’s see how you can select the colour balance option on your camera, and then we’ll see how it works:
Watch the video below to see what to do. Alternatively, you can read the description too.
Video 16: Selecting and Changing Colour Balance
Nikon users, click here to watch the video
Canon users, click here to watch the video
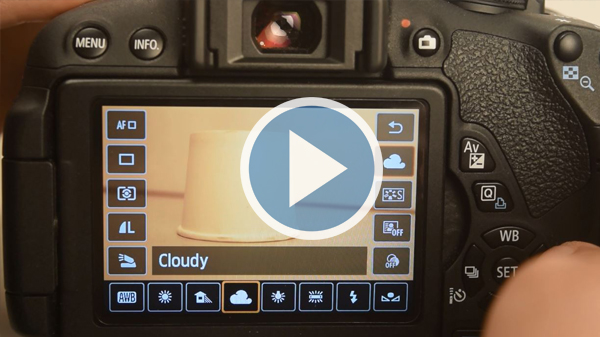
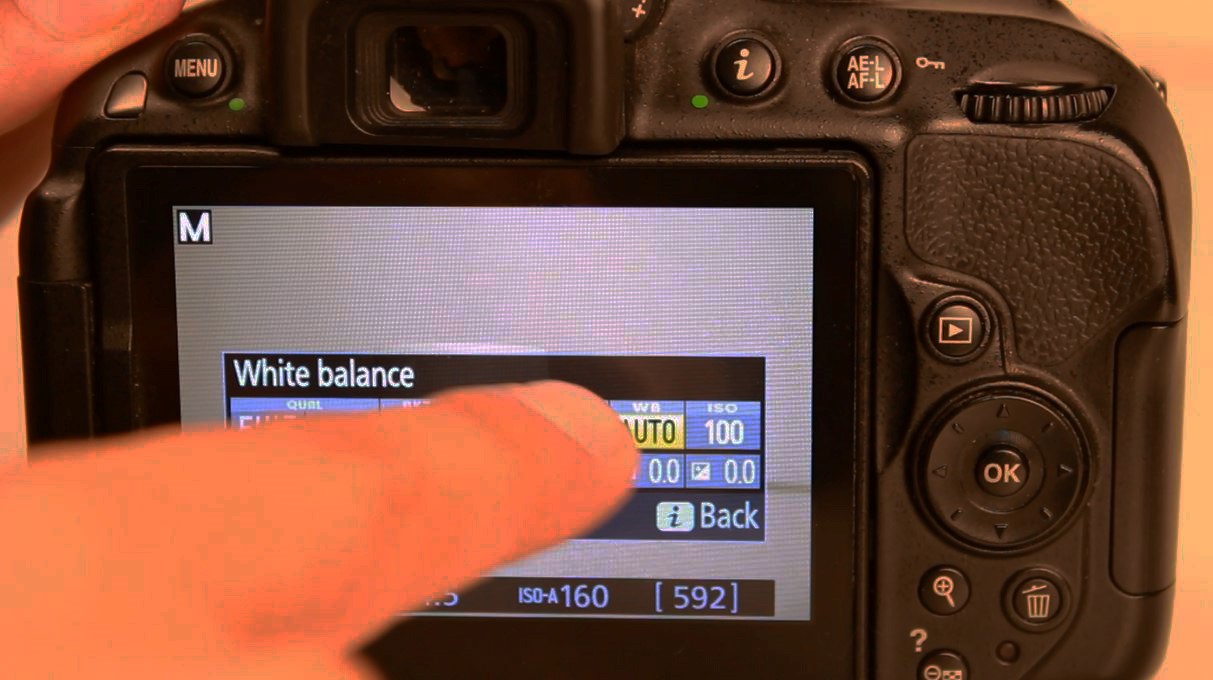
- First of all, let’s see how you can select the colour balance/white balance option on your camera. For Nikon cameras, press the ‘i’ button like you’ve been doing before, and then select the ‘WB’ Option, like shown in the image below:

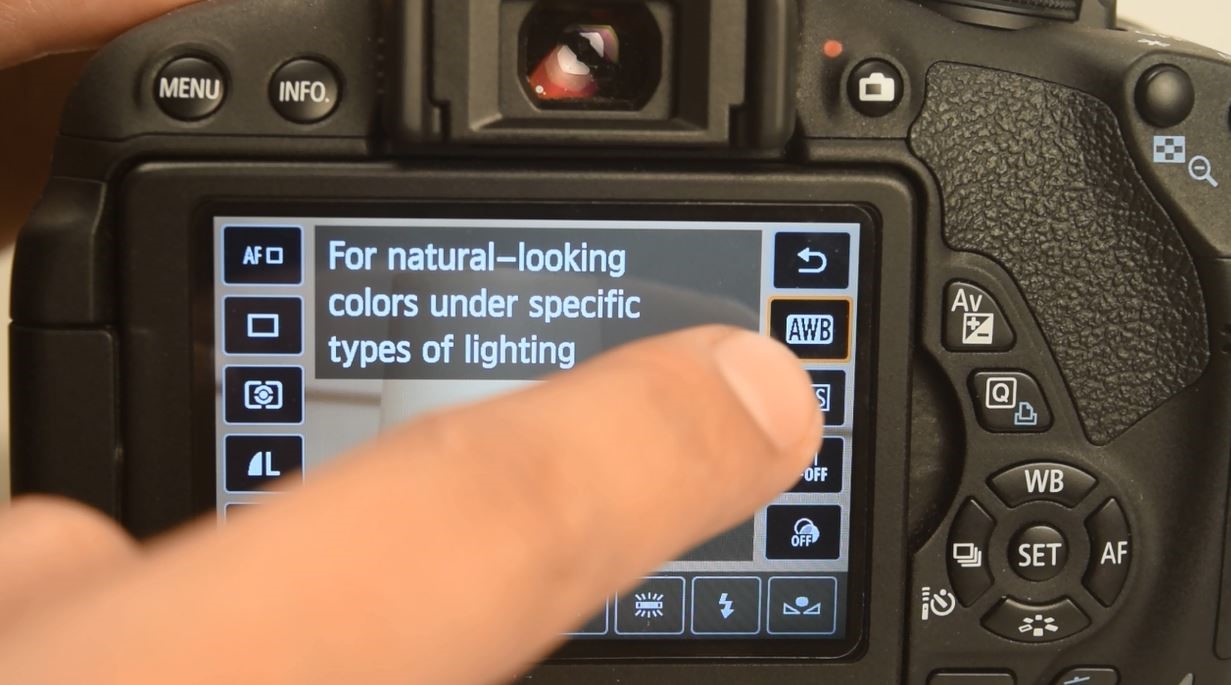
- For Canon cameras, press the ‘Q’ button and select the AWB option as shown below:

- You’ll see the following options in front of you:

- You have to select the option that corresponds to the situation in which you are shooting. For example, let’s say that in the yellowish looking shot that we saw above, we were getting that shot because we were shooting under an incandescent or tungsten light bulb, which gives out a yellowish light. So you’ll select the option ‘Tungsten’.
- What we are doing is this – We are telling the camera, ‘Hey camera, I’m shooting under a tungsten bulb and thus getting an undesirable yellowish color cast. So please correct this and make the colors of the shot look like how it would have been normally.’
- So basically, we choose the colour balance to negate the effect of the situation in which we are shooting.
- Similarly, if you are shooting something under a fluorescent bulb, and getting an annoying bluish look, you can change the color balance to ‘Fluorescent’, and you’ll see that the bluish effect goes away.

Most of the times it’s fine to leave the colour balance setting to ‘Auto’. The camera takes care of everything.
But in certain situation where you find that the shot is looking very undesirable because of the temperature of the picture being excessively cool (blue) or excessively warm (yellow), you can find out the cause and choose the right setting accordingly.