Select and Mask Photoshop Tutorial – For Complete Beginners
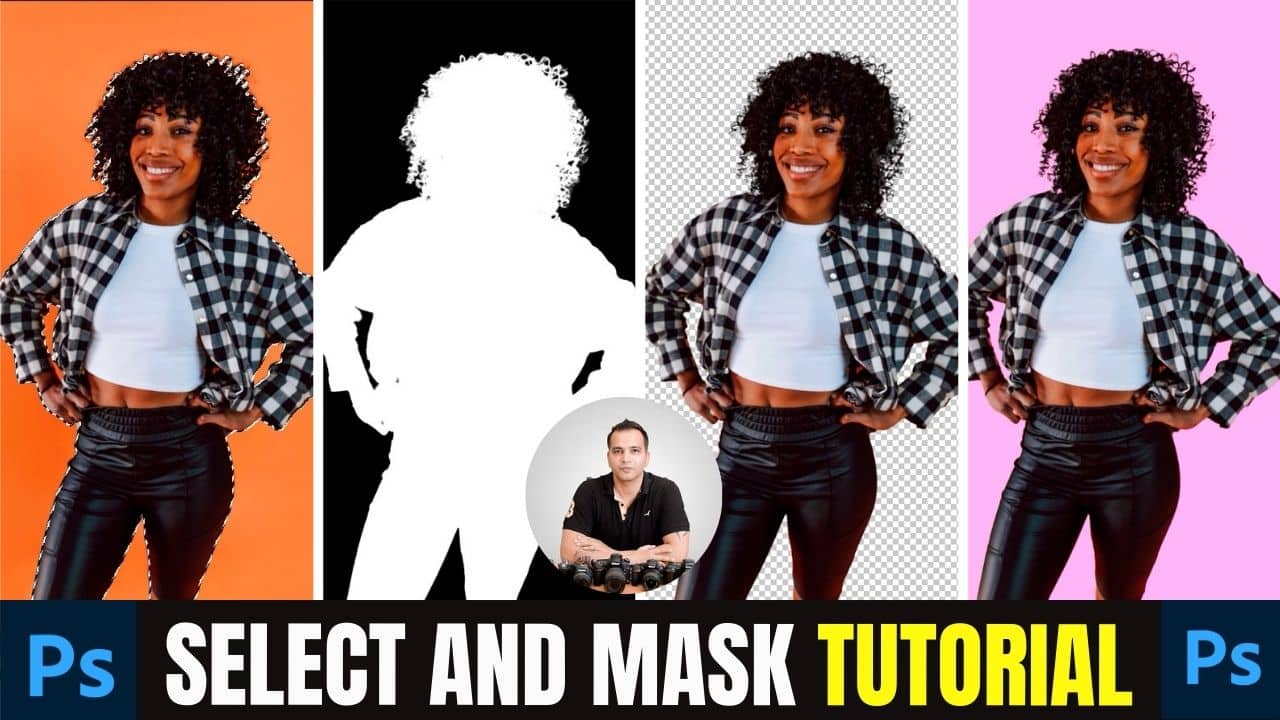
In this video we will be learning how to use Select and Mask in Photoshop to refine a selection. This is an amazing tool because once you master it, you can easily do things like removing the background or changing the background color. Here’s the video:
Video Summary
This comprehensive beginner’s tutorial by Creative Pad Media explains how to use the Select and Mask tool in Photoshop (formerly known as the “Refine Edge” tool) to create high-quality, professional selections, particularly for complex subjects like hair.
Key Summary Points
- Initial Rough Selection: The process starts with a rough selection using the “Select Subject” or “Quick Selection” tool. Select and Mask is then used to refine these rough edges [00:29, 01:12].
- Interface & View Modes:
- The Refine Edge Brush: This is the most critical tool. By “painting” over fuzzy edges like hair, the AI analyzes the pixels to keep the subject while removing the background [08:45, 09:57].
- Refining with Sliders:
- Exporting Results: The creator suggests outputting the selection as a New Layer to keep the original photo intact, then using Ctrl/Cmd + Click on the layer thumbnail to load the refined selection back into your main workflow [23:25, 23:48].
Conclusion: Mastering this tool is essential for tasks like background replacement and color changes on complex subjects, providing results that automated AI alone cannot yet achieve.
Important Links
Link to download the image shown in the video:
This video is from our course called Change the Color of Any Object in Photoshop. Use the link below to access the full course via Udemy:
Change the Color of Any Object in Photoshop