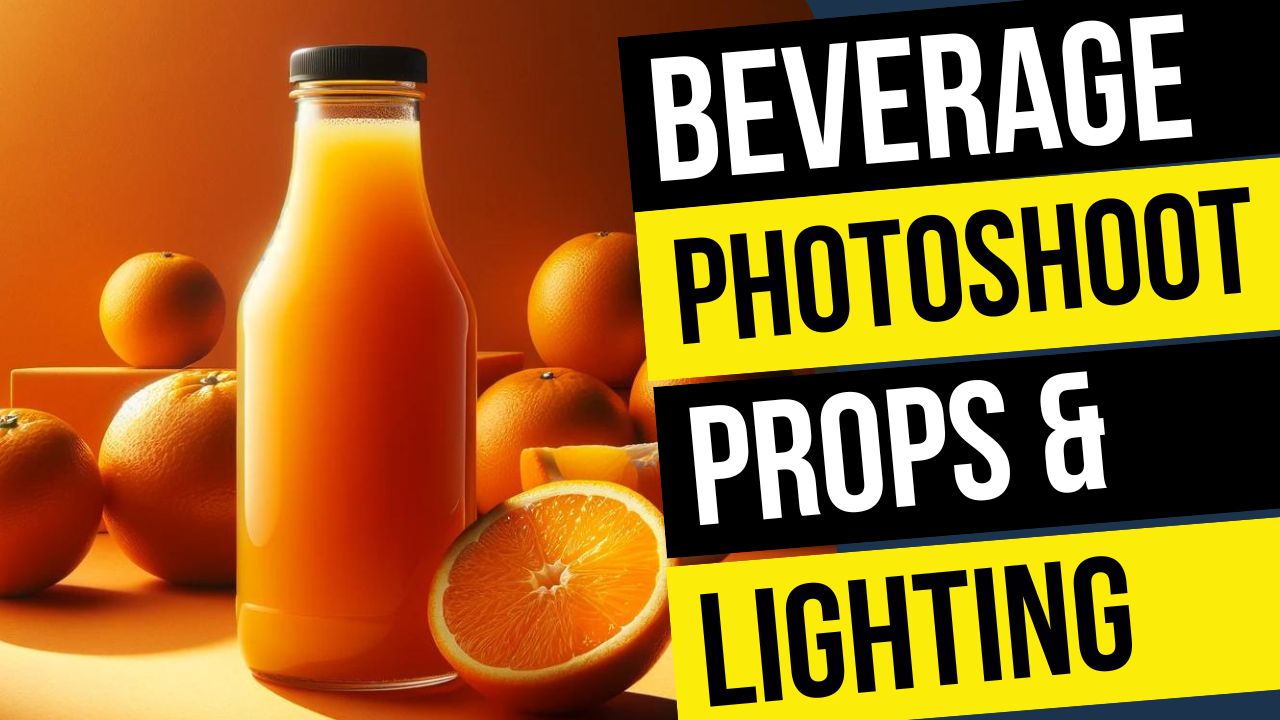
Beverage Photoshoot Using a Phone – Props and Lighting
In this video we will be seeing how to use your smartphone to do a beverage or drink photoshoot. Here we will be shooting an orange juice bottle.
We’ll be looking at the different props that will be required for this shoot. We also be looking at how to create extremely soft lighting using the double diffusion method.
After we have taken the shot, we will also compare it to a shot taken from a full frame DSLR camera with a prime lens. I’ll also be showing you how to shop for the props on Amazon.
Here is the video:
To see the gear mentioned in the video, use the link below:
Food and Product Photography Gear
This video is from our Mobile Photography Course, which has 40 videos and 6 hours of content. Use the link below to access the full course on Udemy:
Video Summary
This tutorial from Creative Pad Media focuses on how to conduct a professional-looking drink photoshoot using a smartphone, covering everything from lighting to props.
Shoot Setup and Equipment
- Background: Uses a yellow PVC seamless backdrop, which is durable, waterproof, and easy to clean compared to standard paper [00:20, 15:22].
- Stability: The phone is mounted on a sturdy tripod using a bracket to avoid camera shake, which is critical when focusing or triggering the shot [02:06, 02:44].
- Lighting: Uses a Godox SL60W continuous video light paired with an 80 cm softbox [03:06]. Continuous lighting is preferred for mobile photography since external flashes don’t sync with phones [03:15].
- Softening Light: To further soften the shadows and highlights, a large 42-inch diffusion panel (from a 5-in-1 reflector) is placed in front of the softbox [04:21, 08:43].
Photography Techniques
- Composition: The bottle is placed according to the Rule of Thirds and aligned using grid lines to ensure it is perfectly straight [09:04, 09:18].
- Creating “Cold” Effects: The bottle was taken straight from the freezer to get natural condensation. Alternatively, you can mix glycerin and water (50/50) and spray it onto the bottle for a long-lasting moisture look [06:11, 06:29].
- Depth of Field: To get a blurred background on a phone, keep a significant distance between the subject and the backdrop [01:29, 06:55].
- Remote Triggering: A Bluetooth remote is used to fire the shutter to prevent any physical movement of the phone [02:55, 09:44].
Post-Processing and Comparisons
- Editing: The final shot was edited in Snapseed (a free Google app) to enhance colors and contrast [12:23].
- Smartphone vs. DSLR: While the phone shot looks professional, the video compares it to a DSLR shot (Nikon D750), noting that the DSLR provides a much more natural background blur and higher sharpness due to the larger sensor and aperture control [13:09, 14:05].