Face & Skin Retouching in Picsart – Using the Retouch Tool
In this video we will be doing face and skin retouching using the Retouch tool in the Picsart mobile app.
Here are the important sections in this video with their respective timestamps:
- 0:00 Color Correcting the Portrait
- 5:51 Blemish Removal
- 10:02 Correcting the Skin Tone
- 13:36 Smooth tool for skin smoothing
- 17:03 Face Fix Tool
- 19:58 Hair Color Tool
- 21:30 Eye Color Tool
- 25:50 Detail Tool
- 33:35 Reshape Tool
Here is the video:
This video is from our Picsart Editing Course, which has 25 videos and 3.5 hours of content. You can access the full course on Udemy using the link below:
Video Summary
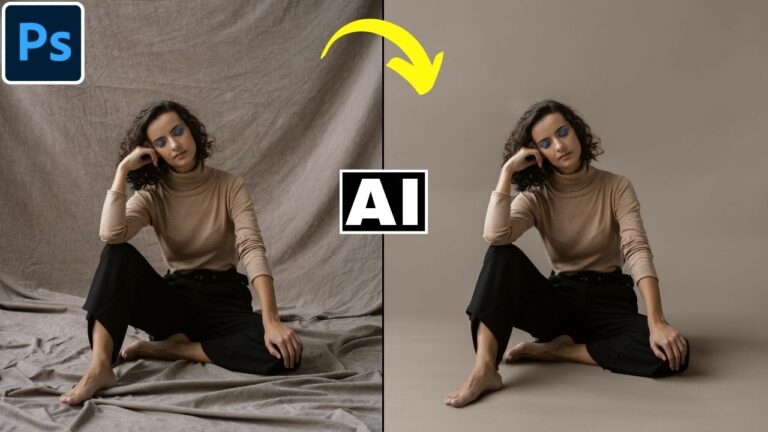
This detailed tutorial demonstrates how to perform a high-end portrait retouch using the Picsart mobile app. The process is broken down into essential phases to ensure a realistic yet polished result.
Phase 1: Initial Preparation
- White Balance Correction: Since Picsart lacks a dedicated white balance tool, the instructor manually adjusts the Temperature (decreasing it to remove yellow/red casts), Saturation, and Contrast to achieve realistic skin tones [02:30].
- Cropping: The image is cropped to focus on the face, which is the primary area for the retouching process [01:50].
Phase 2: The Retouching Workflow
- Blemish Removal: The first step after color correction is manually removing small spots and blemishes with the Blemish tool. Using a small brush size and being patient ensures a clean base for further smoothing [05:30].
- Skin Tone Refinement: The Skin Tone tool is used to further neutralize any remaining reddish or uneven areas by painting on a more accurate shade with reduced opacity [10:04].
- Skin Smoothing (The Golden Rule): The instructor emphasizes texture over blur [13:00]. The Smooth tool is used subtly on the cheeks and shadows to retain natural skin pores rather than creating a “plastic” look [14:40].
- Detailing & Sharpening: The Detail tool is applied to the eyebrows, hair, and specular highlights (on the nose and lips) to add contrast and “punch” to the image [25:48].
Phase 3: Facial Features
- Eye Enhancement: The Eye Color tool is used to subtly brighten the natural eye color. The instructor recommends inverting the effect and manually restoring it with a low-opacity brush for a realistic blend [21:25].
- Avoid Over-editing: Tools like Face Fix (too strong) and Reshape (controversial/distorts reality) are mentioned as options to use sparingly or avoid entirely to maintain the person’s true likeness [17:08].
The final result is a professional-looking portrait that is significantly improved but still appears real and natural [36:54].