Sea Photography Tutorial – Long Exposure Photography for Seascapes
Blurring water in Sea Photography is a cool effect that can be effectively put to use where water is moving.
While blurring waterfalls and achieving that silky effect is pretty common, I’ve noticed that not many beginners use the same concept of a slower shutter speed to blur sea or ocean waves on a beach or something similar where the water movement is not as rapid as a waterfall.
Yes, Sea Photography is more challenging because the relatively still water means you need to use a very slow shutter speed.
Now before we get started with this tutorial, I would like to point out that doing seascape photography requires you to be thorough with using the manual mode of the camera. In case you want to master it, you can check out my Photography for Beginners course, which has 45 videos and 7 hours of content. It is available via Udemy.com. It’s one of the highest rated photography courses on Udemy.
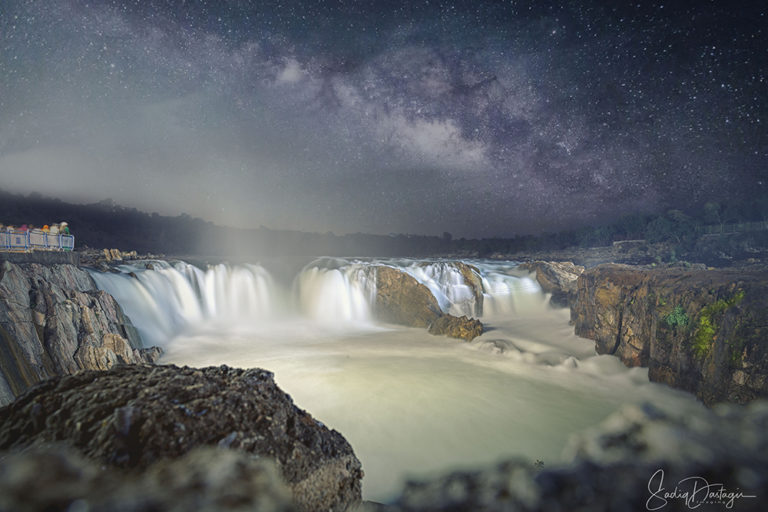
Examples of Long Exposure Seascape Photography
Using a slower shutter speed can result in giving the water a blurry or a misty feel, which enhances the look of shot by giving it a very dramatic and unique look, like in the Sea Photography shots below:


How to Take These Long Exposure Seascape Shots
Depending on the Sea Photography scene that you want to shoot, it may either be too simple or slightly complex to achieve this. We’ll go through both the scenarios.
The simple situations are where the movement of the water is fairly rapid, like that of the waves of the ocean. Here all you need is to be able to use a slow shutter speed which is between 5 to 30 seconds and this is usually not a problem since all DSLR cameras go up to 30 seconds and can function automatically.
If you are not good with using the manual mode of the camera, then I’ll suggest you first go for my Photography for Beginners Course. But if you are well versed with it, then let’s move ahead.
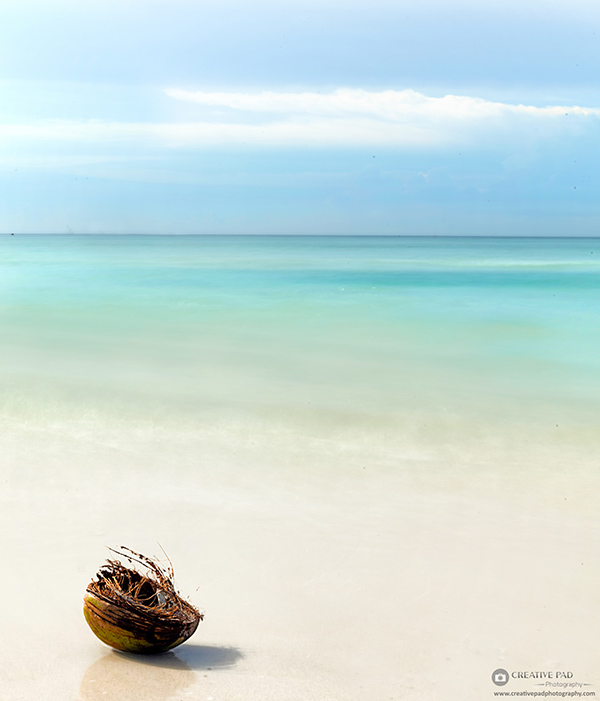
So first we’ll look at a step-by-step approach for a simple shot like the last shot you saw above (the black and white one with rocks). Then we’ll also look at the step-by-step approach for a more complex shot like the first one you saw above.
Things you would require for Sea Photography:
- A DSLR or a Mirrorless Camera (actually any camera that allows you to use to shoot in the manual mode and allows a longer shutter speed can be used).
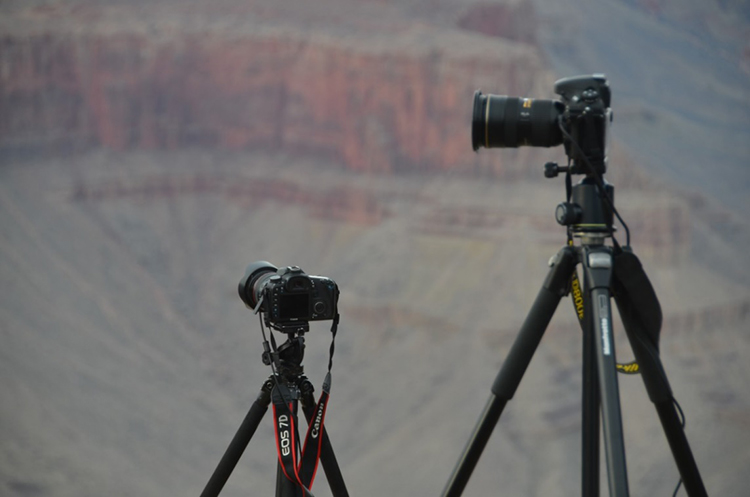
- A Sturdy Tripod.
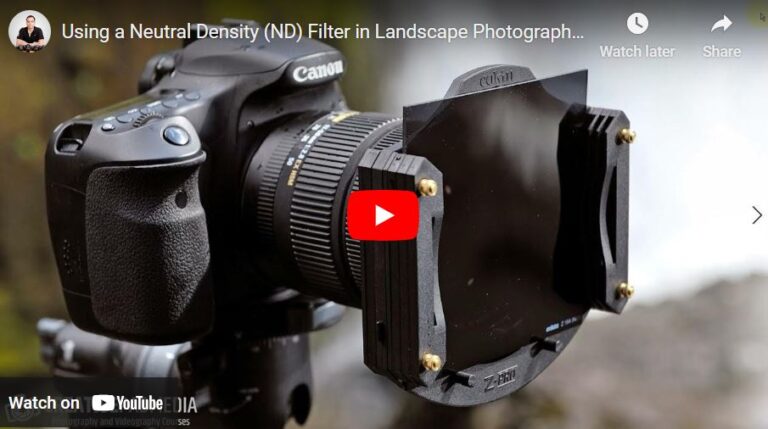
- ND Filter (may or may not be required depending on the time at which you are shooting. You’ll understand how to use an ND filter when you go through the steps below)
- A shutter release (optional but highly recommended. A shutter release remote allows you to take the shot without having to press the shutter button, which is important as the touch can produce vibrations in your camera which can result in your image losing some sharpness as you’ll be using longer shutter speeds.)
- Knowledge of shooting in the manual mode. Check out my Photography for Beginners course for that.
So here’s our shot:

And here are the steps:
- Set up your camera on the tripod and adjust so you get your desired composition.
- Set the ISO to 100 ( some cameras go below 100. For instance, my Nikon D750 goes to ISO 50. So select the lowest value in that case).
- Now comes the aperture. Very high f-stop values can lead to a phenomenon called diffraction which can make your images a bit soft but for now, we’ll keep things simple and not really bother about it . So set your aperture to a higher value like f16 so you can get sufficient depth of field, which is required for a landscape shot to keep everything in focus.
- Now keep lowering the shutter speed till the time you see the exposure meter is pointing at the middle.
- Now a few things can happen. If you’re shooting during the golden hours (early morning or late evening) when the light is less, you will, in most cases, be able to reach a shutter speed like 5 or more seconds and that will enable you to blur the water. If that’s the case, then all you have to do is to use your shutter release remote to take the shot and you are done.
- However, if you’re shooting at a time of the day when there is more light, then you’ll find that using a longer shutter speed makes the light meter go towards the positive side and if you take the shot, you’ll get an overexposed shot. To correct this, you have a few options:
1. First is to make the aperture more narrow if you can. So in our case we were using f16. We can make it f22 and that will allow us to cut down some light coming in the camera, which will in turn enable us to use a longer shutter speed. If doing that solves your problem of over-exposure, then you don’t need to anything else apart from taking the shot.
2. But if that too did not help, then you have to use an ND filter, which is a circular or square filter that attaches in front of the lens to reduce the amount of light coming in the camera. You can imagine it like a pair of shades for the camera.
3. After putting on the filter, it becomes possible to use a longer shutter speed. And for shots like these, where you don’t need an extremely long shutter speed as the water movement is fairly rapid, this should do the job. However, if you are shooting at a time like the afternoon (which you should not as harsh light doesn’t look too pleasing), you may need to use a stronger ND filter or maybe even stack two ND filters together on top of each other.
- So in case you don’t have an ND filter, it’s advisable to shoot at a time when the light is very less.
- Another point I should make is that if you’re finding that the over-exposure in your shot is only marginal and not extreme, then you can take that shot and it’s easy to correct the exposure in post-processing. Make sure you are shooting in RAW format as it’s easier to edit RAW photos than it is to edit JPEG ones, without a loss of quality.
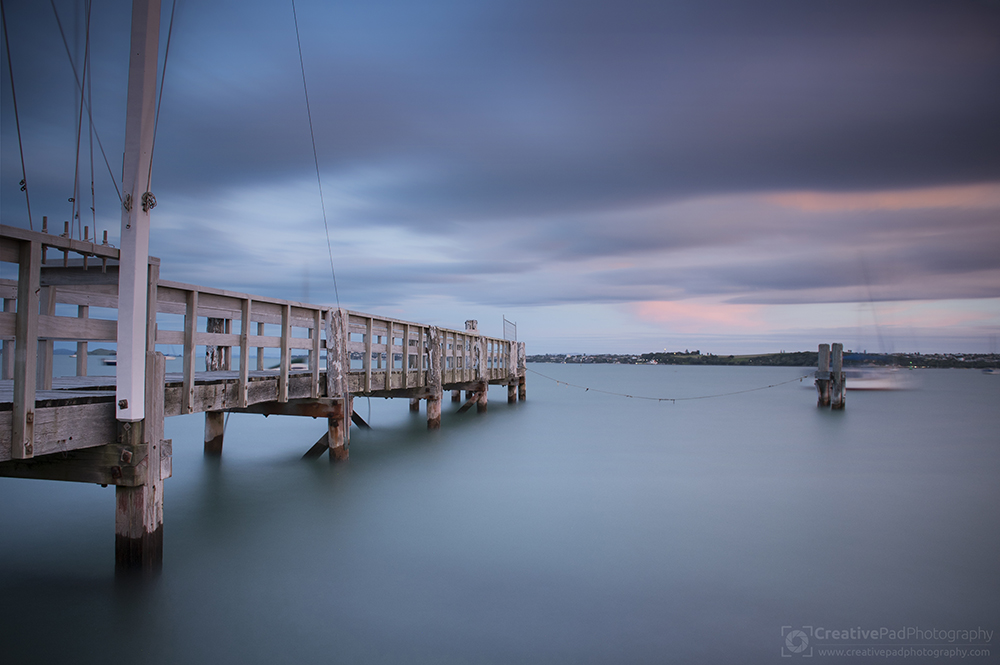
Now let’s look at the process for a more complex Sea Photography shot like the one below:
Here, everything else remains the same as the steps before, but if you need to blur the water so that it looks really smooth like in the shot above, you will, in many cases, require a shutter speed that is more than 30 seconds. So you’ll have to use the bulb mode.
The bulb mode enables you to use a shutter speed of any length. When on the bulb mode, you are required to press the shutter button twice, once to begin the shot, and once to end it. The interval between these two actions is the duration of the shutter speed.
Needless to say, having a remote shutter release is mandatory here since touching the camera twice during an extremely long exposure will most definitely result in a blurry shot.
So what do you need for this?
The most important accessory for such shots is a very strong ND filter. ND filters come of varying strength. Some only stop a small amount of light (and are cheaper) and some stop a lot of light (and are usually expensive). For instance an ND8 filter, perhaps one of the most popular ND filter amongst beginners, only reduces 3 stops of light and an ND1000 filter, reduces almost 10 stops of light.
If you are a complete beginner, then I would suggest you read about ND filters and stops of light first. I plan to write an article about it soon but here, I’ll just give you an overview.
Since we need a very long shutter speed for such shots, we need to cut down a lot of light coming in the camera.
So here I’ve used a ND1000 filter which has enabled me to use a shutter speed of 151 seconds.
There are a few challenges when it comes to using a strong ND filter and using an extreme shutter speed like this.
The first challenge lies in being able to calculate the correct shutter speed. Since you are on bulb mode, you need to predict the correct shutter speed. This is not as easy as it sounds.
What you have to is that you first take a meter reading without the ND filter on.
So use the procedure described for the simple shot above and arrive at the three settings (Aperture, Shutter Speed and ISO) when the light meter is in the middle. These are your base settings.
Now is the time to put on your ND filter. But before you do that, make sure you have switched from auto-focus to manual focus since it’s usually very tough to focus again when the ND filter is on as it makes it too dark for the lens to see anything.
Now you need to use an exposure calculating app.
I use an app called Exposure Calculator on my smartphone.
You have to enter the base shot settings inside this app and then enter the strength of the ND filter that you are using. It will calculate the required shutter speed with the ND filter on.
Once you know the shutter speed, you can put your camera on bulb mode and then use a timer (this app has an in-built timer) on your phone to start and finish your shot for that duration.
And that’s it. You’ll get a correctly exposed shot.
Since you are using a very long shutter speed, another important accessory is a very sturdy tripod.
Long Exposure Seascape Photography Video Tutorial
I recently decided to make public one of the videos from my Photography course, which shows the usage of ND filters and the Exposure calculator app, like discussed above. This video shows me doing the exact same thing that we talked about above but I just feel in these cases, watching a video is better than reading an article. So here you go. Here’s the video:
I hope this article and video helps you get some nice seascape shots.


Is Vanguard 203 agh still considerable right now at ₹3800 or can you suggest some other
quite useful and practical tips
thank you
Well explained Kush
Thank you 🙂
very nice knowledge sir ji.
You’re welcome!