Long Exposure Photography Tutorial – Settings for Slow Shutter Speed Photography
Long exposure photography or Slow Shutter Speed Photography is a very fascinating genre that involves the use of slower shutter speeds to create effects that otherwise would not be possible.
When a beginner learns photography, they can actually think that slow shutter speed is a bad thing since it results in camera shake.
But what you are about to find out is that a slow shutter speed can actually result in way more creative shots than what fast shutter speed can achieve.
But long exposure photography can be a bit tricky sometimes.
Depending on what subject you are shooting, the methodology to take such shots can vary and can demand the usage of not just the tripod but also filters like the ND (Neutral Density) filter.
Let’s see a few shots like these and take a deeper look into what is the exact methodology to take such shots.
So let’s get started.
Steps to Take for Different Types of Long Exposure Shots
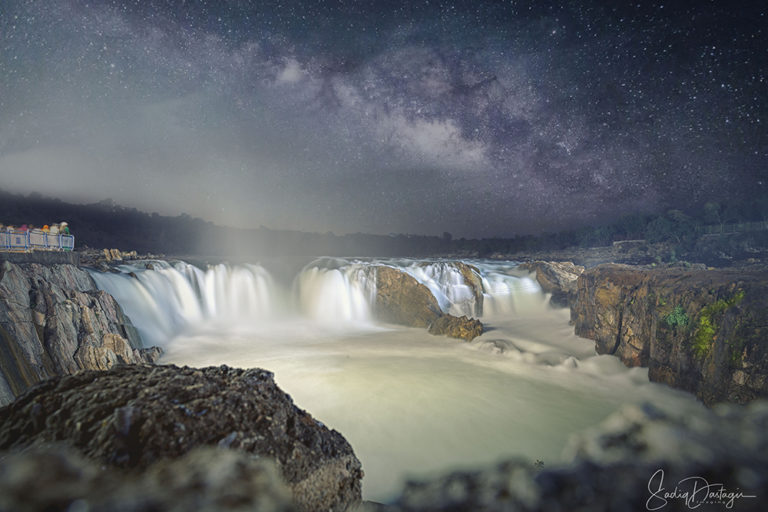
Silky Waterfall

Here’s the methodology to shoot the above shot:
- Place your camera on a tripod.
- Compose your shot
- Ideally you should be getting the foreground in your composition but like I mentioned before, if you have a strong focal point, like I’ve got in the waterfall here, you can give it a skip.
- Now you are set to take this shot.
- Usually for landscape shots, it’s alright to have the focus point in the center where it is by default because a larger f-stop number makes sure everything comes into focus. But when there is such a strong focal point in the picture, I like to use the keypad to move the focus point on top of it just to be very sure that it comes out really sharp.
- Now it’s time for the settings. Set you aperture to a large f-stop number, like f11, f13, f16, etc.
- Next make sure the ISO is 100. (You should avoid using Auto-ISO in situations where you have to use ISO 100 only, like in landscape shots)
- Ideally, you’ll be shooting in low light conditions since it’s good to shoot close or during the golden hours as we learned in the landscape photography section.
- This would mean that the exposure meter is pointing in the negative direction.
- Now all you have to do is to keep reducing your shutter speed till the meter comes in the centre.
- As long as the shutter speed is below 1/10, it’s usually good enough to blur a waterfall.
- So if that’s the case, you can go ahead and take the shot.
- As mentioned before, for long exposure shots, it’s always better to not touch the camera to press the shutter button to avoid any chances of a shake. So ideally, you should use a wireless remote to take the shot.
- If you did everything right, you’ll get a great looking shot. There can be one problem though, which is described below:
The Problem of Over-Exposing the Photo During a Long Exposure
Let’s assume that in the last shot that we were taking, we faced a small problem as described below.
You noticed that as you were reducing the shutter, the meter came in the center before you could go to a slower shutter speed. Let’s assume that at a shutter speed of 1/60, the meter came in the center.
Now 1/60 is not enough to blur the waterfall. It will make the waterfall look frozen and that will not look good at all.
So in such a case what do you do?
Many beginners make the mistake of ignoring the meter and just continue to reduce the shutter speed. The problem with that is that you’ll get an overexposed shot.
If you think about it, the main problem here is that there is too much light.
So you need to cut down light so that the meter starts to point towards the negative side again, thereby allowing you to reduce your shutter speed further.
One way of doing that is to increase the f-stop number. This will make the aperture narrower and hence cut the light coming into the camera. This will enable you to reduce your shutter speed. (Bonus tip: In landscape photography, you should try to avoid using very large f-stop numbers like f29, f36, etc. because they introduce a phenomenon called diffraction into your shots, which can end up reducing the sharpness of your shots. It’s best to use something between f8-f16.)
But let’s say you are shooting at a time when there is a lot of ambient light and even when you increased the f-stop number, you still were not able to reduce the shutter speed all the way down to what was necessary.
Now your settings cannot help you anymore.
So you have two options:
You can take the patient approach and wait till the time there is less ambient light. So let’s say if you were shooting at 4 P.M, you may have to wait till late into the evening.
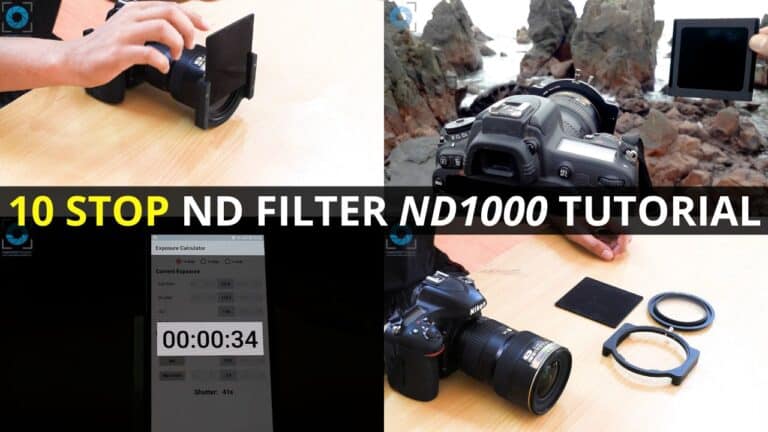
Or you can use an accessory called as an ND filter, which refers to Neutral Density Filter. It looks like this:
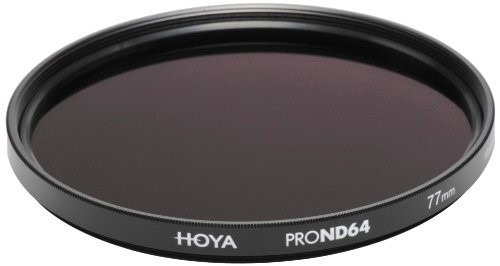
An ND filter fits in front of your lens and reduces the amount of light coming into the camera.
You can think of it like wearing shades. When you wear shades, the amount of light coming into your eyes reduces.
Similarly, when you fix the ND filter in front of your lens, it cuts the amount of light coming into the camera.
So putting an ND filter will make your meter go towards the negative side. You can then reduce your shutter speed further.
ND filters come in different strengths. Some cut less amount of light and some cut a heavy amount of light. So if you’re shooting a waterfall in the middle of the day, you’ll mostly have to use a strong ND filter to cut down the light because there will be too much ambient light and shooting at slower shutter speeds would not be possible.
See the Recommended Photography Gear section to see which ND filters I recommend. You will find them under the Landscape Photography gear section.
In my Landscape Photography course, I teach the usage of ND filters in much more detail.
But to get a preview of how ND filters can help in long exposure photography, check out this video from my DSLR Photography for Beginners Course, where I demonstrate the usage of shooting long exposure seascapes using a very strong 10-stop ND filter:
How to Use a Strong ND Filter to Shoot Long Exposure Seascapes (Video)
Let’s look at another shot and see the methodology behind it:
Motion Blur
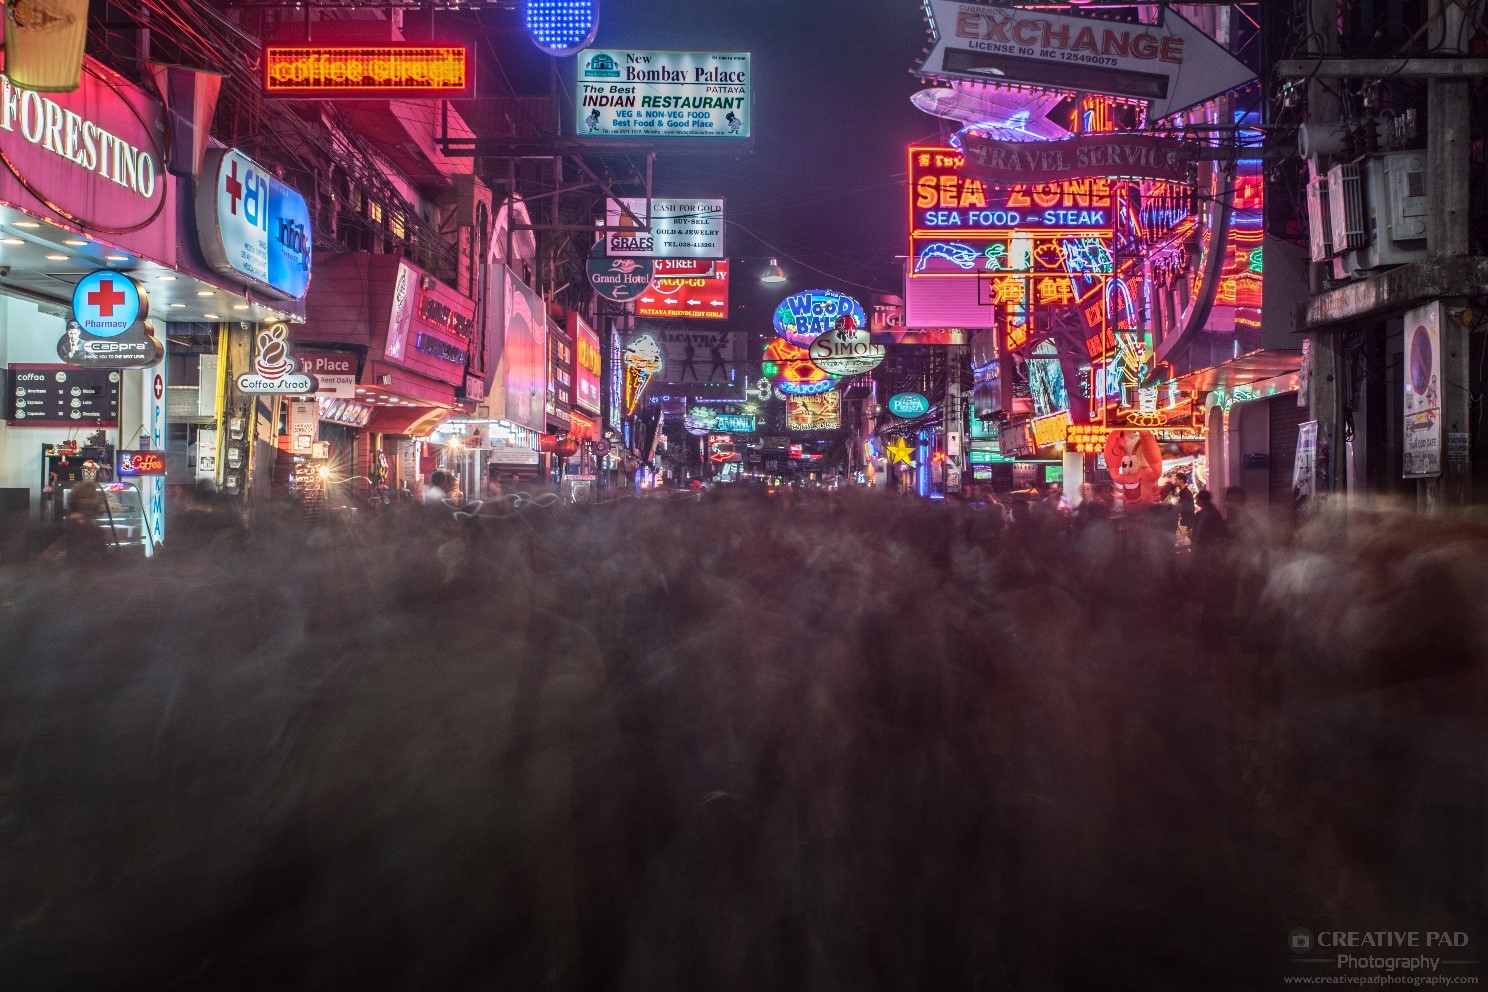
As seen before, here is a shot where I have blurred the people who were walking towards me on this street. Here’s what I have done:
- Placed my camera on a tripod right in the middle of the street.
- Increased the f-stop number to f13 since I want to capture the entire scene in focus.
- Made sure the ISO was 100.
- Reduced my shutter speed to 10 seconds. That’s where the meter came in the centre.
- Now I just had to wait for the time when a lot of people were walking towards me.
- Once that was the case, I just took the shot using a remote.
- It was important that none of the people walking towards me bumped into any part of the tripod, so for the 10 seconds while the shot lasted, I stood in such a position that I used my body to form a shield around the tripod.
Light Trails
Let’s take a look at another shot which is a Light Trails shot. This one is perhaps the most popular types of shots when it comes to long exposure photography or slow shutter speed photography.

- First of all, set up your tripod and get the composition right.
- Then lock focus, preferably on the area where the cars will be going through, so you can get the trails to look very sharp.
- Now it’s time for the settings. First of all, set ISO to 100.
- Next use a large f-stop number like f13 or f16 to get the entire scene in focus.
- Now it’s time to set the shutter speed. I mostly go with 30 seconds first and see the results. It usually delivers the shot like in the image above.
- But one point to keep in mind is that sometimes the trails can come out overexposed. In that case you can try to use a faster shutter speed like lets say 25 seconds. But doing this will impact the exposure so you can compensate that by making the f-stop larger and using something like f22.
Background Motion Blur
Let’s look at another long exposure photography shot where a slow shutter speed has been used to get a creative effect:

Let’s see the process of taking this shot.
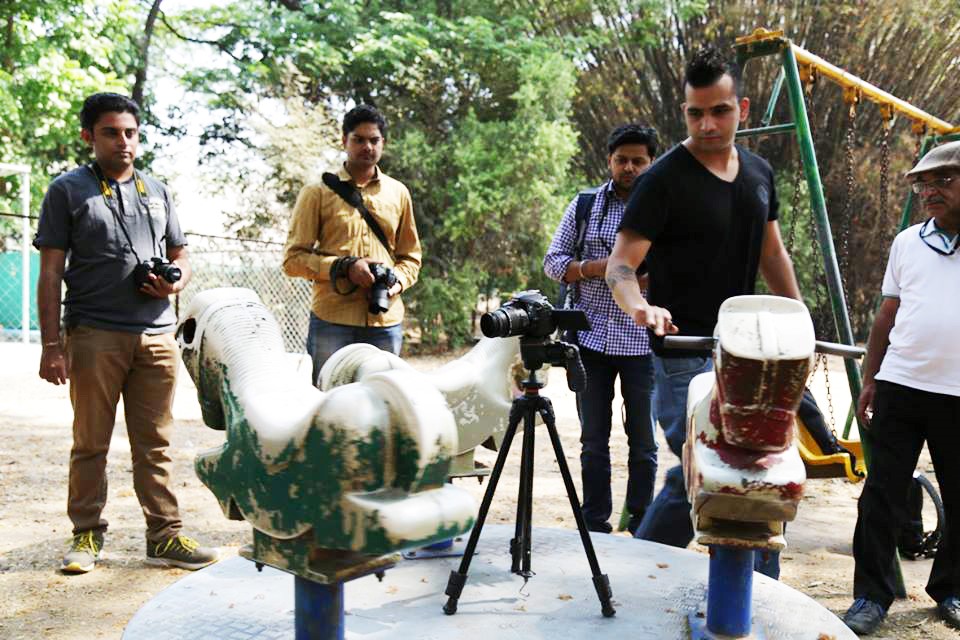
First thing I’ve done here is that I’ve placed my camera on a tripod and kept it on the merry-go-round. To make sure the tripod doesn’t fall off when it’s spinning, it’s advisable that you use a duct tape to fix it on any part of the ride. In this case I was on the ride myself and holding the tripod firmly with my hands (be careful with this approach as you may feel dizzy afterwards).
You can even see the set-up in the picture below, as I’m explaining this shot to my students during one of our photowalks:
- Next, I started reducing the shutter speed. I chose 1/15 because I had planned on spinning the ride at a decent speed. This meant that even 1/15 was enough to blur the moving background. Remember, the faster the movement, the less slow the shutter speed has to be to do produce a motion blur.
- The problem with spinning the ride very slow is that you’ll have to reduce your shutter speed even further. The problem with that is that you have a living being in the frame, which is a kid. If you are using very low shutter speeds, something like 1 second, it may make it easy for you to throw the background into a motion blur, but it can also result in the kid coming out soft and blurred if he moved even slightly.
- So rotating the ride fast enough to use a sufficiently low but not too low a shutter speed is important.
- Next I’ve used a larger f-stop. This is mainly because reducing the shutter speed increased the light into the camera and the meter was pointing to the positive side. So I cut down the light by using a larger f-stop number.
- The ISO is 100.
- I asked someone to spin the ride.
- Then I locked focus on the kids face and used a remote to take the shot.
Panning
The same concept of motion blurring is used for a very popular type of photography called as panning photography, used for shots like the ones below:
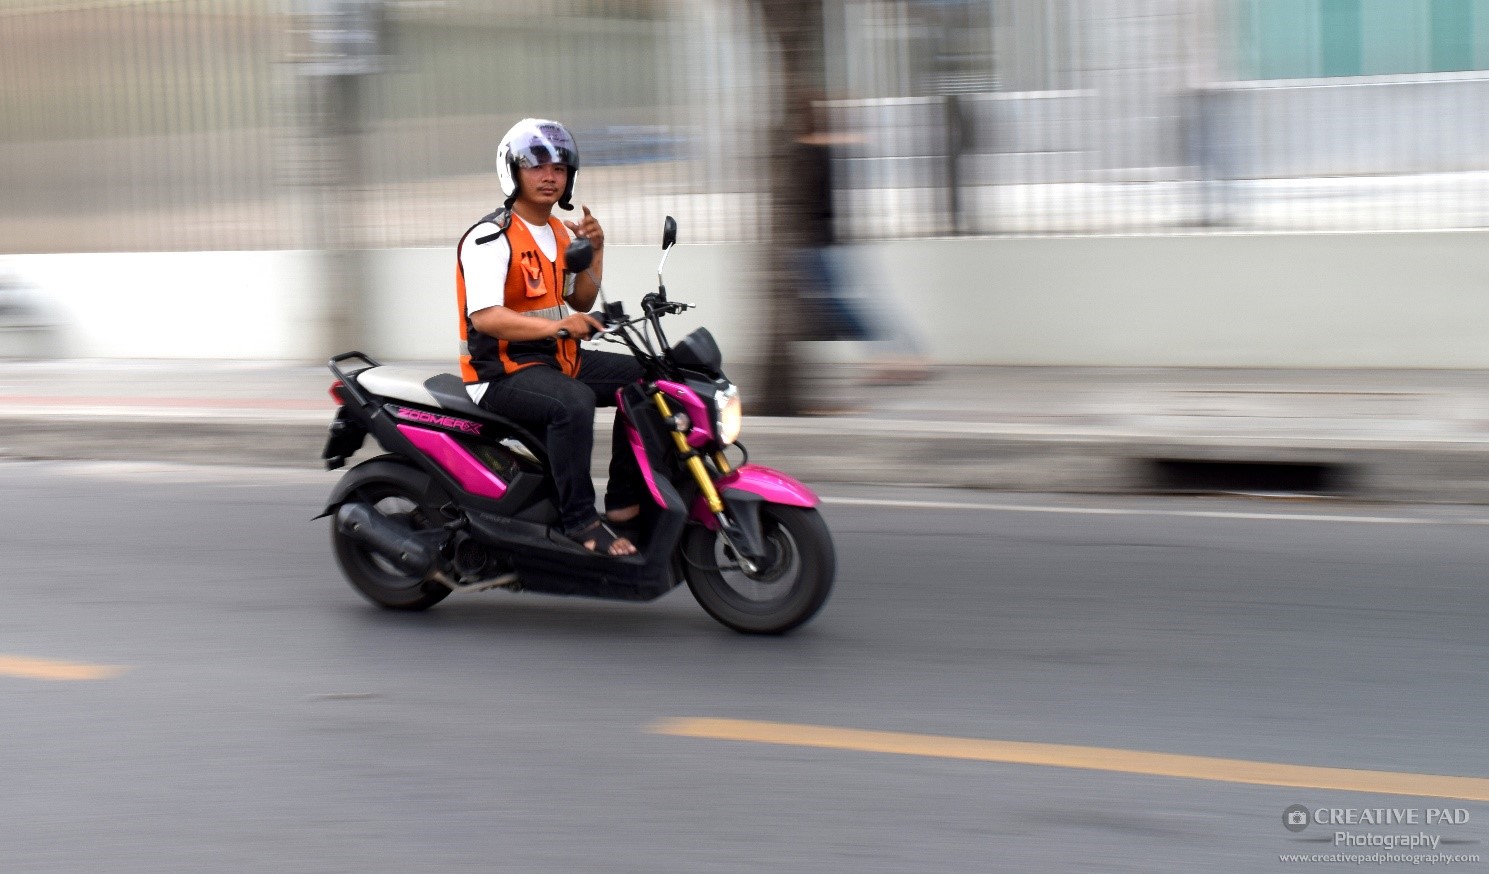
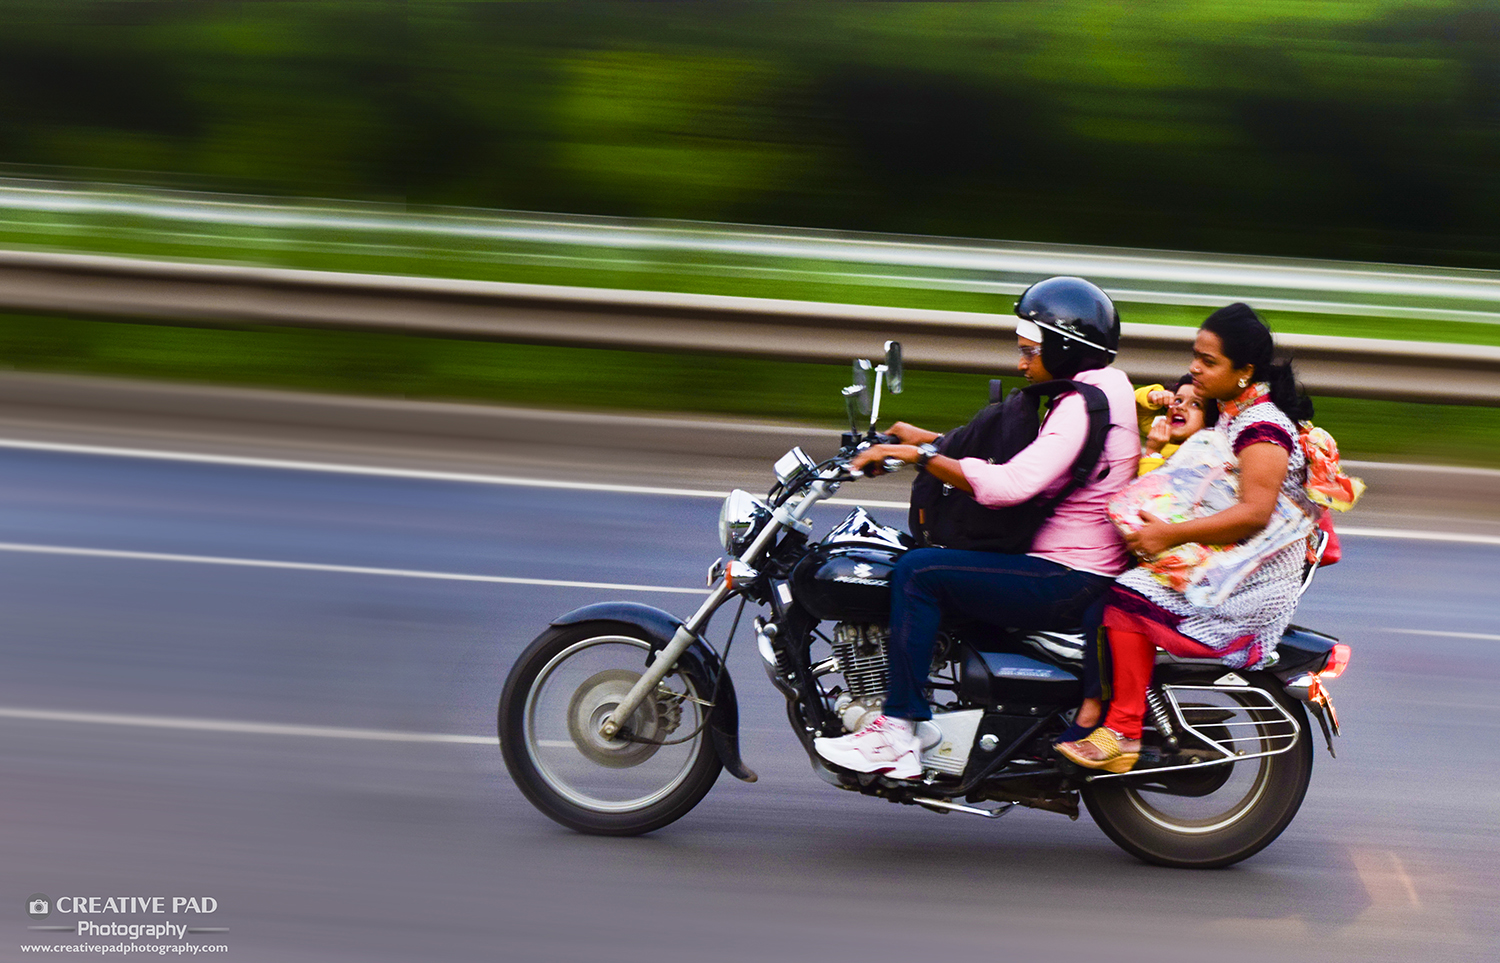
We won’t be going into too much detail but what you need to do in panning photography is that you have to pan your camera along with the moving subject , lock focus on it and then take the shot while keeping the shutter speed low but not too low.
For the shots above the shutter speed is 1/50 for both the shots.
The idea is to move your camera as you take the shot so that relatively speaking, you and the subject are still and it’s the background that is moving, just like the merry-go-round shot that we saw before.
The slower shutter speed throws the fast moving background into a blur and since you and the subject are relatively still, the subject comes out sharper.
Panning photography requires a lot of practice but it’s lot of fun to do. Also, remember to use burst mode to increase your chances of getting a good shot.
Can you guess what will happen if you use a very high shutter speed, like 1/500 for both the shots above?
The answer is that it will definitely freeze the subject but the problem is that it will freeze the background too, which will result in a very ordinary looking shot.
Not to be frank panning doesn’t strictly come under the long exposure photography genre because shutter speeds like 1/40 or 1/30 are still fast shutter speeds. But since the desired effect comes as a result of motion blur, I have included it here. Plus it’s lot of fun to try too.
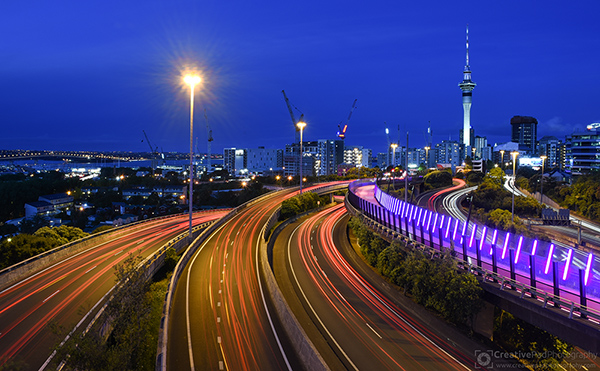
Long Exposures for Photography at Night or in Low Light Situations
Almost all shots taken at night time (where subjects are not moving) are shot using the long exposure photography or slow shutter speed photography technique that you have been learning so far.
In these cases, the idea is not to just get the desired blur effect but also to cut down noise as using a slow shutter speed means we don’t have to rely on a higher ISO value to increase exposure. Let’s take an example:
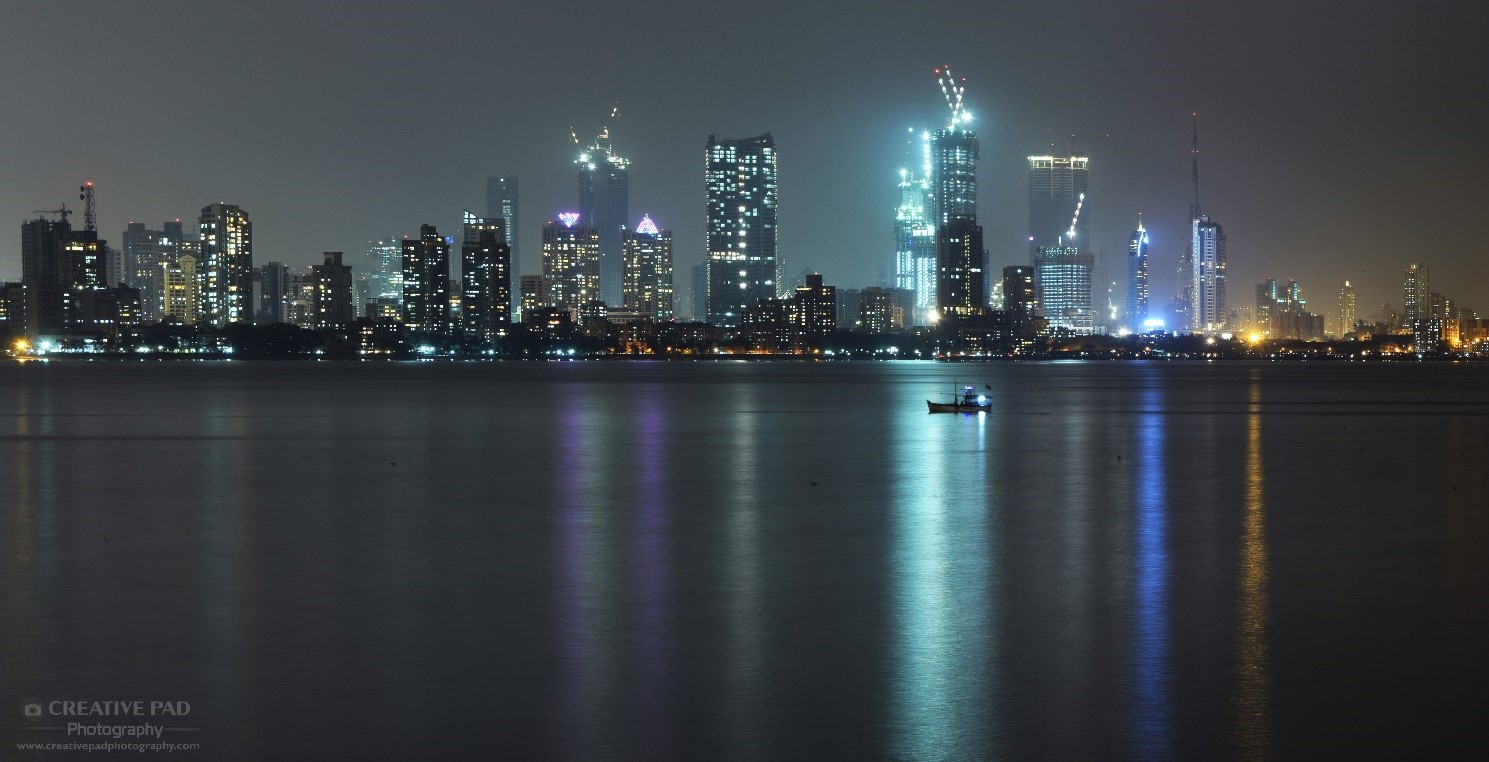
In this shot, what I’ve done is to use a tripod and shoot it at a shutter speed of 30 seconds. Why? Here’s why:
Let’s say I take this shot without the tripod. In that case you know that I should not go down below a shutter speed of 1/40.
Now since it’s night time, the ambient light is very low so the meter is already pointing towards the negative side.
Next I increase my f-stop number because it’s a landscape like shot. I have used f11 here. Doing this makes the meter go further towards the negative side.
Now I cannot do anything else to get the meter in the centre but to increase the ISO.
But this will result in a noisy looking shot.
But because I have the tripod with me, I can shoot this at ISO 100 and then compensate for all the lost light by reducing the shutter speed.
Here at 30 seconds, the meter came in the centre.
This not only gave me a very clean looking shot, but also resulted in a bonus for me.
The bonus was that a slow shutter speed ended up blurring the water which looks very pleasing to the eye. The blurred water also enhances the reflection from the lights that are coming from the sky scrapers. And in case you’re wondering why the boat came out sharp, it’s because it wasn’t moving. Here’s another shot for which I used similar settings:

But remember, all this was possible because nothing was moving in the scene. If there is some object that is moving and it’s important, then you cannot reduce the shutter speed to save noise. For instance, look at the shot below:
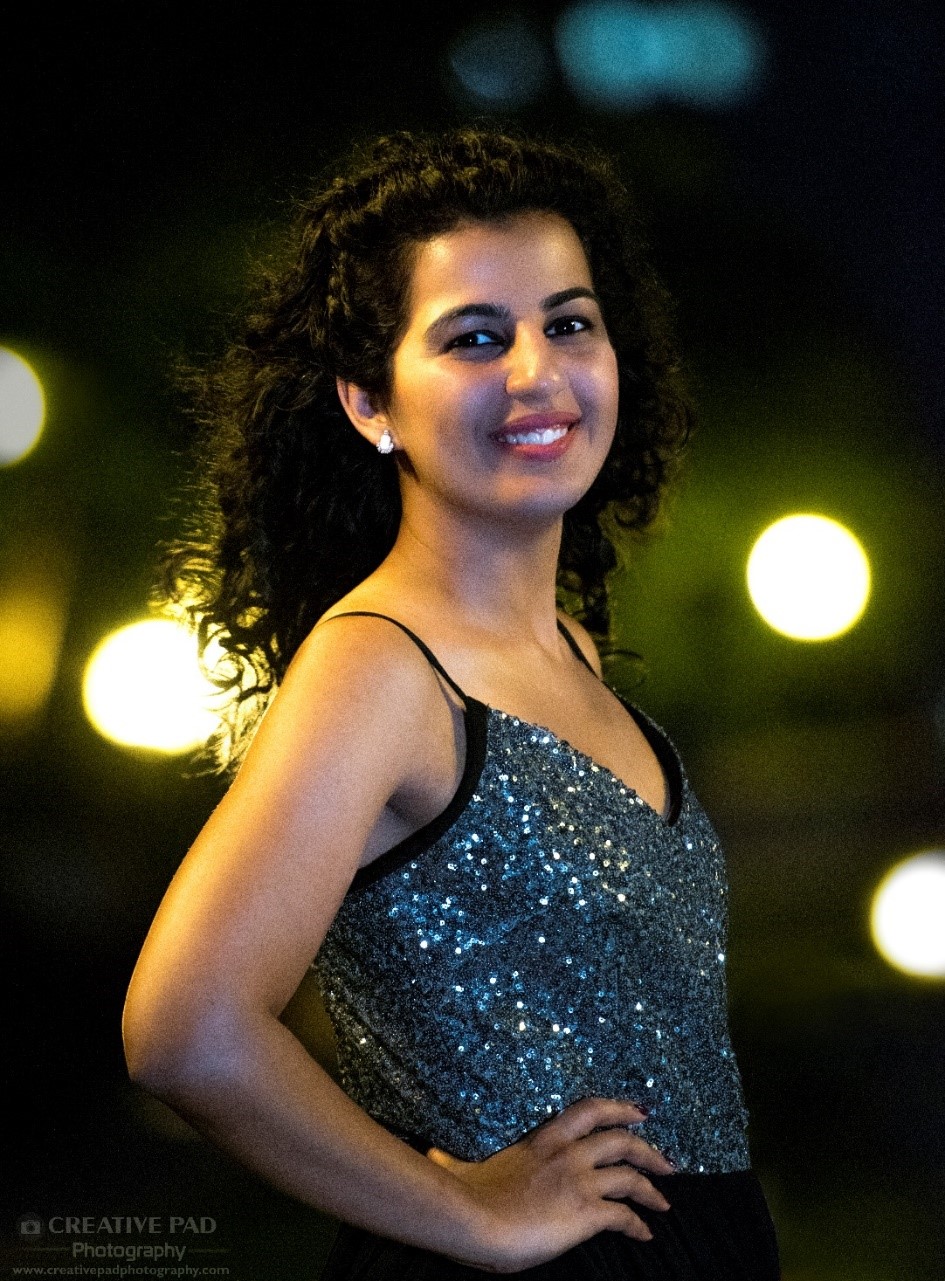
This is also a night shot but since I’m shooting a person, I cannot decrease the shutter speed too much. So even though this shot may come under night photography, it will not come under long exposure photography.
So you can see that using a slow shutter speed for long exposure photography can result in some amazing looking shots.
Do check out my premium online courses where I teach the art of long exposure photography in much more detail.


Hi,
Does (Any client) specifically ask for Landscape photography images ?
Who are these clients – Any specific user types ?