How to Shoot the Milky Way Using a DSLR. A Step-by-Step Tutorial by Sadiq Dastagir.
This is a guest post by Sadiq Dastagir, a film maker and photographer from Pune, India.
Sadiq, tell us something about yourself.

My name is Sadiq Dastagir. I’m from Pune city and I am a film-maker by profession. Photography is something that was always on my mind since my composition skills were decent but when it came to the technical side of things (the dreaded Manual Mode), it was game over. Like many others, I took up the basics of photography workshop with Kush Sharma from Creative Pad Photography back in 2015 and since then there has been no looking back.
Post this workshop I began to dive deeper into the ocean of photography by experimenting with various genres of photography, learning through YouTube and other advance online courses and even till now, the learning process is very much on.
So what will you be teaching us?
We will talk bout capturing the Milky Way since it’s a challenge for many photographers and more over it’s the right time now since the Milky Way season has just started. Good news isn’t it?
When I started my photography journey I was extremely fascinated by the Milky Way and always wondered, how does one capture this?
After seeing several videos and tutorials online on how to capture it, I wanted to have a go at it.
I made several attempts but failed miserably. It was then I decided I am going to go in a systematic manner and not be hap-hazard about this process. It was much later that I realized that shots like these are achieved with sincere efforts and calculated risks. And I’m here to explain you this process so you don’t make the same mistakes.
What do you require in order to capture the Milky Way?
Here are the things you need:
- Obviously, the first thing you need is a DSLR. Full frame or crop frame is a separate issue but it can be done by both. So any kind of DSLR should do the job. Even a sem-DSLR that allows you to shoot in manual mode can do the job but the results may not be satisfactory.
- Though you can use a kit lens, I would really suggest you go for a wide angle lens like a 16-35mm f2.8(Canon) or 14-24mm f2.8 (Nikon). If you’re using a crop sensor, you can go for even wider focal lengths like that of Tokina 11-16mm f2.8.
- It’s preferable that the aperture opening is f2.8.
- A sturdy tripod.
- An area free of light pollution.
- A mobile app to track the milky way.
- A bright torch
- Very importantly you should have done your location scouting in day time so that you know exactly where you are shooting and know your exit points in case of emergency.
One of the most important things when shooting the Milky Way is the location itself. Before we get into the process of shooting, tell us why the location matters so much.

When I mentioned a light pollution free location, it means you need to be well away from the city so that the street lights, car lights, home lights and all other kinds of lights do not block your camera from capturing and over exposing the milky-way.
People tend to make a big mistake by going to very nearby outskirt location to capture the milky-way and end up being disappointed when they are not able not even see it in their image.
The milky-way is right there but the light pollution has become a barrier like a curtain between you and the Milky Way.
Shooting the Milky Way is quite an effort and it involves sacrificing your sleep and luxury with risk factors involved. Risks such as being alone in a isolated area away from city in pitch dark conditions with reptiles and insects lurking around. I’m not trying to scare you but that’s a fact you need to keep in mind for your safety. Remember, nothing should come at the cost of your safety. After all someone’s waiting back home for you.
To sum things up, look for a light pollution free location. Some of the locations where I shoot the milky-way are Tamhini Ghat, Pavana Dam in Lonavala, Tikona Fort again near Lonavala.
You can even use a website called www.lightpollutionmap.info to check the intensity of light pollution in the area you are heading in.
Another thing you need to keep in mind is that you should avoid shooting on days when the moon is very bright (full moon). New moon nights (Amavasya) would be ideal. This is because even moon light can cause the milky way to not be seen.
And it goes without saying that you should check the weather beforehand. An overcast day would obviously mean you can’t see the milky way no matter what location you are in.
What are the steps involved in executing this shot?
- Once you are at the location and ready to shoot, you need to use an app to track where the Milky Way is located in the sky. I use Photopills software on my iPhone for getting the exact location of the Milky Way. It’s an amazing software to get AR (augmented reality) position of the milky-way and it’s 100% accurate. You can also use an app called Star Walk 2.
- You then mount your DSLR on the tripod and point it towards the Milky Way in the sky.
- Your focusing mode will now be manual mode, you need to switch from auto-focus to manual focus on your lens. We do this because it’s not possible to focus on the stars using auto-focus as they are very far away. You set the manual focus to infinity on your lens. From there on it may or may not require some very fine adjustments. You can be sure that you’ve got the focus spot on by taking a shot, zooming into the shot and seeing when the stars in the sky look very crisp.
- Change the f-stop number to the minimum that your lens can go to. It’s recommended that you have a lens that goes at least to f2.8. The lesser f-stop allows maximum light to reach the camera,
- Set your ISO to 3200 to begin with.
- The shutter speed to be used will depend on the lens you are using. The wider the lens, the lesser the shutter speed that you can use. There is a rule for calculating the shutter speed. It’s referred to as the “500 rule”. Divide 500 by the minimum focal length of the lens you are using and that should give you the required shutter speed. For instance, if you are using the Nikon 14-24mm f2.8, then the required shutter speed will be 500/14 = 35 seconds. Note that you don’t have to follow the result exactly. For instance, in this case 30 seconds should do the job. This rule is more important when you’re dealing with a lens that has a larger focal length. For instance, if you are using a 24-105mm lens at 24mm, the answer will be 500/24 = Roughly 20 seconds. Now here if you use 30 seconds, the problem you can face is that you may start to see trails left by the stars as on higher focal lengths trails become more apparent since you’re zoomed in to the star. Also, you should take into account whether you are using a crop or full frame camera. In a crop sensor, you have to first multiply the minimum focal length by the crop factor. For example, if you are using the Nikon D5300, which as a crop factor of 1.5, you’ll have to multiply the focal length of 14mm by 1.5 first. So the shutter speed to be used will be 500/14*1.5 = 500/21 = Roughly 23 seconds. If all this sounds too complicated, just try different shutter speeds starting from around 20 seconds and you should eventually find the right shot. The only thing you have to make sure is that when you zoom in, the trails should not be too apparent. If you’re getting trails that are clearly visible, then make the shutter speed faster.
- It goes without saying that you should be using a remote shutter release to take the shot since it’s always better to avoid touching the camera at slower shutter speeds.
What are some additional things to keep in mind?
- Always be on the look out for some interesting foreground objects. Just a plain shot of the milky way in the sky without a foreground object can look a bit dull.
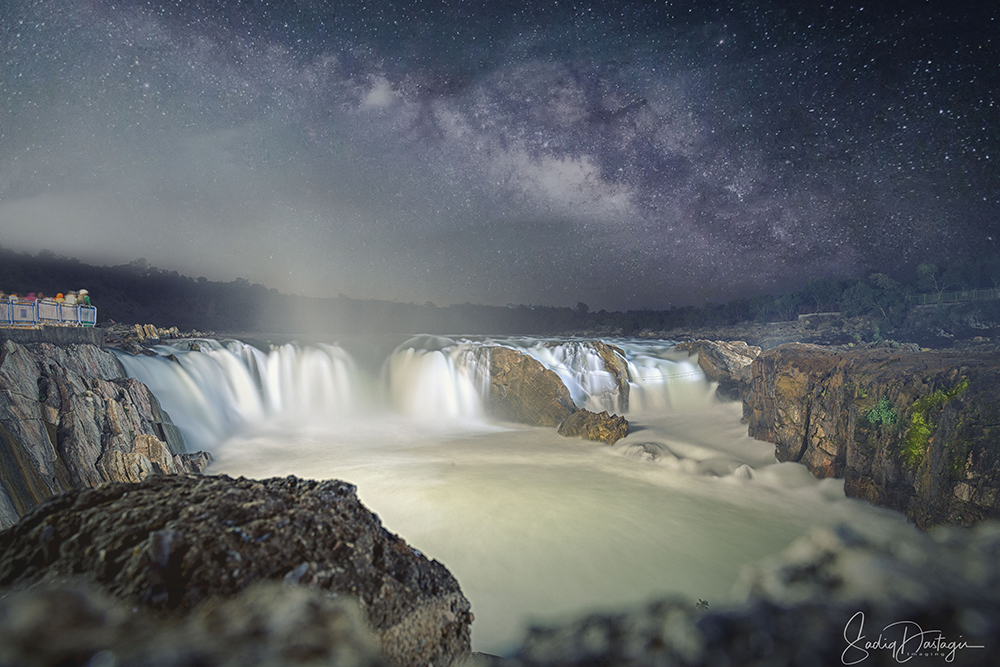
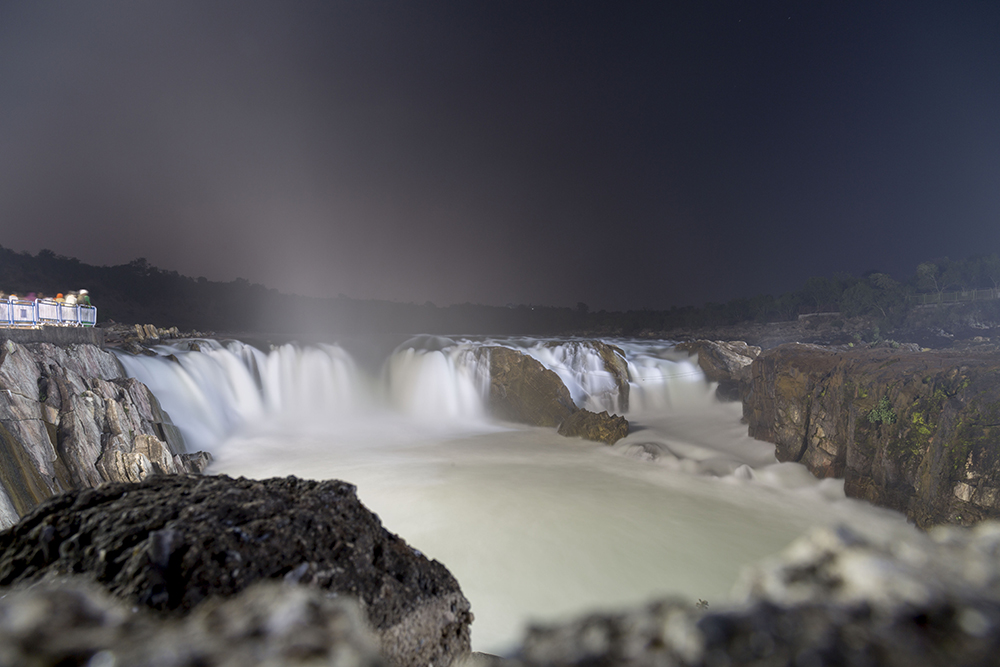
- You can even create a composite if you have some basic knowledge of editing. For instance, in the waterfall image that you saw above, I’ve taken the shot of the waterfall first as shown in the image below:

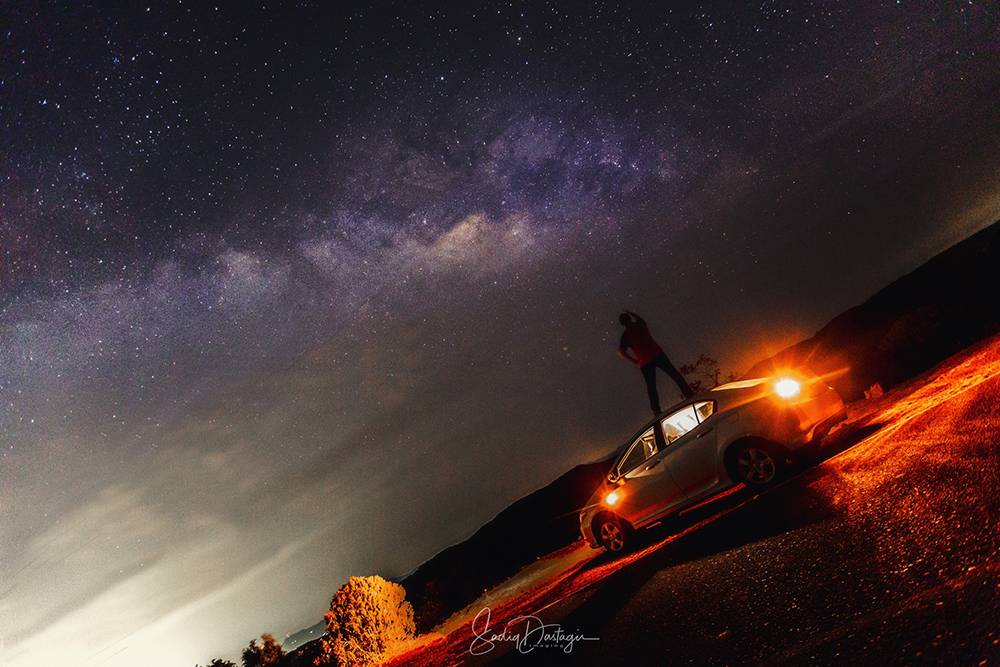
Then I’ve shot the sky for the milky way. This location was almost 3 km ahead of the waterfall. Here’s the image:

Then I’ve combined these two form the composite image:
Creating composites is very popular among photographers who capture milky way as it’s not often possible to have the milky way situated right above an interesting foreground. In addition to that, it also opens up the possibility to create some really interesting images which otherwise would not have been feasible. - Another thing to keep in mind is to carry fully charged batteries since you’re outdoors. It’s preferable that you buy an extra set of batteries. Long exposure photography drains the battery much more quickly.
- Always shoot in RAW since it’s very important to edit images to get the best out of the image. Without editing, the milky way can look a bit faded and dull.
- Wear a jacket, denim, boots (ankle length) to keep you safe from lurking insects and also rocks and pieces of glasses.
- Always be vigilant about your surroundings, ask your friend to keep guard as you shoot and take turns to shoot.


Sadiq, where can people find you and see your work?
You can find me at:
https://www.sadiqsimagings.com
https://www.facebook.com/sadiqdastagirphotography


Awesome explanation sir