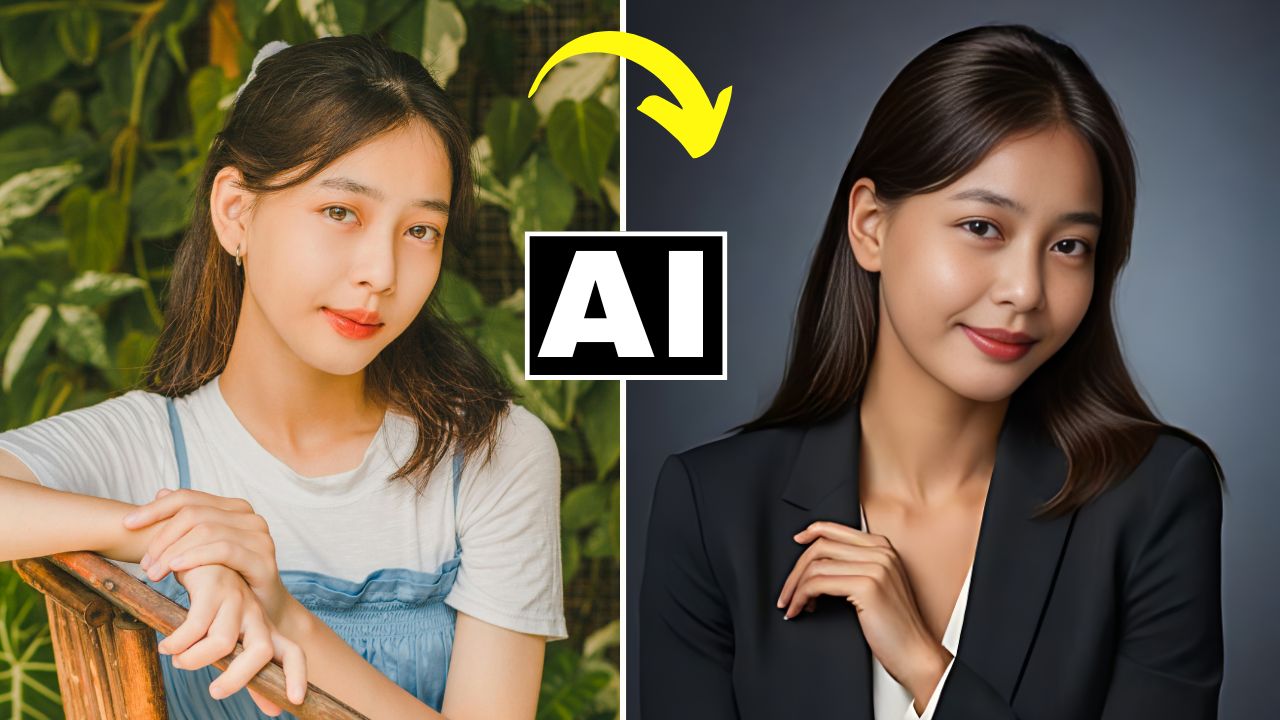
Most Realistic FREE AI Headshot Generator – DZine AI Tutorial

In this video we will be seeing how to turn an ordinary portrait into a professional studio headshot using a free AI tool called Dzine AI. We will also be using a host of other free AI tools to achieve the final outcome. Here’s the video:

Video Summary

In this tutorial, the instructor demonstrates a multi-step AI workflow to turn casual outdoor photos into professional corporate headshots using entirely free tools. The core of this tutorial is about maintaining structural integrity. Most AI generators change your pose or body shape, but this workflow uses specific settings and a “chain” of tools to ensure the final professional image still actually looks like you.

  • Primary Tool: Dzine.ai (formerly Styler.ai). It offers a “Structure Match” slider that is the secret to keeping your original pose while changing your clothes to a suit.
  • The Problem-Solving Phase: The instructor shows how to handle “challenging” faces (unique hair or jawlines) by generating two separate versions and blending them in Photoshop.
  • The Realism Chain: To fix “AI-looking” faces, the workflow moves from generation to Face Swapping, then to Eye Direction Correction, and finally to AI Restoration for high-end skin texture.

Time Stamps

  • 0:00 – Introduction to the workflow and Dzine.ai (Styler.ai).
  • 0:50 – Understanding the credit system (50 free credits + 30 daily replenishments).
  • 1:33 – Comparison: Why standard AI headshot tools often produce mediocre/fake results.
  • 2:43 – Accessing the AI Profile Picture tool and setting up the canvas.
  • 4:22Style Intensity vs. Structure Match: Explaining the two most important sliders.
  • 5:00 – Pro-Tip: Using Structure Match to lock in your body’s outline.
  • 7:20 – Analyzing the first generation (4 images) and checking for “AI finger” errors.
  • 8:20The Realism Hack: Why a perfect structure is better than a perfect face (prepping for face swap).
  • 9:22Remaker AI: Swapping your real face onto the professional AI body.
  • 10:52 – Starting the “Challenging Portrait” (handling unique hair and bone structure).
  • 12:30 – Advanced Technique: Generating a “Strict” version vs. a “Liberal” version.
  • 14:26Photoshop Integration: Using Layer Masks and Generative Fill to combine the best parts of both AI images.
  • 16:20 – Final Face Swap for the challenging portrait.
  • 17:12Reshot.ai: Using the “Eyes Editor” to fix the subject’s gaze and look directly at the camera.
  • 18:05PhotoRestore.io: Final sharpening and adding realistic skin texture to remove the “AI blur.”
  • 18:25 – Upscaling the final result for high-resolution use (LinkedIn/Web).
  • 18:40 – Final before-and-after comparison of the entire workflow.

Important Links

Here are all the links:

DZine AI

Images shown in the video

Remaker AI Face Swapper

Photo Restore AI

Reshot AI Eye Direction Changer

Upscale Media AI

About the Author

portrait photographer for portfolio shoot in pune

Hi there, I'm Kush Sharma, the founder of Creative Pad Media, an organization dedicated to simplifying photography, videography and editing education.

We have over 50 online courses that cover various genres in photography & videography, catering to both beginners as well as professionals. These courses are available via Udemy.com. Our courses have been downloaded in over 180 countries.

I hope to see you inside a course very soon!

Similar Posts