Off-Camera Flash for Indoor Portrait Photography
In this video we will be learning how to use an off-camera flash to shoot some indoor studio portraits. We will be using multiple speedlight set-ups to get different types of results.
We will also be looking at the camera settings for these type of shots. Here is the video:
This video is from our Off-Camera Flash for Beginners Course, which has 33 videos and 4 hours of video content. You can access the full course using the link below:
Off-Camera Flash for Beginners Course
Video Summary
This video tutorial provides a comprehensive guide on setting up a budget home studio for portrait photography using off-camera flashes.
Camera Settings for Studio Portraits
The goal in a studio is to ensure that the ambient light (natural or room light) does not affect the photo. The first shot should be completely black with the flash turned off [04:24].
- Shutter Speed: Set to your camera’s sync speed (e.g., 1/200s or 1/250s) [05:12].
- Aperture: Set to f/8 to maintain sharpness and cut ambient light [05:16].
- ISO: Set to ISO 100 for maximum image quality [05:16].
Lighting Setup (Three-Light System)
- Key Light: The strongest and main light source, typically placed at an angle to one side of the subject’s face (e.g., set at 1/4 power) [01:43].
- Fill Light: A secondary light placed on the opposite side to soften shadows created by the key light. It should be set to a lower power (e.g., 1/64 power) [01:53, 07:29].
- Third Light (Background or Hair Light):
Equipment and Tips
- Slave Mode: If using different brands of flashes, set the secondary flashes to Slave Mode (Optical Triggering). they will fire automatically when they detect the pulse from the main flash [07:59].
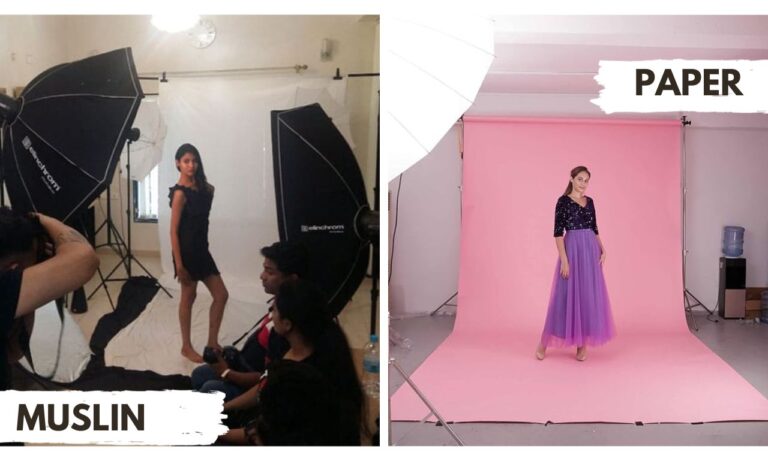
- Backdrops: You can use a budget-friendly muslin cloth, though professional seamless paper is recommended because it doesn’t have textures or wrinkles [00:40, 10:12].
- Focus: Lock your focus manually on the spot where you will be sitting to ensure consistent sharpness when shooting alone [05:29].