Levitation Photography – How to Make Things Fly
Levitation photography is a type of photography where you make things fly and make it look like that people or objects are flying or floating in the air.
It can be a lot of fun, especially when you are starting out.
It’s a type of photography that has the potential to continually knock on your creativity prowess as you can think of a million things to do with it.
Before we get started, I wanted to let you know that I have a 5 hour long Trick Photography Course (available via Udemy) where I teach you the art of Levitation Photography and a host of other trick shots too.
Now let’s get started.
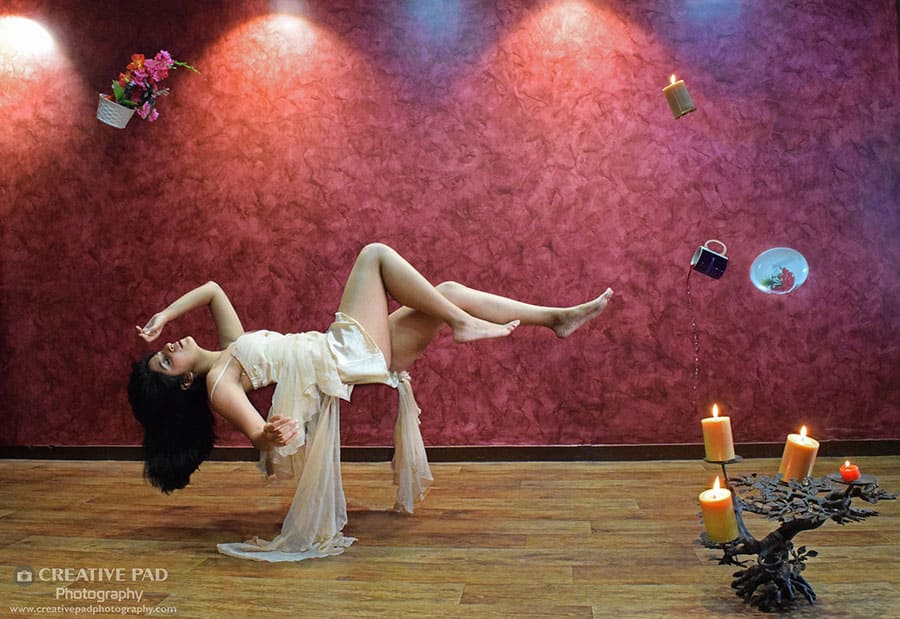
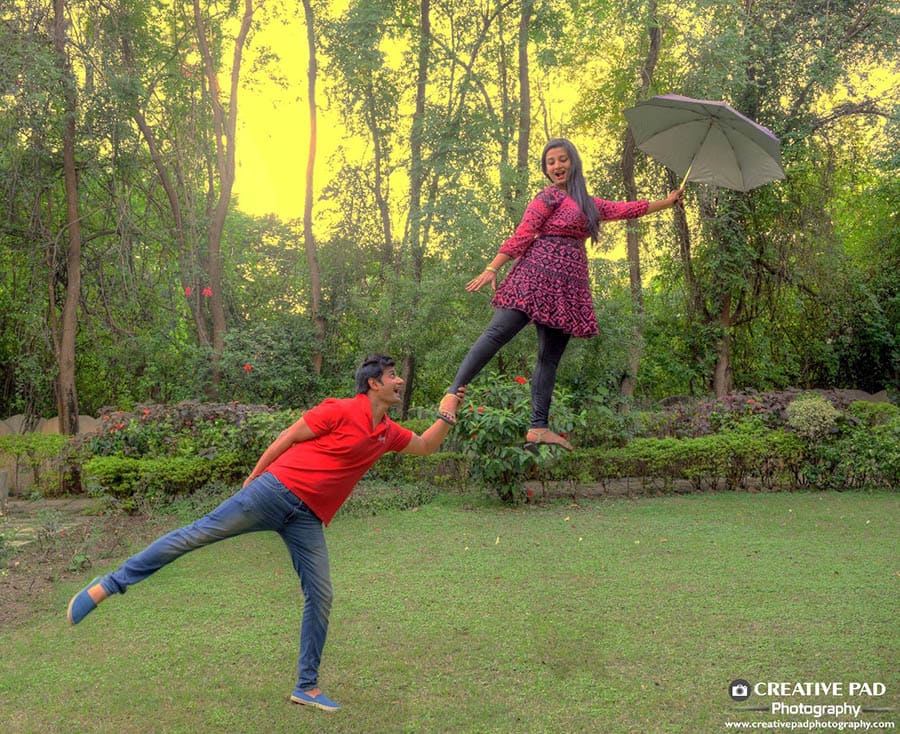
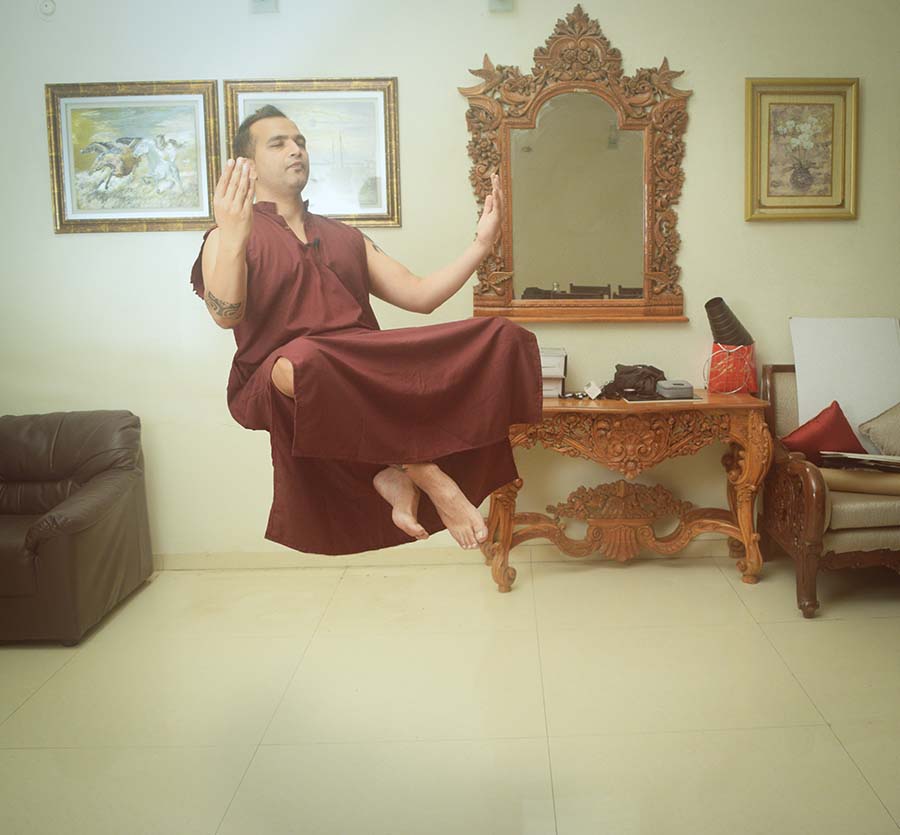
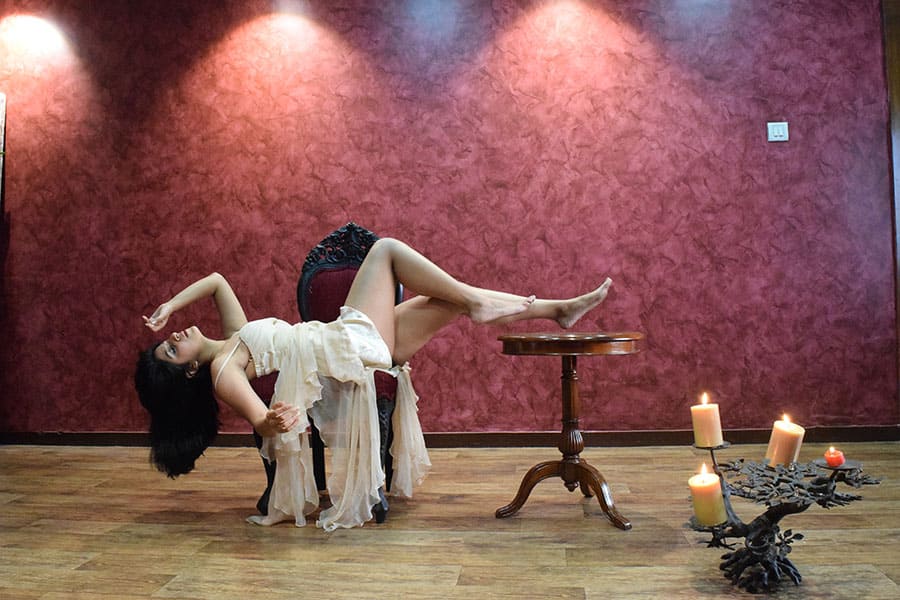
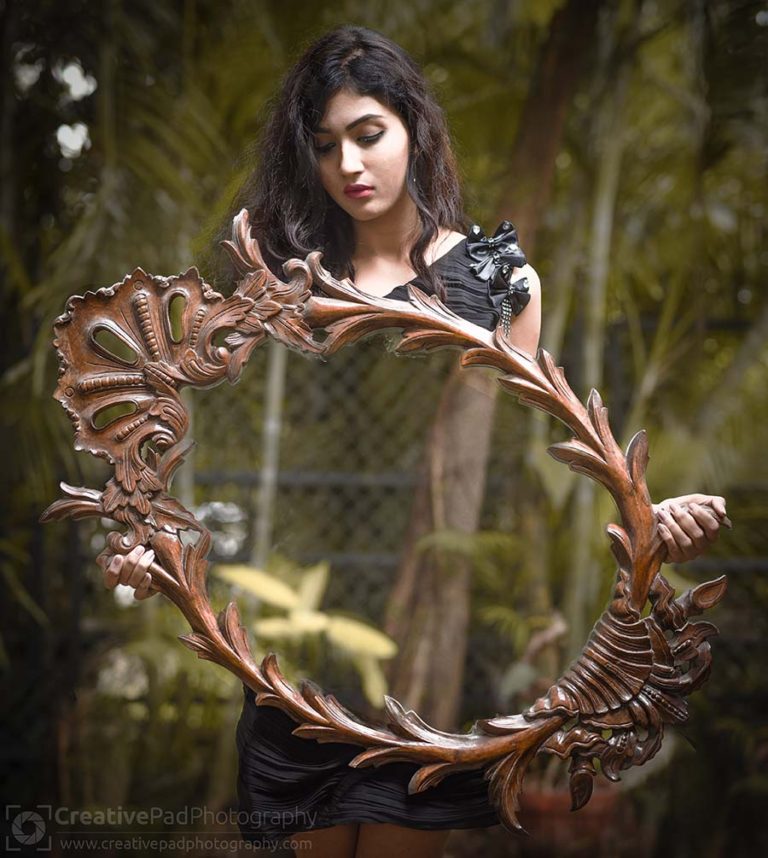
Examples of Levitation Photography
First, let’s look at some levitation photography shots to get an idea:

So how do we achieve these levitation photography shots?
The trick involves three steps:
- Having a set-up that enables the subject to assume the floating position and then taking a shot with that set-up.
- Removing the subject and set-up from the scene and then taking an empty shot of the scene.
- Superimposing the shots taken in Step 1 and Step 2 in a software like Photoshop and then removing the part which involves the set-up.
We’ll be seeing all these steps in this article.
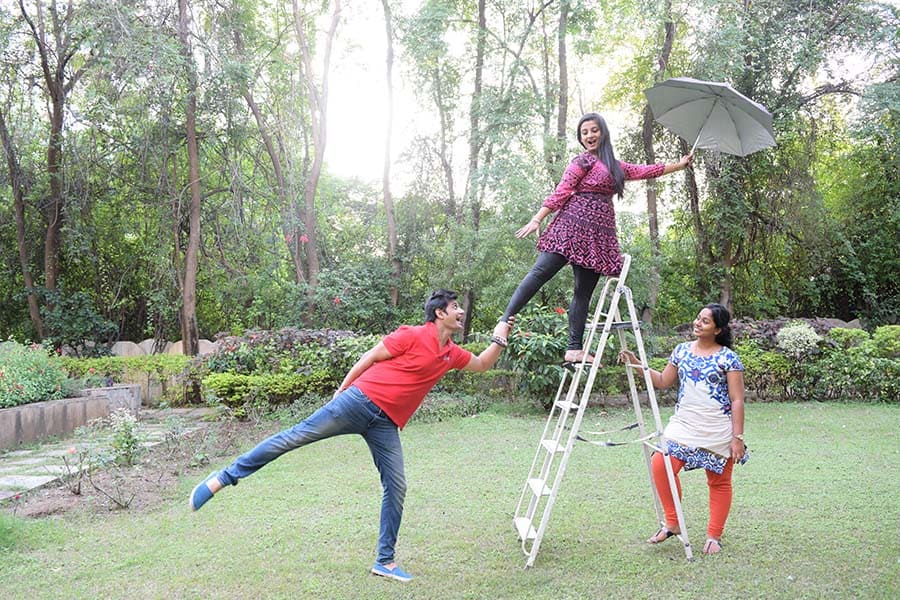
Behind The Scenes Set-ups of the Levitation Shots Shown Above
But first of all, to get an idea about the levitation set-up, let’s look at the behind-the scenes of all the levitation photography shots that we just saw above:


Now that you know how step 1 works, let’s see the whole process by creating a levitation photography shot from scratch.
Levitation Photography – Steps to Take
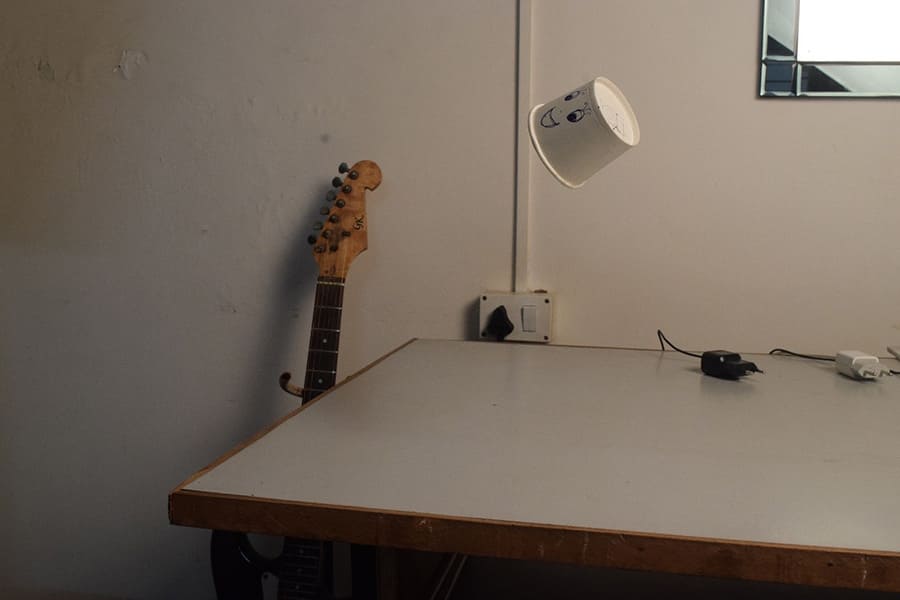
We’ll be looking at how we achieve the following shot of a “floating” paper cup.
The same principle can then be applied to anyone or anything you want to in any levitation scenario.
Things you would need:
- A DSLR Camera
- A tripod
- Photoshop
Here are the steps:
1. Find a surface on which you want the cup to hover on. In this case, it’s a table.
2. Find an object to which you can attach the cup to, like the stand in the picture below:

3. Place your camera on a tripod and adjust the composition to your liking.
4. Focus on the cup and take a shot. This is your first shot.
5. Now for the second shot, the thing you have to do is to take a shot without the stand and the cup. So remove those first. Now, before taking the second shot, change the focus mode of the lens from automatic to manual. We are doing this because we want to maintain the focus of the camera on the same area as the first shot. This is because we want two identical shots, the only difference being the absence of the cup and the stand. Switching to manual focus ensures the camera doesn’t focus again on the background (the wall in this case). Now take the shot. This is your second shot. If by chance you noticed that the camera lost focus after the first shot, you can again lock focus on the cup by half-pressing the shutter button and then switching the focus mode from automatic to manual. You should get a shot like the one below:
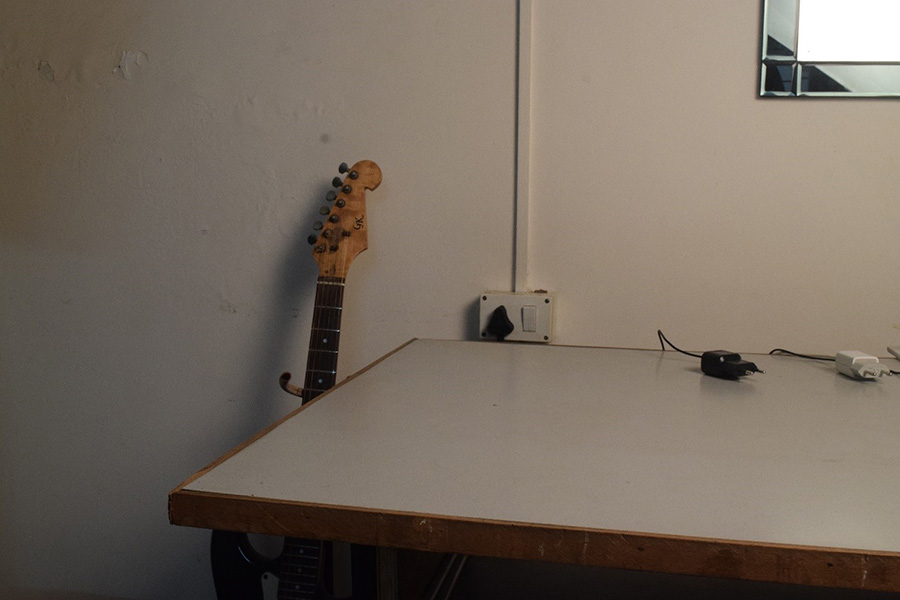
6. Just to make sure, you’ve got everything correct, review both the shots on your camera screen and go back and forth between them. The only difference between both the shots should be the absence of the cup and the stand.
7. Now that you’ve got the shots you need, it’s time to head to the editing part, for which you can view the video below:
The better you are with Photoshop, the easier it is to create complex levitation shots. You can check out out premium online courses to get better at editing.
Some Important Things to Keep in Mind For a Good Levitation Shot
- Make your subject wear loose and long clothes. Long flowing dresses work the best. That’s one reason why female subjects work better. The longer dress hangs down and therefore adds to the illusion that the person is levitating. The long dress also hides a lot of the set up making it easy to edit the shot later on.
- The higher or taller the set-up the better. Taller set-ups really make for dramatic and eye-catching shots than set-ups which are closer to the ground.
- Avoid chairs with arm rests and back rests. That’s why stools work the best. Arm rests and backrests make it tougher to edit the shot.
- Don’t unnecessarily add shadows in editing. Add a prominent shadow only if the set-up itself was casting a strong shadow on the ground. If the set-up did not cast much of a shadow then adding a strong shadow in Photoshop can actually make the shot look bad. Adding a subtle shadow is usually better. You can look up tutorials on YouTube on how to create a shadow in Photoshop. It usually takes 30 seconds and is very simple. A lot of times you can simple use a brush with black color and set at a low opacity.
Now that you know how to do levitation photography, let your creativity go wild and try to come up with some dazzling shots and impress your friends.
One of the best parts about learning levitation photography for professional reasons is that if you are a professional portrait photographer, then you can offer these levitation shots to your portrait clients and charge them extra for it.
If you have any questions about levitation photography, do leave them below and I will be happy to help you out!
And don’t forget to check out my Trick Photography Course where I teach you how shoot and edit Levitation shots and a host of other trick shots too. It’s available via Udemy.com. It has 35 videos where I show you the entire process of creating of shooting and creating not only levitation shots but a host of other trick photography shots too. You can watch the promo video below to understand what all is inside this course:


Thanks for the tips….
Hi Kush,
I bought Photoshop video course from you but till date I am unable to install in my laptop can you help me from where I can buy with paid full version, send me some link, I also tried from amazon but could not find.
Regards,
Alim
Thanks!!!