Beer Photography Tutorial – ONE LIGHT Beer Bottle Shoot & Compositing in Photoshop | Product Shoot (Video)
In this video we will be learning how to shoot a bottle of beer (beverage photography) with a single light set-up and then creating a composite in Photoshop.
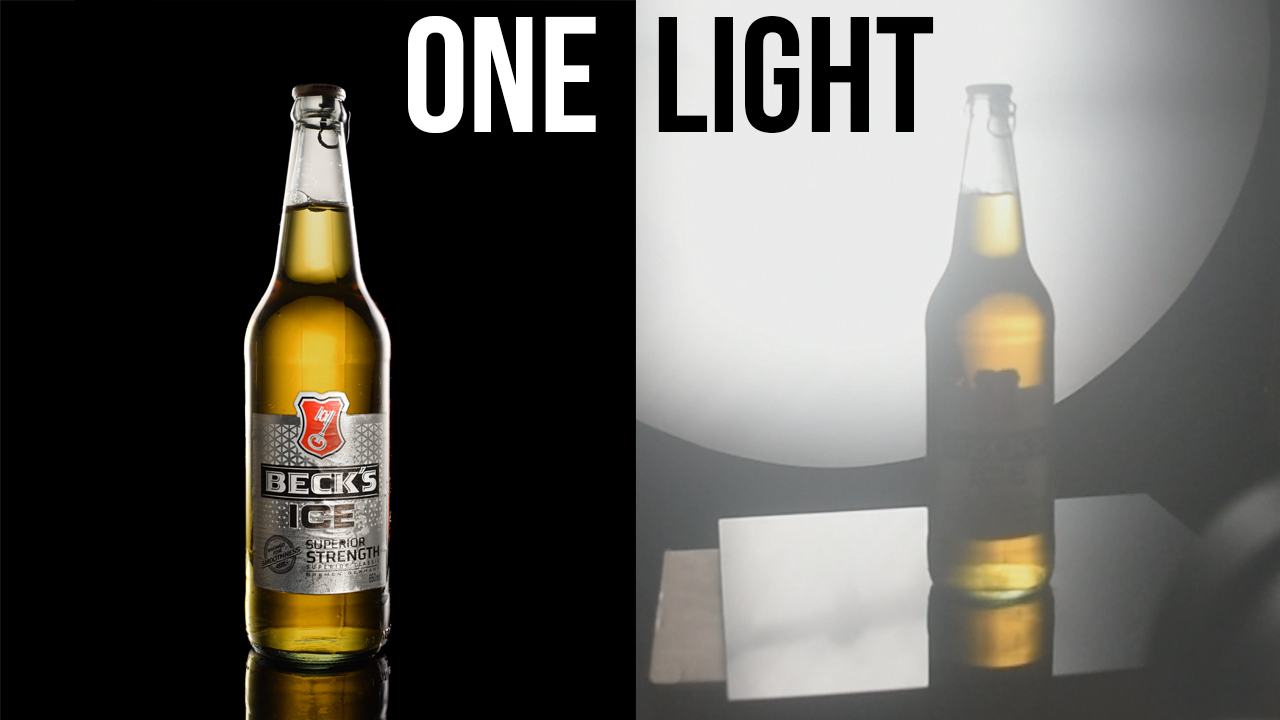
This technique can be applied to any drink photography shoot. This technique will result in a bottle with a beautiful glow and this is the most economical way to do beverage photography since it only requires a single light.
LINK TO OUR PRODUCT PHOTOGRAPHY COURSE (available via Udemy.com)
Product Photography Course for Beginners
Video Summary
This video by Creative Pad Media is an in-depth tutorial on how to shoot and edit a professional beer bottle photograph using just a single light source and Photoshop compositing.
Summary of the Process
- One-Light Setup: To stay on a budget, the shoot uses a single Godox SL-60W light modified with black paper to act as a strip softbox [01:53]. A diffusion panel is placed in front to soften reflections, and a black muslin cloth creates the background [02:18].
- The Four Essential Shots: Since only one light is used, the final image is a composite of four distinct exposures:
- Photoshop Compositing: The shots are stacked and blended using Layer Masks. Black masks are used to hide layers, and a white brush “paints in” the specific highlights and glows from each exposure [13:28].
- Advanced Retouching: The instructor uses the Camera Raw Filter to turn the background jet black [25:50] and enhance the liquid’s warmth and saturation [27:43]. The Content-Aware Fill tool is used to expand the canvas for better framing [23:40].
- Realistic Details: A crucial final tip is to ensure the side highlights overlap the label naturally by masking out parts of the label layer, making the composite look less “fake” [35:41].