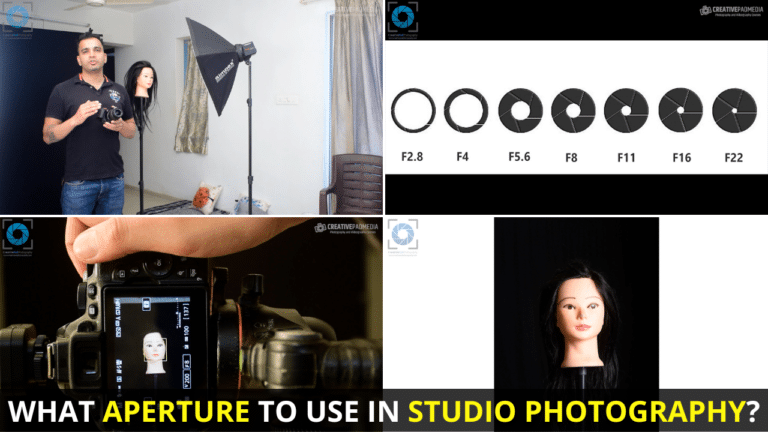
Studio Photography for Beginners: A Free Online Course

Hello there. This is Kush Sharma, your photography and videography mentor.
I’m glad that you want to learn the art of studio photography.
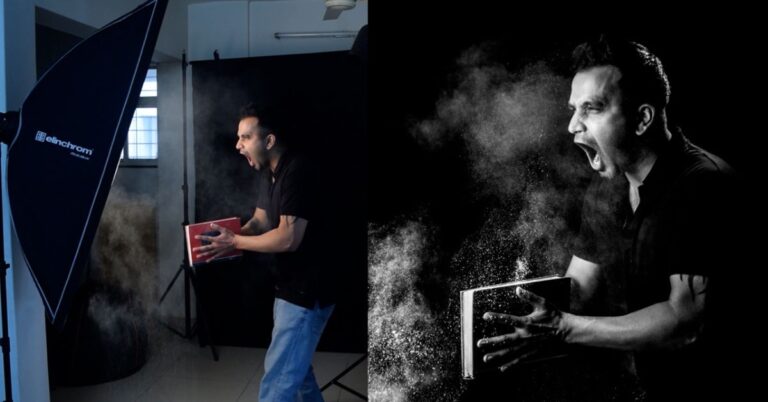
Studio photography is one of my favorite forms of photography because it involves creativity as well as technical knowledge related to using lights and the different settings in the camera.
Here is a completely free course on studio photography, which will teach you how to do studio photography by setting up a budget home studio in your house.
I hope you enjoy this course. Let’s get started.
Table of contents
- What is the equipment you need to set up a photography studio in your house?
- What is the difference between a strobe light and an external flash and which one should you use for studio photography?
- Understanding a Strobe Light – It’s Anatomy and How to Trigger it
- Hard Light vs. Soft Light – Understanding the Quality of Light and How to Modify it Using Modifiers
- Understanding Flash Exposure and Ambient Exposure
- How do Aperture, ISO and Shutter Speed Affect Ambient and Flash Exposures
- Taking Our First Studio Shot – How to Shoot Using a Strobe Light
Important point to note – Throughout this course, you will notice that I mention the different equipment and tools you would be needing for studio photography. If you are planning on buying them, then you can always head over to our Recommended Photography and Videography Equipment page, where I have listed all the important equipment with respective links to Amazon.
What is the equipment you need to set up a photography studio in your house?
When it comes to doing studio photography, a lot of beginners seem to think of it as a daunting and expensive affair since we are so used to seeing those massive commercial studios used by professional photographers.
The truth is that studio photography doesn’t have to be an expensive affair.
You can easily do studio photography if you have some basic equipment and a small space (like a room in your house).
So let’s learn about the different things you would require if you were to set up a budget photography studio inside your house.
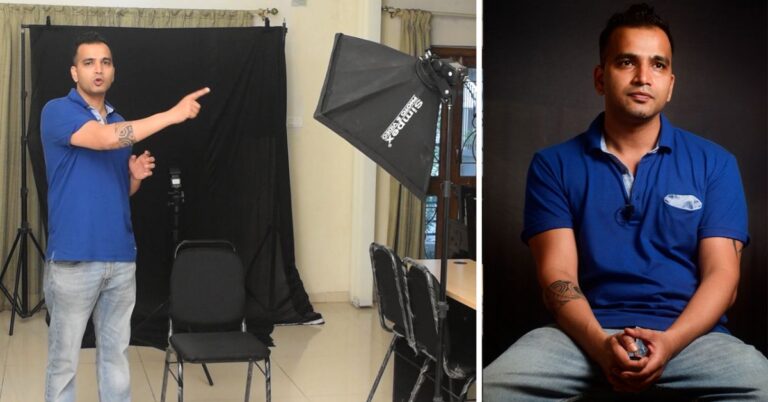
Backdrop and Stands
This is the first thing you would need. Many beginners even use the walls of their house but that won’t result in good looking shots. Here’s how a backdrop with stands looks like:

It consists of a colored backdrop with stands.
These days stands come really cheap. For instance, the stands below cost only Rs.1800 on Amazon (less than $30)

Then comes the backdrop cloth.
If you want things to be really cheap, you can go for a muslin cloth backdrop. They are the cheapest and if you’re a complete beginner I would recommend these. They come in different colors. When you are starting out you can go for both black and white colors.
There is another type of backdrop called as a Seamless backdrop. These can be more expensive but they are better because as the name suggests, they are seamless and hence you don’t face the problem of texture of the backdrop showing up in shots. They look something like this:
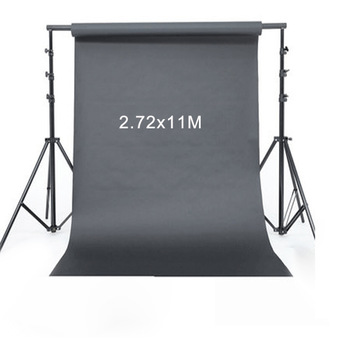
The seamless paper comes in the form a roll and it can be extended. One of the best places to buy this in India is www.studiobackdrops.com
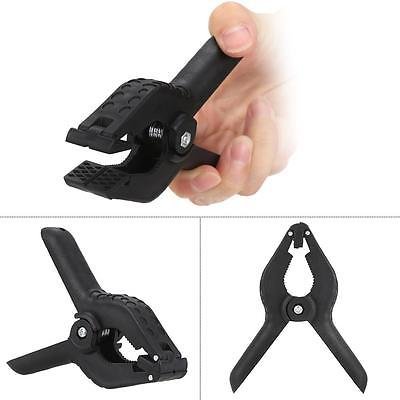
You’ll also require clamps that will hold the backdrop to the stands. Here’s how clamps look like:
Studio Light/Strobe Light or External Flash/Speedlight
When it comes to using a light, you have two options.
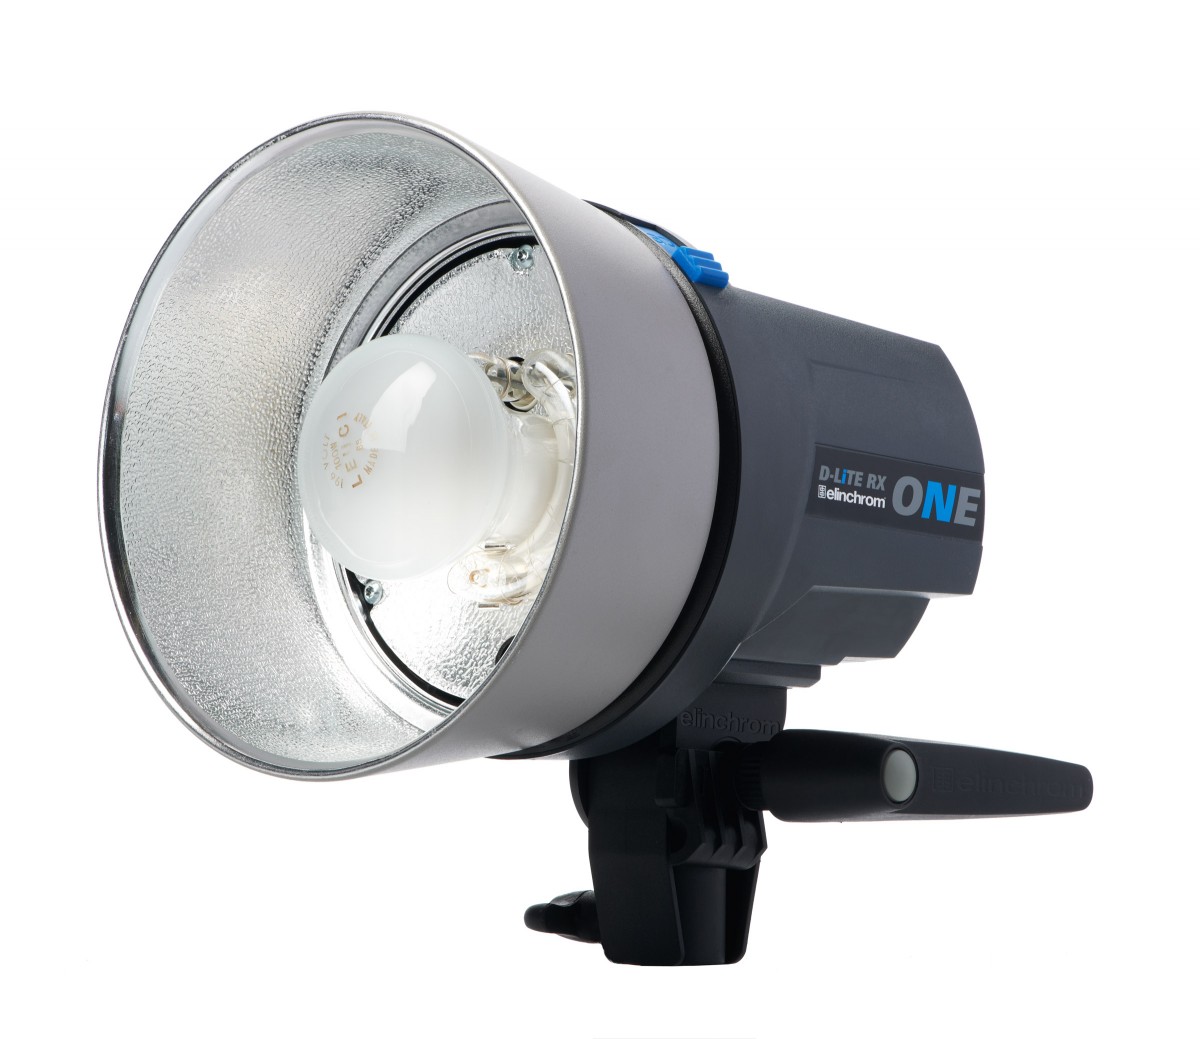
The cheaper option to use is an off-camera flash/external flash/speedlight. The more expensive option is to use a proper strobe light or studio light.
Here’s how a strobe light looks like:
And here’s how an external flash or speedlight looks like:
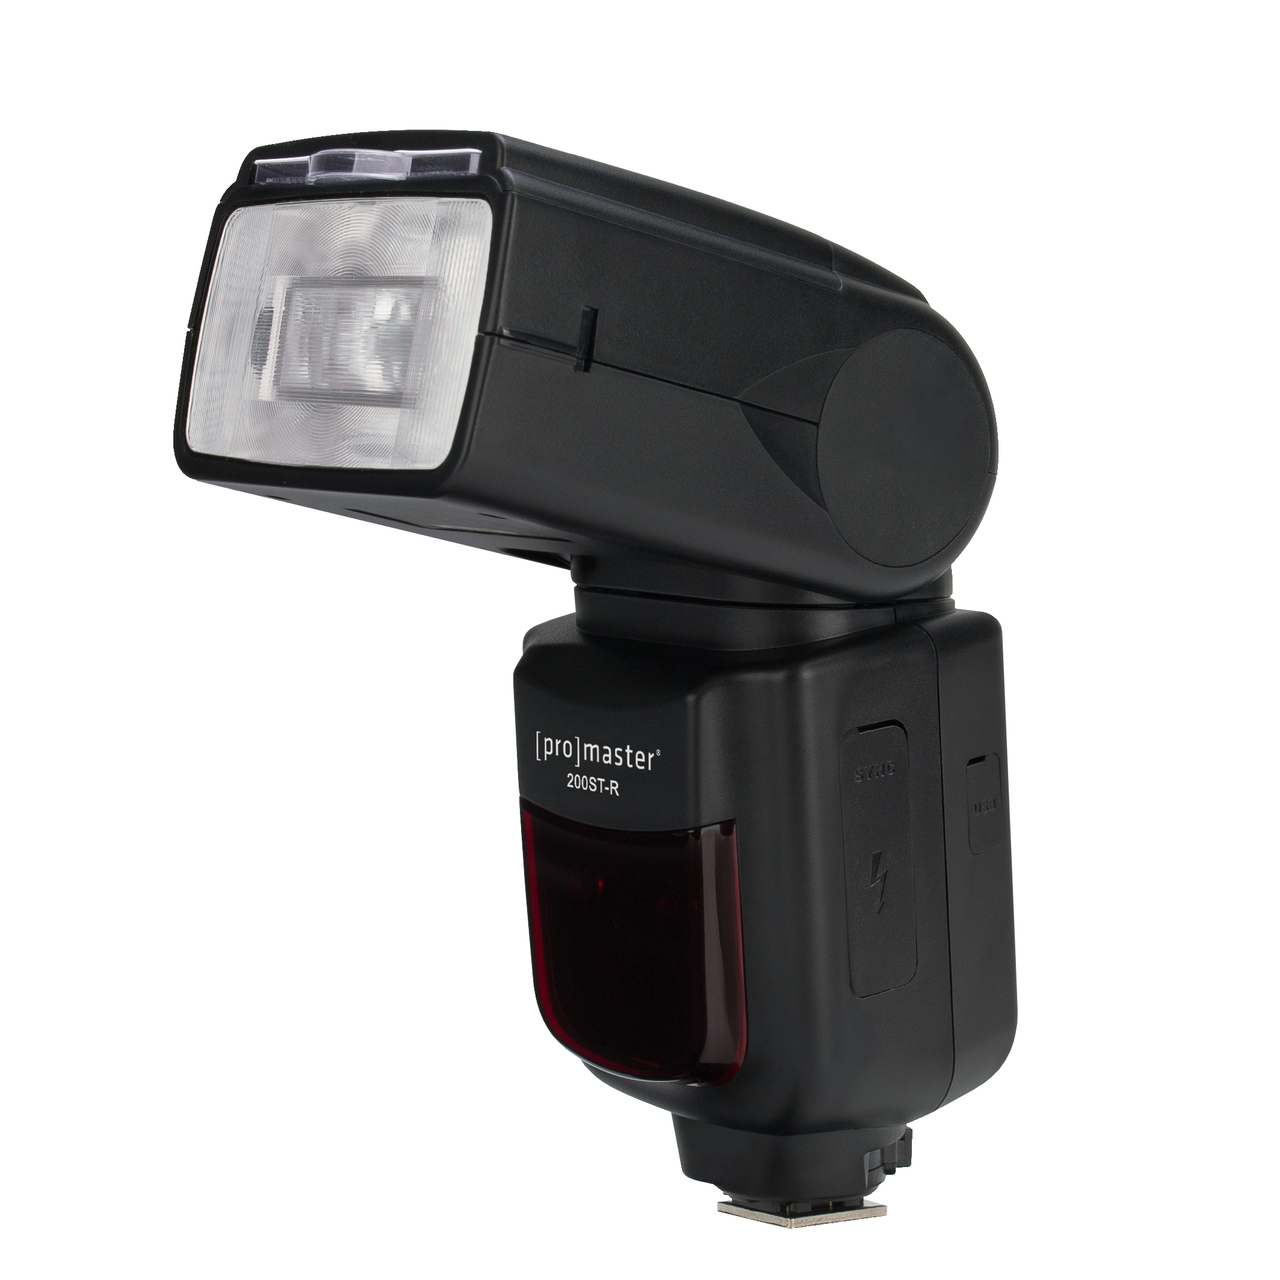
Basically speaking, both these lights are flashes.
In the next part, we’ll be looking at the difference between a strobe and an external flash in detail.
But you’ll need either of these for your lighting. For now, let’s move to the next piece of equipment you would need:
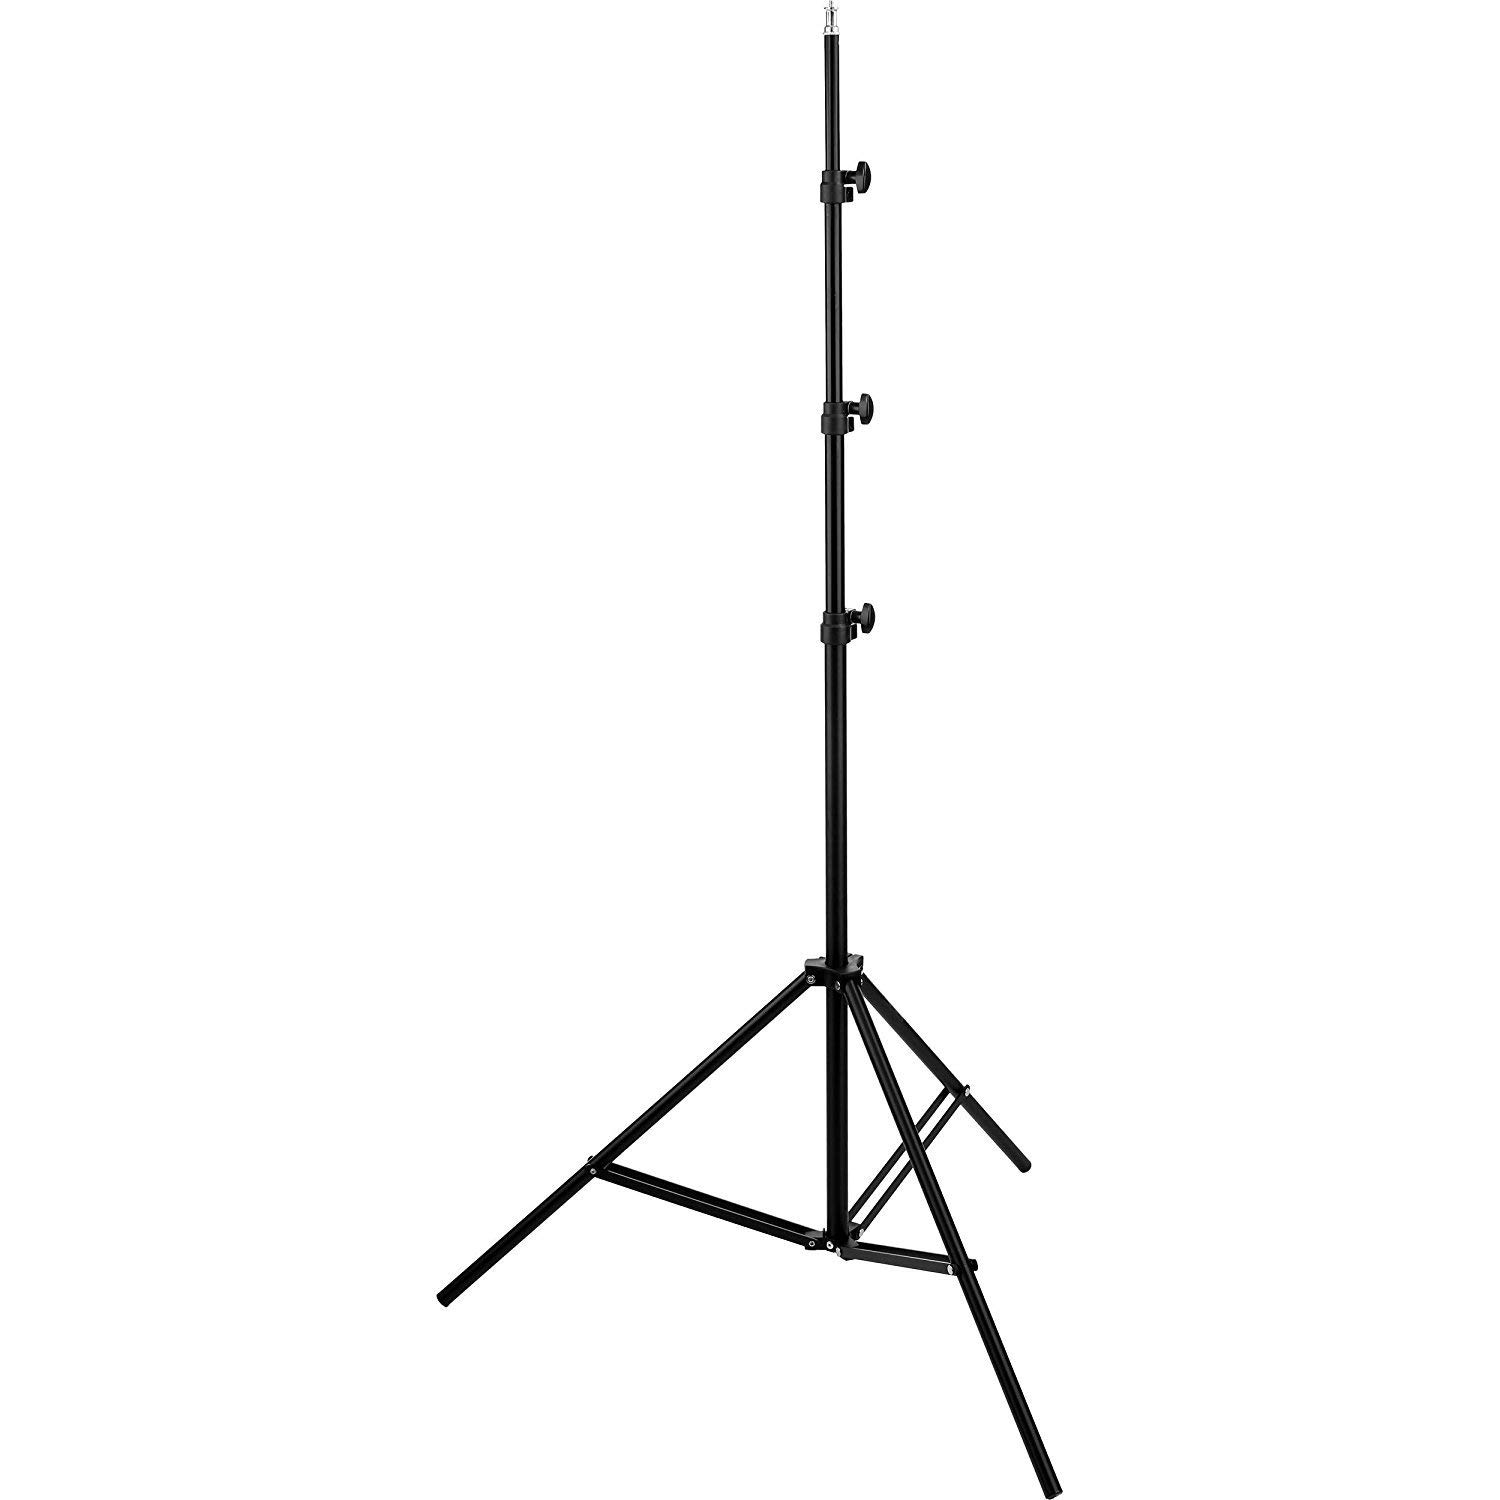
Light Stand
No rocket science with this one. As the name suggests, a light stand is where you’ll be placing your light. It looks something like this:
Modifier
A modifier is a piece of equipment that modifies light coming from the strobe.
Usually, modifiers are used to turn the hard light coming from the strobe or flash into soft light. They are mounted on the light.
They basically make the source light bigger and the bigger the source of light is, the softer it gets. For instance, here are some two most popular type of modifiers:
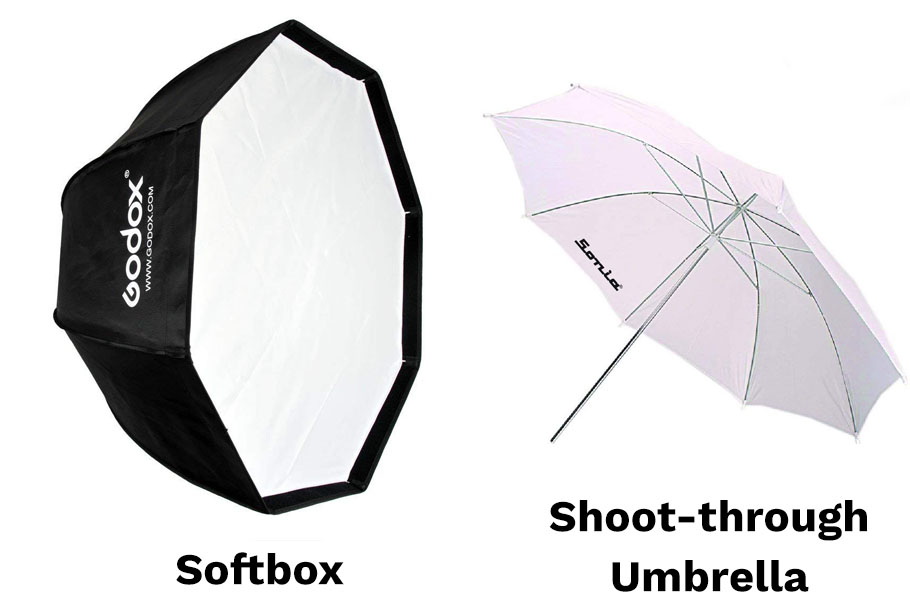
Even within a softbox and an umbrella, there are countless variations. We’ll be talking about modifiers later on when we talk about hard light and soft light.
So that’s it. Though a proper studio can have countless things, these are the most basic things you will require. Later on, we’ll also talk about some advanced equipment that you may need.
Now one of the most important piece of equipment is of course the light. So let’s now see the difference between a strobe light and an external flash/speedlight and understand which one should you be going in for.
What is the difference between a strobe light and an external flash and which one should you use for studio photography?
In the last part we discussed the equipment you would be needing to set up a budget photography studio in your house.
In this part we’ll get into more details when it comes to the lighting.
We’ll be talking about the differences between a strobe and an external flash/speedlight. Like we saw before, here’s how they look:
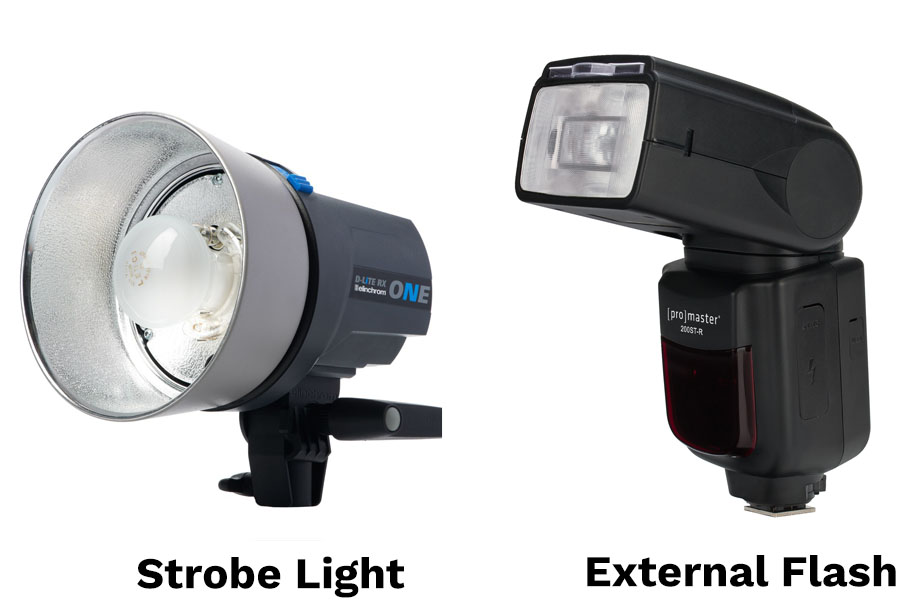
Basically speaking, both these lights are flashes.
First let’s look at the positives of a strobe over an external flash/speedlight.
A strobe is a more powerful flash than a speedlight. So if you have a very large space or you intend to shoot large groups of people, then a strobe is better than a speedlight.
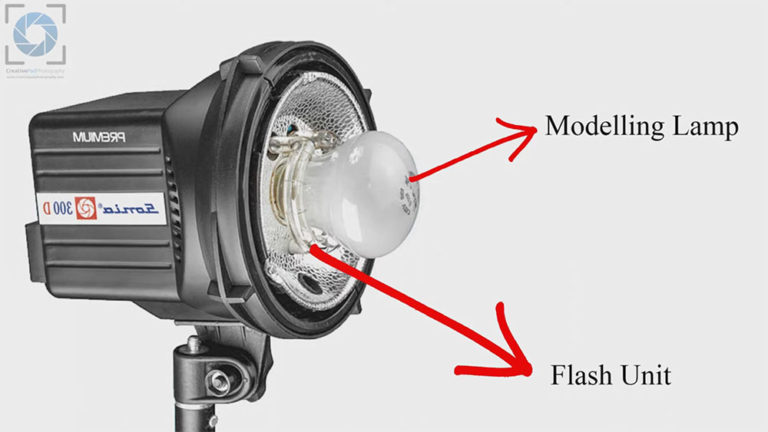
It has has some additional features which makes it slightly better than using a speedlight. For instance, all strobes have a unit called as a modelling lamps. Let’s look at the image below to understand this:

As you can see above, the bulb that you see is that modelling lamp and the circular unit behind is the flash unit.
The main light is produced by the flash unit when you take a shot. It fires just like a normal flash does.
But a modelling lamp offers continuous lighting when you switch it on, just like a regular bulb does. It helps the photographer in composing a photo because the photographer can see before hand how the lighting from the flash unit will look like once the shot is taken.
Hence, the photographer can get the subject in the desired position because the photographer already knows where and how the highlights and shadows will form on the subject.
This really makes the life of a photographer easy because there is no time wasted in trial and error.
An external flash doesn’t have a modelling lamp. It only has a flash unit so you’ll often be required to take a shot first and then adjust your composition.
Also, like mentioned before, a strobe is more powerful than a speedlight. So if you have a very large space or you intend to shoot large groups of people, then a strobe is better than a speedlight.
The higher power also allows you to easily use bigger and double-diffused soft-boxes to create softer light. You can use these with a speedlight also but often that will mean bumping up the power of the speedlight to the maximum and that will mean the battery of the flash drains out faster. Also, just the way a speedlight is designed, it may not cover the entire surface area of a big soft-box, thereby still resulting in a light which is harsher than what you would get with a strobe.
And of course, a strobe, unlike a speedlight, is just plug and play, so you don’t have to worry about charging a battery.
A strobe also has come additional features that can be helpful but as of now that’s all you need to know.
Now let’s look at some of the positives of an external flash/speedlight over a strobe.
The main positive is that an external flash will save you a lot of money as compared to a strobe.
The other advantage is that since they are lightweight and run on batteries, you can move them around easily.
You can also use them for outdoor portraits.
That’s about it.
So which one should you be going in for?
If you have the money, definitely go in for a strobe light. There is a reason why pros use it and why they cost so much. They do the job very well.
However, if you are on a budget and just want to see whether studio photography is for you or not, then go in for an external flash.
Provided your studio space is not too large and you mainly intend to do it for single portraits and large group shots, there is no harm in going in for an external flash. They do the job too.
Also, having an external flash with you will never hurt you anyway even if you later on decide to buy a strobe light. Because when it comes to using multiple light set ups, an external flash will always be handy for things like rim lighting/hair lighting/fill light. We’ll be learning about all this later on.
There’s another option you have. Which is to buy a bigger and more powerful external flash like the Godox AD400 Pro. These are basically a hybrid of a speedlight and a strobe since they offer the power of a strobe light but run on batteries so you can use them outdoors too. But again they can be a bit expensive, often even more than a normal strobe. Here’s how they look:

In this series, we’ll focus more on using a normal strobe light since that’s what many studio photographers use.
Now let’s take a look into the anatomy of a strobe light and understanding how it works with the camera.
Understanding a Strobe Light – It’s Anatomy and How to Trigger it
In the last part, we learned about the differences between a strobe light and a speedlight and which one would be the better option according to your circumstances.
Like mentioned before, in this series of articles on Studio Photography, we will keep our focus on using a strobe light as we have separate article on using an external flash/speedlight.
So let’s look at a very basic strobe light to see some of its important parts.
We’ve already seen the shot above before. On the front side, the strobe will have two units – a modelling lamp and a flash unit.
We’ve already seen in the previous part what these two units do.
Let’s see how a strobe light looks from behind:

Now the look of a strobe (especially from the back) will differ from strobe to strobe, but there are some important functions that all strobes consist of. We’ll talk about those.
The first one is a set of buttons to change the flash output/power of the strobe.This is pretty straight forward. You can increase or decrease the power of the strobe (the light thrown by the flash unit). This power is measured in terms of stops of light but we won’t get into that discussion right now. In the diagram above, the up arrow and the down arrow on the left side represent those buttons and the number on the screen is displaying the power of the flash unit.
The button next to it activates the modelling lamp and the up and down arrow above and below it can be used to increase or decrease the power of the modelling lamp.
One more important function is that of the slave mode. In the shot above, it is the button on the top right with the eye symbol. When you activate the slave mode, the strobe will fire when it detects another flash going off. We’ll talk about the slave mode later in this article after we have learned how to trigger a strobe from our camera.
There are other functions too but the ones discussed above are common to almost all good strobe lights.
Now that we are aware of the anatomy of the strobe light, let’s try to understand how to trigger a strobe light using our camera.
How to Trigger a Strobe Light
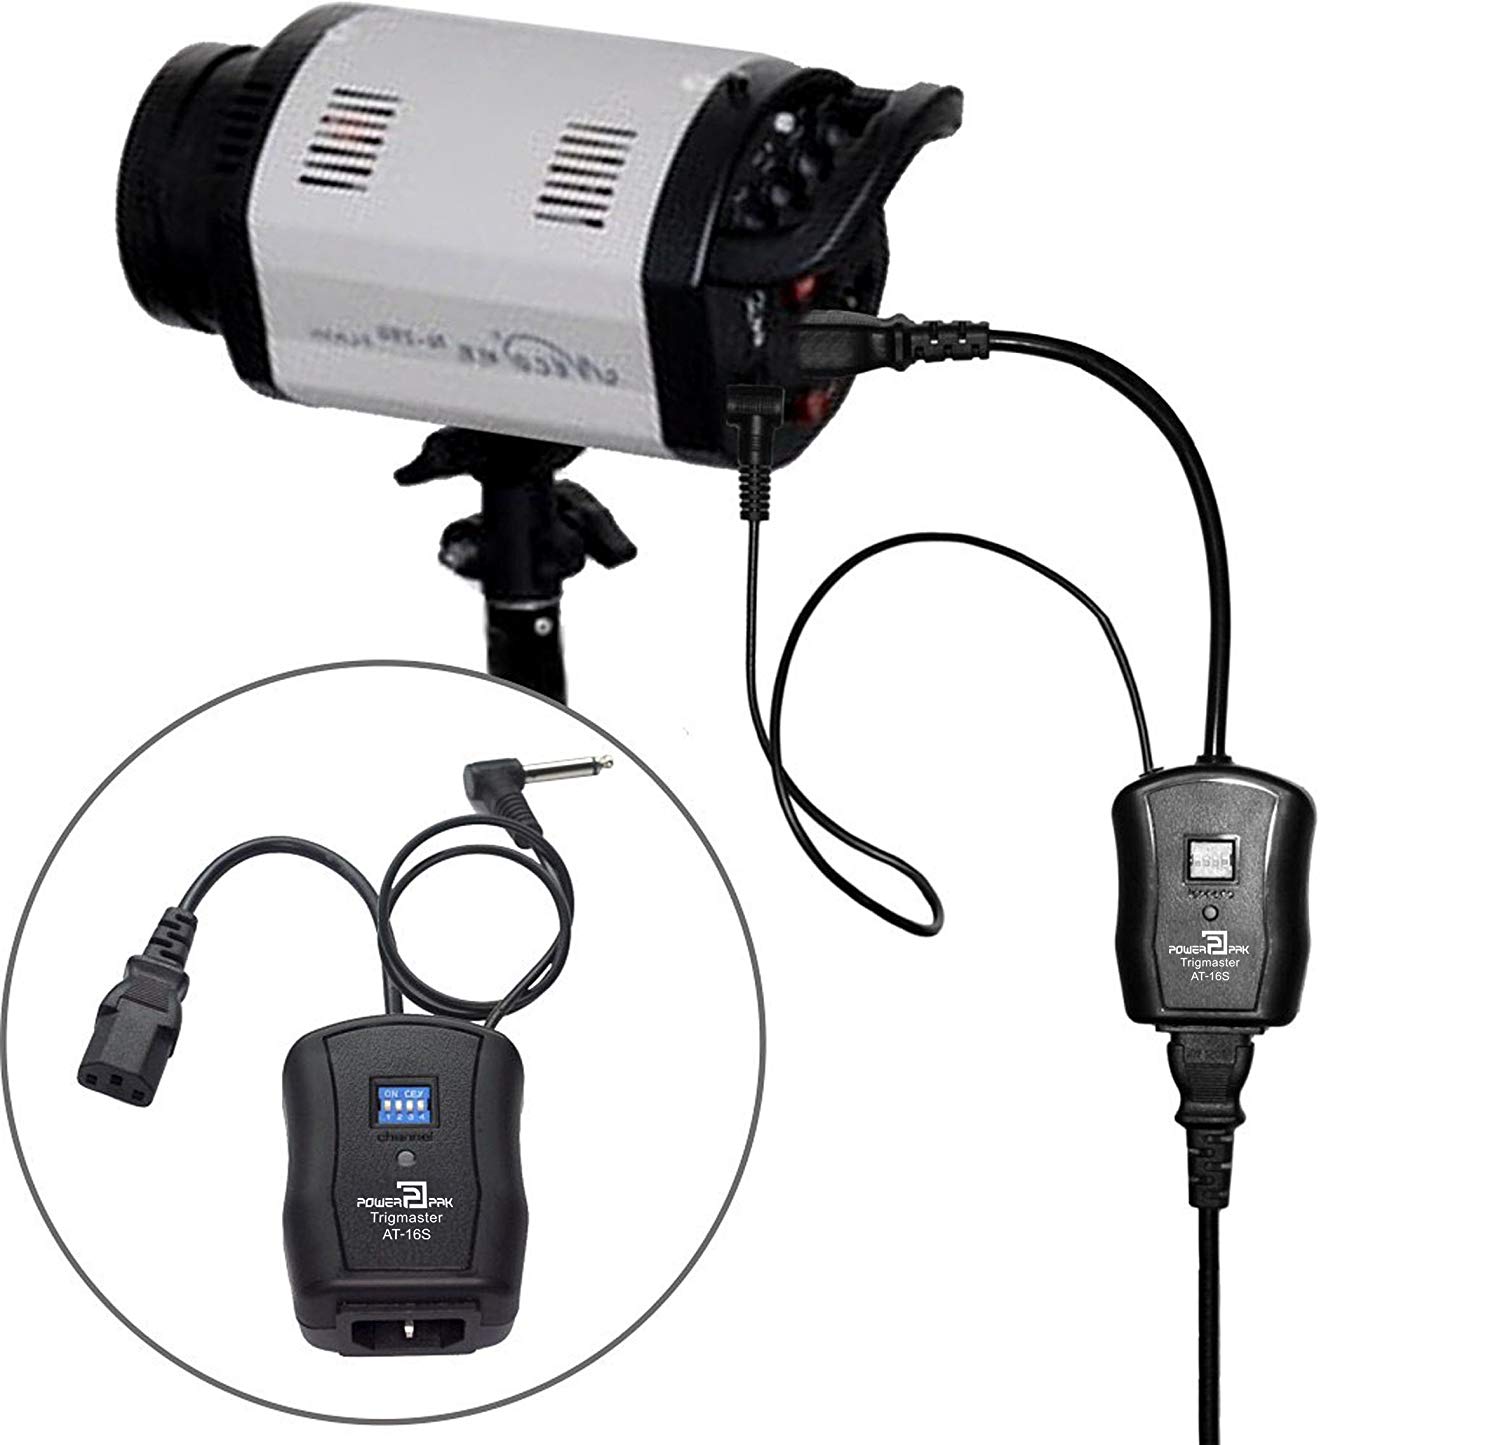
To trigger a strobe light, you need a set of devices called as transmitter and receiver.
They look something like this:
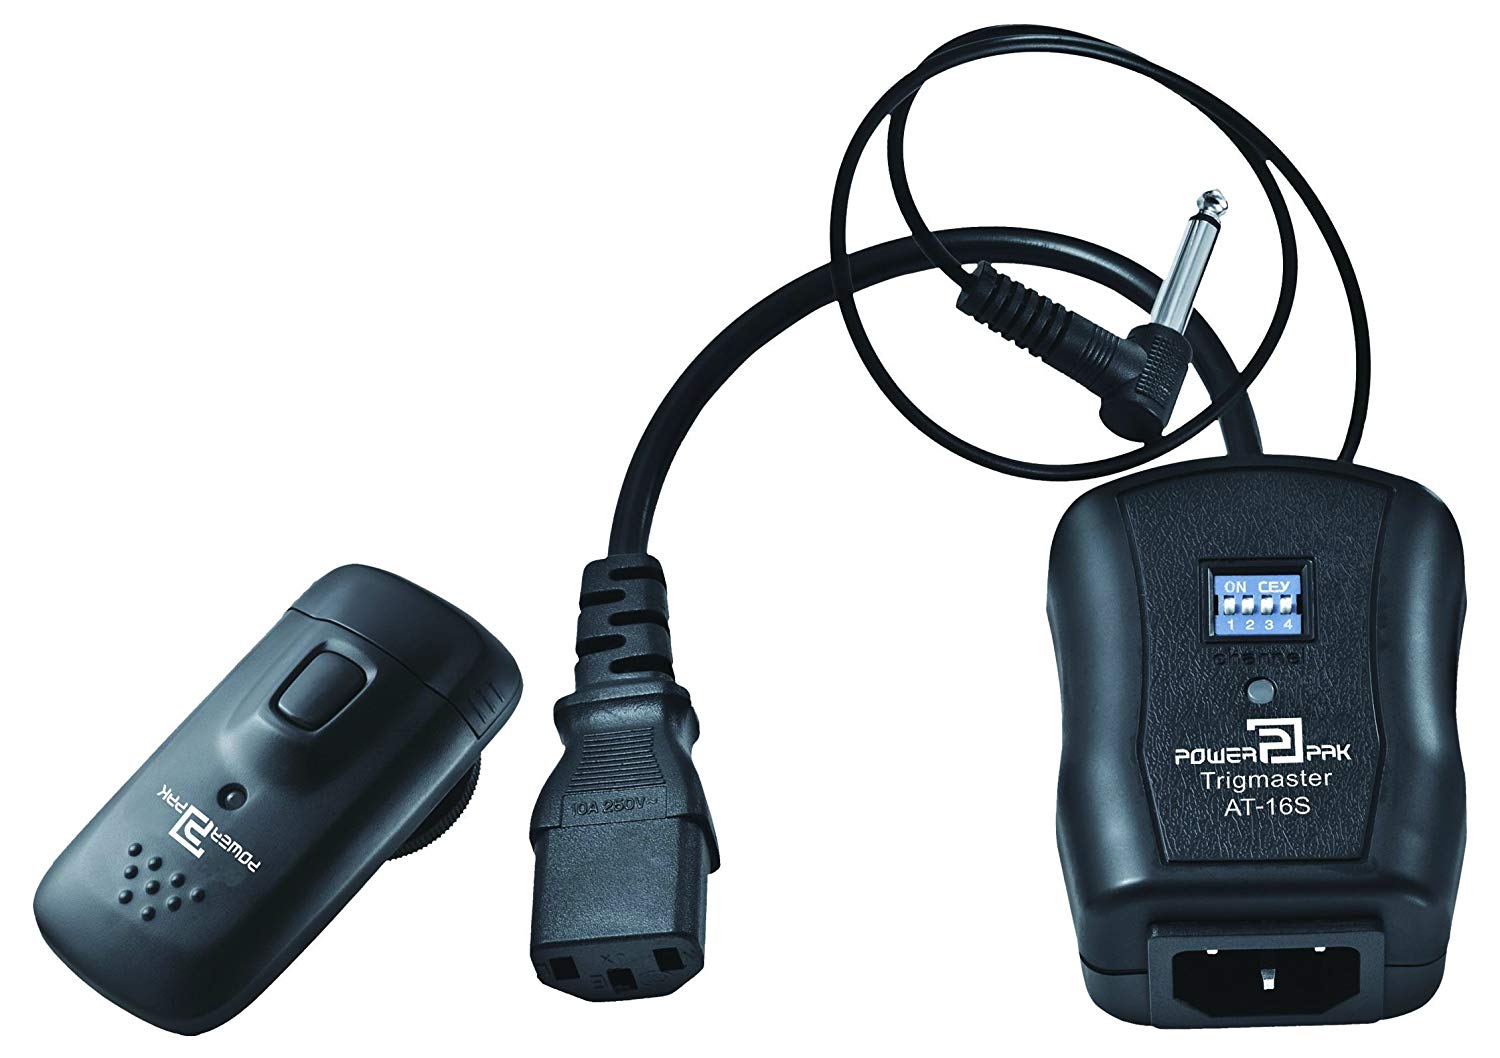
The device on the left is called a transmitter. The transmitter goes on the top of the cameras hot shoe, like shown in the image below:
The receiver goes into the strobe light, like shown below:
Most of the strobe lights these days have built-in receivers in their body so you only need a transmitter.
The transmitter and receiver (if not in-built) comes with the strobe itself in most of the cases so you don’t have to purchase it separately.
When the transmitter is mounted on the hot shoe of the camera, it communicates with the receiver in the strobe and the flash unit of the strobe will fire whenever you take a shot, just like a normal flash on the camera does.
If you have multiple strobe lights from different brands, you can use the slave mode on the one of the brands to make it fire with the strobe that you are triggering with the transmitter. You can also combine an external flash/speedlight by using the slave mode as external flashes too have a slave mode.
Now that you know about a strobe light, let’s move on to the next part where we will be learning about how to modify the light coming out of a strobe light in order to make it softer and more flattering on the subject.
We will begin the process of understanding how modifiers work by understanding the differences in hard light and soft light.
Hard Light vs. Soft Light – Understanding the Quality of Light and How to Modify it Using Modifiers
In the last part, we learned about the anatomy of a strobe light and we also learned how to trigger it.
When you are using a strobe light in a studio, you’ll rarely be firing it bare.
That’s because the light coming from it is hard light and not soft light. So what is difference between hard light and soft light?
First we’ll learn the differences between hard light and soft light by looking at some images. Then we’ll understand what actually causes hard light and how we can turn it into soft light. So first of all, let’s see how hard light looks like:
This shot has been taken by firing the strobe light bare. You can see that it has produced hard light by looking at the shadows.
If you look at the shadows produced by the nose and under the neck, you’ll see that they are very defined and noticeable. This is one of the main characteristics of hard light and it looks very unpleasing as everything looks very uneven.
The transition from highlights (brighter parts) to shadows defines the quality of light and is termed as edge transfer in photography. If the edge transfer is very defined (like in the shot above), you’re looking at hard light. Now let’s look at a shot with soft light:

This shot has been taken by mounting a modifier on the strobe light and this time you can see that the quality of light has changed. If you look at the edge transfer, it’s very subtle and gradual.
The shadows are very soft and that gives the subject a pleasing softer look.
So how did this happen?
There was a modifier mounted on the strobe. In this case I used a soft box, like the one below:
So what exactly does a modifier do to turn hard light into soft light?
For that we have to understand what causes hard light and soft light.
The main thing that causes hard light and soft light is the size of the source of the light in relation to the subject.
To make this clear, let’s take an example of the sun.
Is the sun a big source of light or a small source of light? It’s a big source of light.
So technically it should produce soft lighting, but we know that that is not the case. When you take a shot with sunlight falling directly on your subject, you get that unpleasing hard light look like the shot below:

You can see here that the shadows and highlights are very defined and this looks very uneven and is very unflattering for our subject.
So why is this happening even though the sun is a big source of light?
Let’s go back to the sentence above – The main thing that causes hard light and soft light is the size of the source of the light in relation to the subject.
The last part is very important – in relation to the subject.
So it’s not just about the actual size of the source of light, it’s also about how large it is in relation to the subject. So even though the sun is actually very large, it still produces harsh light because its very far away from us. That’s why it looks so small to us. So it will still be considered a small source of light and hence will produce hard light.
Now let’s come back to the strobe light.
When you fire the strobe bare, the source of light is very small. But when you put a modifier on top of the strobe, it increases the size of the source of light. The bigger the modifier, the softer the light gets.
But you’ve also got to keep in mind, that the distance of the light from the subject will also matter. Because it’s all in relation to the subject.
For example, you can put a really big softbox on the light but if you take it very far away from the subject, it will still result in harsher light than if it was closer. If you bring it closer to the subject the softness of the light will increase. But because it’s not always possible to bring the light extremely close to the subject, bigger softboxes are preferred in studio photography.
So as a rule of thumb, bigger modifiers are better since they will produce softer and more pleasing light (other things being equal).
We’ll also talk about the different types of modifiers later on and learn their usage.
So now that you are aware of the differences between hard light and soft light, we’ll slowly start getting to the shooting part.
We’ll begin by understanding how the different camera settings will affect our studio shots when we are triggering a strobe light with our camera.
For this, first of all, we have to understand two terms – Ambient Exposure and Flash Exposure. That is what we will be doing in the next article.
Understanding Flash Exposure and Ambient Exposure
In the last part, we learned about quality of light. Now it’s time to start moving towards the shooting part.
Before we can learn how to take studio shots using our camera, one of the key things you have to learn is about two terms – flash exposure and ambient exposure.
To understand this, lets for a moment, forget all about studio photography. Let’s just consider a normal shot we take in natural light.
When we take a normal shot, the ambient light which is reflecting from our subjects enters the lens and falls onto the sensor of the camera, which thereby produces the final image that we see.
What happened there is what we call as ambient exposure, i.e, an exposure (image) formed by the ambient light.
Similarly, when we use a strobe light in a studio, this light also reflects from our subjects and enters the camera just like the ambient light did and it also falls onto the sensor to create an exposure. Since the strobe light is nothing but flash light, this type of exposure is termed as flash exposure.
Now if you have gone through my article on external flash photography, you would have learned that when you are shooting outdoor portraits using a flash, both ambient exposure and flash exposure are important since ambient exposure forms the exposure for the background and flash exposure forms the exposure for the subject and learning how to balance both of them is the key to getting a good outdoor portrait using flash.
But in studio photography, ambient exposure is not important at all. In fact when we start the process of actually taking our studio shot, you’ll find that the first step is to actually take a shot with the strobe light off and achieving a shot which almost black (severely underexposed), i.e, no ambient exposure is allowed. The entire image in studio shots is formed by the flash exposure, i.e, our strobe light. That time we’ll talk about the reasoning behind this.
But for now, all you need to understand is what ambient and flash exposures are.
From the next step, we’ll start the process of understanding how Aperture, ISO and Shutter Speed affect the ambient and flash exposures. This will make you understand what settings to use when it comes to doing studio photography.
How do Aperture, ISO and Shutter Speed Affect Ambient and Flash Exposures
In the last part, we learned the meaning of flash and ambient exposures.
In this part we’ll be learning how Aperture, ISO and Shutter Speed affect ambient and flash expoures.
I’ve already written about this in detail in my article on using an external flash.
Since the strobe light is nothing but flash, the procedure that I mentioned there will remain exactly the same. So you can read those articles by using the links below.
When you go through this articles, I have also talked about what settings to use while using an external flash for outdoor portraits. You can ignore those points when you are reading these articles since we are more concerned about studio photography.
You just need to pay attention to the parts where I talk about how these settings affect flash and ambient exposures. Here is the link:
How does ISO, Aperture and Shutter Speed affect flash and ambient exposures?
When it comes to Shutter Speed, there is another important concept you need to know. Which is that of Sync Speed. I’ve written an article on that too. You can read it by using the link below:
Once you’ve read these four articles, you’re good to go to the next part because we will be starting the actual shooting process in the studio.
Taking Our First Studio Shot – How to Shoot Using a Strobe Light
In the last part we learned how the different settings in the camera (Aperture, ISO and Shutter Speed) affect the flash and ambient exposures.
Now it’s finally time to get started with the shooting process.
This will be a two-step process.
In the first step, we will cut down the ambient light to such an extent that our first shot comes almost black (very underexposed).
This is done because, as mentioned before in this series, in studio photography we light up our subjects and background using only the flash exposure, i.e, using the light from the strobe lights.
This is done mainly because ambient light and flash light have different colour temperatures. If you allow both to form the exposure, you can get bad looking colors on your subject and the skin of the subject can look very odd as the white balance gets messed up.
So how you achieve a shot in which the ambient light is cut out? Let’s go setting by setting
Shutter Speed – In the last part you already learned about the concept of Sync Speed. Let’s assume we are using a camera which has a Sync Speed of 1/200. Since we are trying to cut down ambient light, we’ll use the fastest shutter speed possible. That will be the Sync Speed itself. So for our first shot, the shutter speed will be 1/200.
ISO – Again, we are trying to cut down ambient light. In the last part we already learned that ISO affects ambient exposure. So we’ll use the lowest ISO value. This also makes sure we don’t get any noise in our shot. So it’s a win-win. So we’ll be using ISO 100 (or a lower value if your camera permits).
Aperture – When it comes to Aperture, to be frank, you can start with any setting. Usually I prefer staring with something in between like f8. I’ve usually seen this is enough to cut down the ambient light. So here we’ll use f8.
Also, the transmitter will be set to off for this first shot because we don’t want the strobe to fire in this shot. We are only dealing with ambient exposure for now.
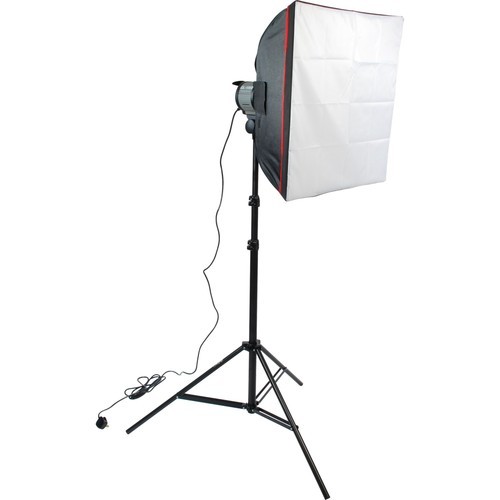
The subject in this case is a mannequin and the set-up looks something like this:

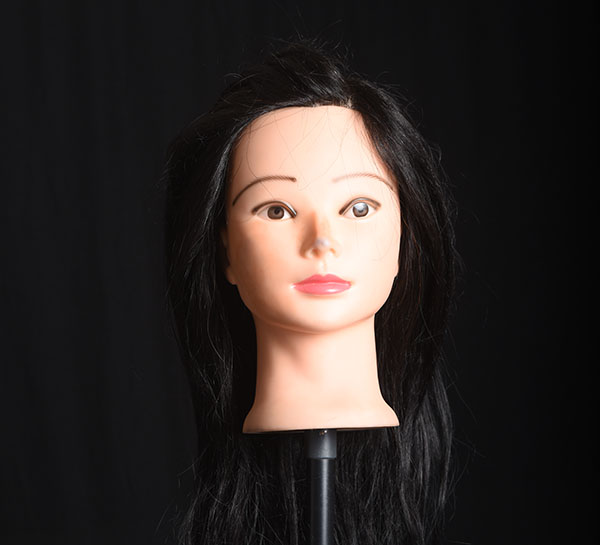
So again, the settings I’m using for this first shot are – 1/200 f8 ISO 100 and the strobe is not firing. Let’s see how this shot looks:

You can see that we can barely see the mannequin. So we’ve been able to cut out enough ambient light. If you find at these settings, you’re still seeing a good amount of ambient exposure, i.e, the subject is still coming out bright enough, then you can make the f-stop larger to restrict more light. For example, in this case, you can go from f8 to f11 and so on till you get a shot like the one above.
So our first step is complete.
Now it’s time to move on to the next step, which is relatively straightforward, i.e, firing our strobe.
So just set your transmitter to ON and take a shot. This time the strobe will fire.
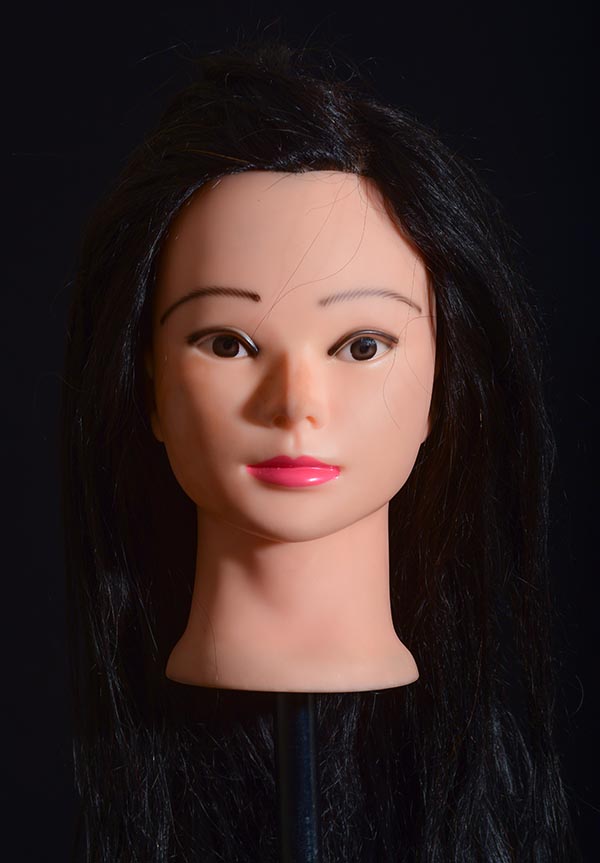
See if you are happy with the exposure. If not, you can tweak the output/ power settings on the strobe. For the shot I am taking, I set the strobe light to 1/2 power and this was the result:
This was slightly too bright in my opinion. So for the next shot, I have decreased the power from 1/2 to 1/4. Let’s see this new shot:

You can see that by decreasing the flash exposure, we’ve been able to get a perfect shot now.
The best part about studio photography is that once you’ve nailed down the settings, they really won’t change much. Mostly you’ll only be tweaking the flash exposure by changing the strobe power/output. If you have a transmitter that allows you to change the power right from the transmitter itself, this is very convenient. But if you don’t have such a transmitter, then it can be a bit inconvenient to walk up to the light every time to change the power.
So another quick way to solve flash exposure problems is to change the aperture. We have already learned that Aperture affects both flash and ambient exposure. If you change the aperture a bit, it won’t have a significant impact on the ambient exposure since the other settings are already restricting a lot of light. But changing the aperture will have a clear impact on the flash exposure so it’ll almost be as good as changing the strobe output itself.
For instance let’s say you took a shot at f8 with the strobe set to 1/2 power. You found that your subject looked very bright. You want to reduce the flash exposure by 1 stop of light (halving the amount of light). You can either do this by changing the strobe output from 1/2 to 1/4 or changing the aperture from f8 to f11 (1 stop of light reduction).
Of course, the ideal way would be to use the strobe output power because it only impacts flash exposure and not ambient exposure. But as long as you are not changing the aperture to extremes (like f2.8 or f29), you can definitely use the aperture to make small tweaks in exposure because it’s very convenient since you can do that from the camera itself.
So this is how studio photography works. Cut out the ambient light and then use the strobe to get the correct flash exposure.
From there on, you can experiment with the lighting and add multiple lights too. You can get an idea about this by reading my artcile on studio photography using a speedlight, where I talk about using multiple lights.