The Principle of Shooting Through Obstacles to Add Depth
Adding depth in photography can mean a lot of things but here we’ll be specifically looking at a few techniques on how to make your shots have a three dimensional feel to them so that they:
- Look more imposing
- Don’t look flat
- Appear to the viewer like how things appear in reality
Let’s get started with these techniques:
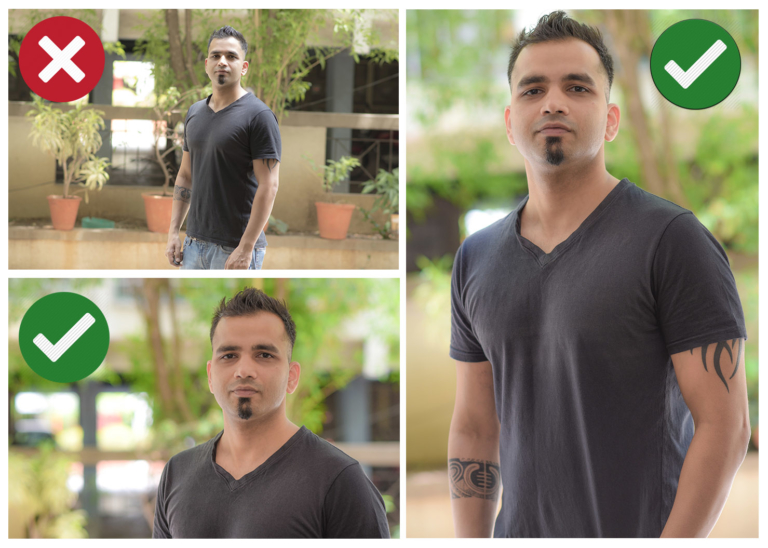
Deliberately Adding an Obstacle In Front
This is a technique that’s very popular amongst photographers who do candid and event photography, like wedding photographers.
Look at the shot below:

Here I’ve taken a very basic looking candid shot of a man having a conversation.
I could have just gone in front of him and taken this shot too, but I chose to back away and deliberately let the woman whom he was talking to come in the frame on the left.
Because I’m using a low f-stop number (remember aperture and depth of field), the woman’s body has become blurred.
This instantly improves the depth of the shot because these kind of shots look very real to the viewer’s eyes.
They look real because that’s how we are used to seeing things with our own eyes.
For instance, just look anywhere. You’ll notice that even though the thing you are looking at is the sharpest as your focus is on that, you can still see other objects around the thing that you are focusing upon. We are never really looking at only one thing. It’s just that other things don’t appear sharp because we don’t focus on them. Like in the shot above, if you were looking at the man, he would appear sharp to you but you would also be seeing the woman in your line of sight. This is what we are trying to achieve by adding an obstacle in front.
This technique works well with using a low f-stop number so that you can blur the obstacle that you are adding.
Also, in such shots, now you know how you can quickly focus and compose the shot using the focus and recompose technique that we discussed in the previous section. So you lock focus on your subject and then keeping the shutter button half pressed, you move around to compose your shot in such a way that the obstacle you’re trying to add comes in the frame, and then you take the shot.
Let’s look at a few more shots that make use of adding obstacles:

You can see here that the main subject of this shot is the woman in black. There are two obstacles used here. First is a woman that you can see towards the left part of the frame and second is the man in blue on the right just in front of the camera. Do you notice that the man is more blurred than the woman who is on the left? That is because the farther away something is from your subject, the more blurred it will get. It’s the same principle as what applies to the background, as we learned in the chapter on aperture. What is near to the subject will come out sharper as it’s closer to the depth of field.
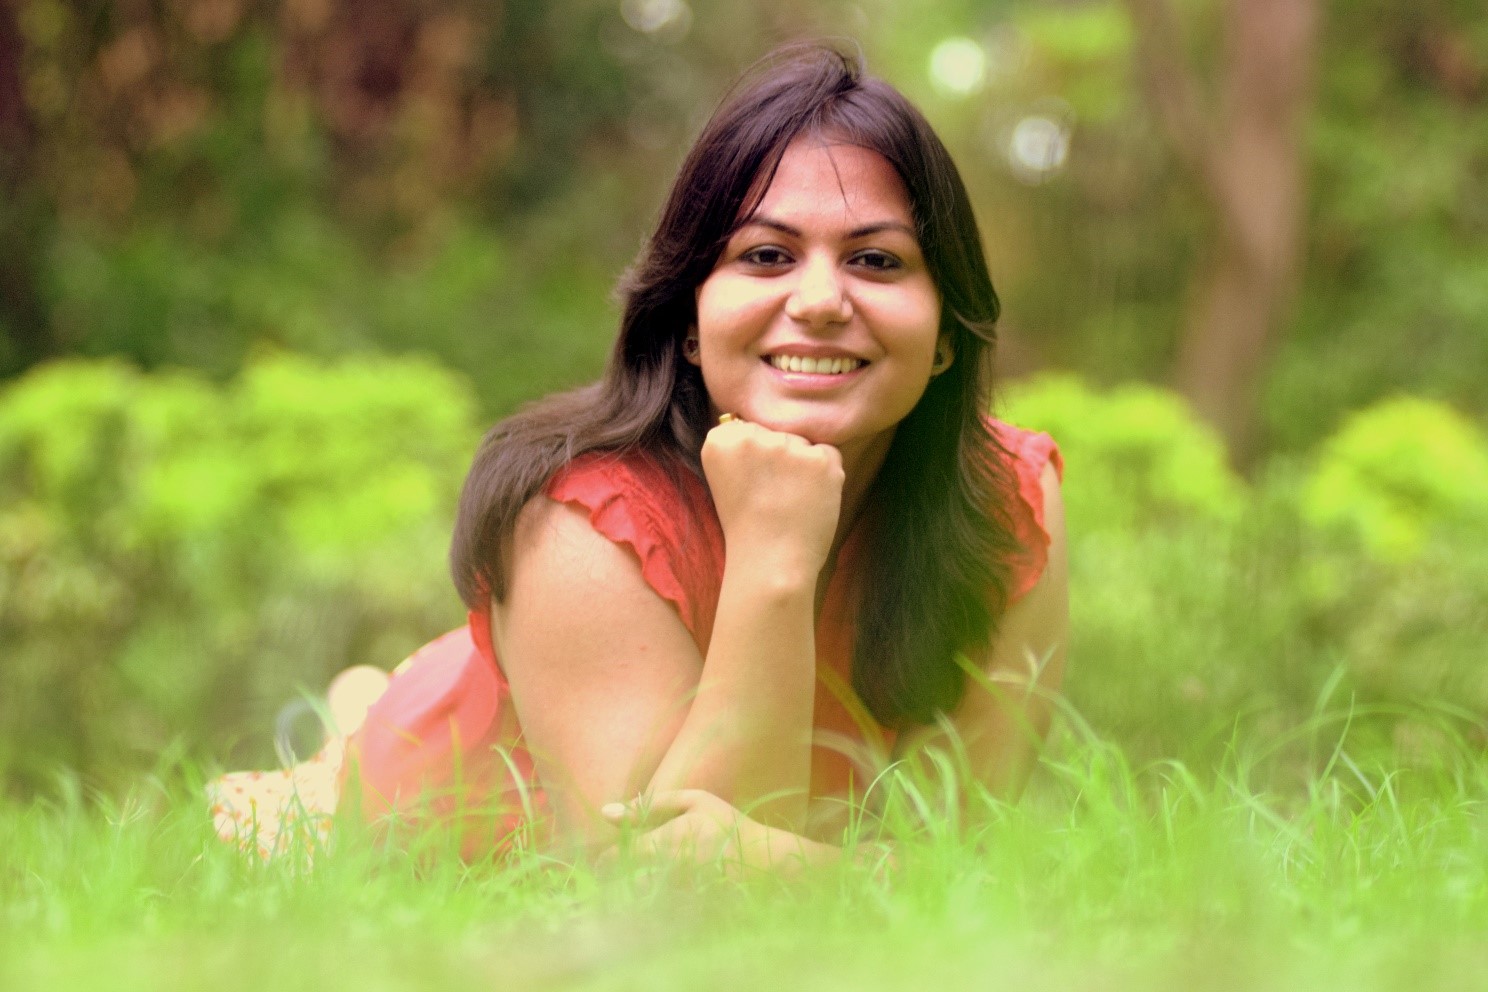
In this shot, the obstacle that I have used is the blades of grass in front the camera. The hazy look you can feel in front is nothing but the grass which has been blurred because I’m shooting this it f2.8.

A simple looking shot can be enhanced just by shooting through an obstacle. I’ve gone behind a steel gate to take this shot through the gap.