The Technique of Focus and Recompose
The technique of focus and recompose is a very popular way to shoot a subject in such a way that you can place it in any part of the frame, thereby giving you full control over the composition of your shot.
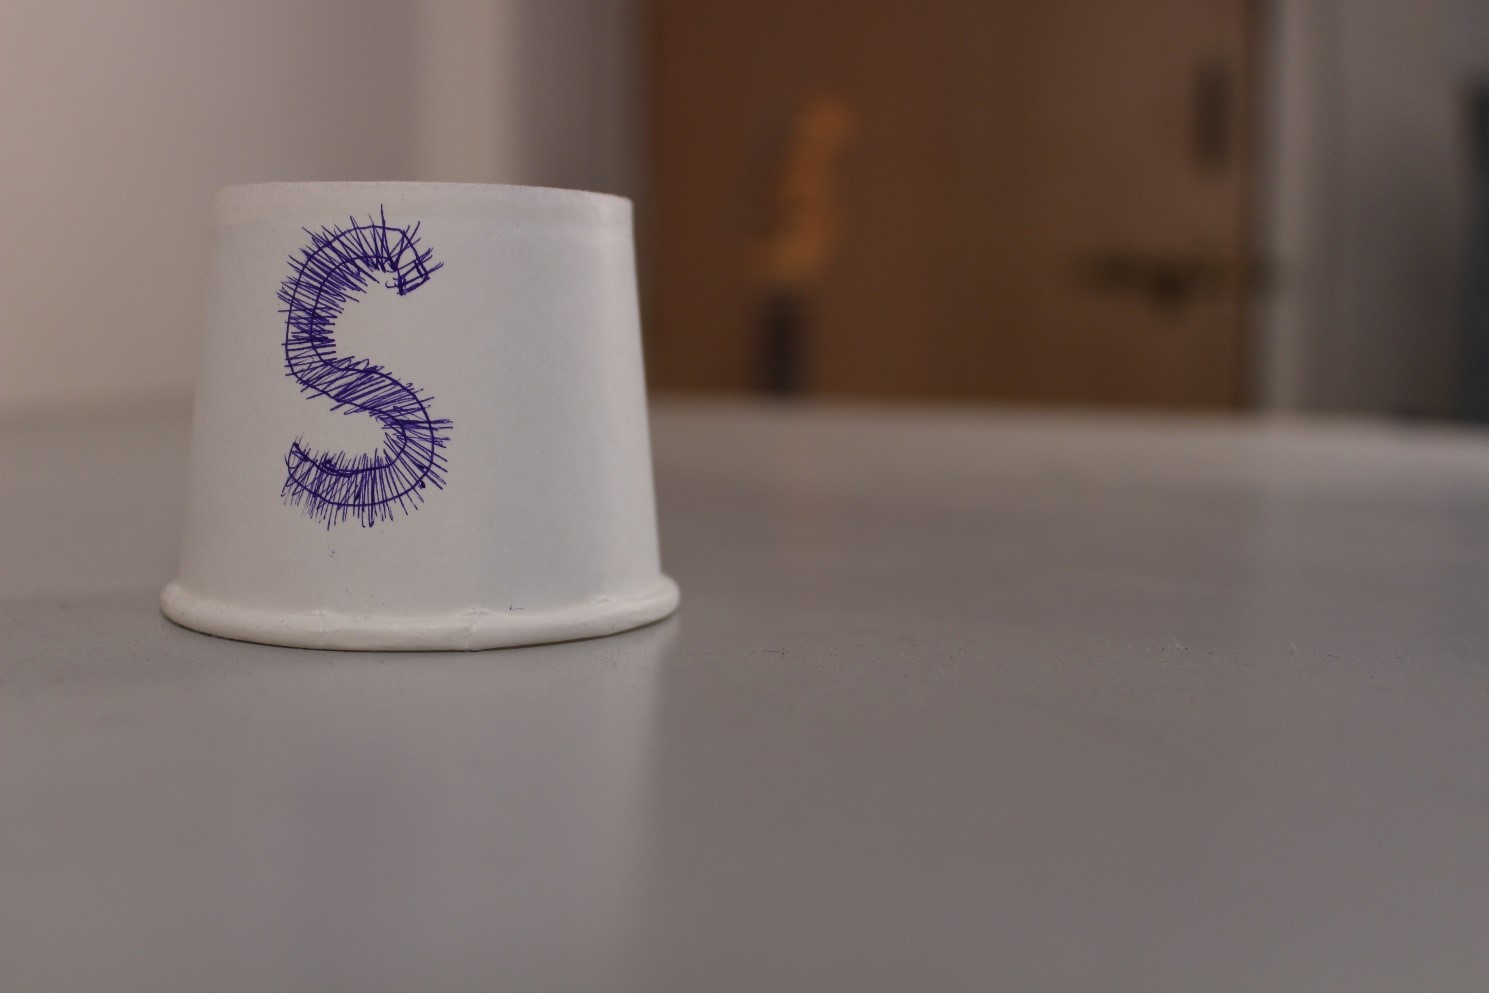
For instance, let’s say that you want to take a shot of a cup which is following the rule of thirds and placed on the left side of the frame like shown in the image below:

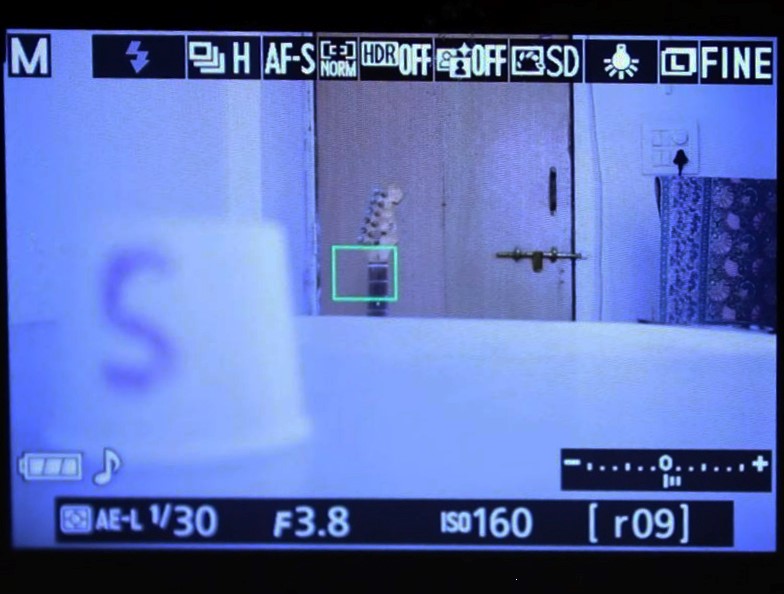
So we get the above composition in frame and are ready to take the shot. But by default, our focus point is near the centre of the frame, like shown in the image below:

So if we lock focus right now, the camera will focus on the background and not on the cup, and you’ll end up getting an image where the background is sharp and the cup is blurred, like the one below:

So how can we avoid this?
One way out is that you can move the focus point using the keypad on your camera or you can touch the screen in case you have a touch-screen.
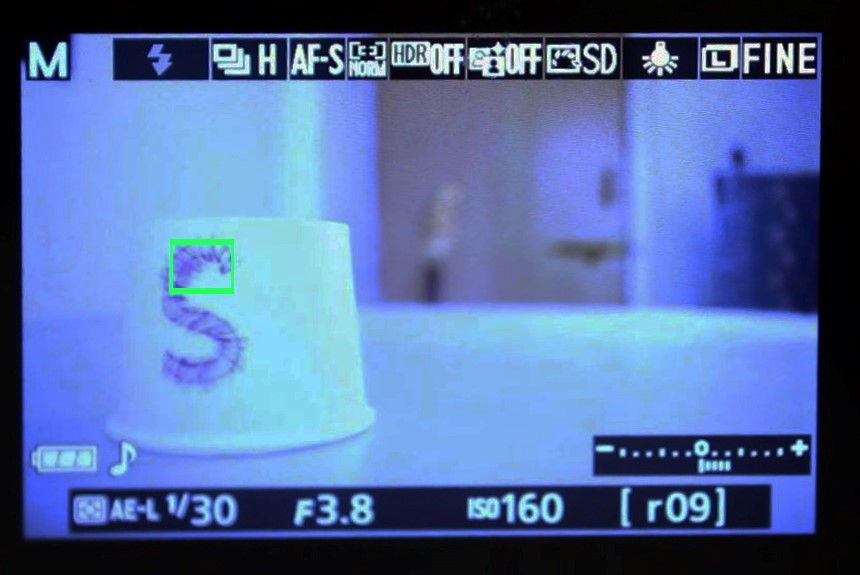
You can use it to move the focus point over to the cup, like in the image below:
Then you are ready to take your shot.
But this is a very slow way of doing things.
While it’s okay to use the keypad to move the focus point in situations where time is a luxury, situations that demand quick shooting capabilities won’t allow you that much time.
So a better and a much quicker way out is to use a technique called as focus and recompose.
Let’s see how this technique works.
Watch the video below to see what to do. Alternatively, you can read the description too.
Video 19: The Technique of Focus and Recompose
Nikon users, click here to watch the video
Canon users, click here to watch the video

- What you do is that you start out shooting with the cup in the middle, just like you have been doing up till now. So to start off, here’s what you should see in your screen:

- You can see that the focus point is in the centre on the cup. What you should now do is lock focus on the cup by half-pressing the shutter button, just like you’ve been doing up till now.
- But now instead of pressing the shutter button all the way down to take the shot, what you do is that you first move the camera to the right side so the cup comes on the left. While moving the camera, make sure you haven’t released the half-press on the shutter button. You should see the following image in your screen:

- Now press the shutter button all the way down to take the shot. You’ll get a shot with the cup in focus, exactly how we wanted it like the image below:


The cup came out in focus because you locked focus on it and then recomposed. The camera retains the focus wherever you initially lock it. And since you keep the shutter button half-pressed, it doesn’t have to focus again.
That’s why the technique is called as focus and recompose.
You can see how much quicker it is than having to move around the focus point using the keypad.
All you have to do is just lock focus on your subject, keep the shutter button half-pressed and then move the camera left or right according to whichever side you want the subject to be in, and then press the shutter all the way down to take the shot.
So now you’ll understand how I’ve taken the shot below:
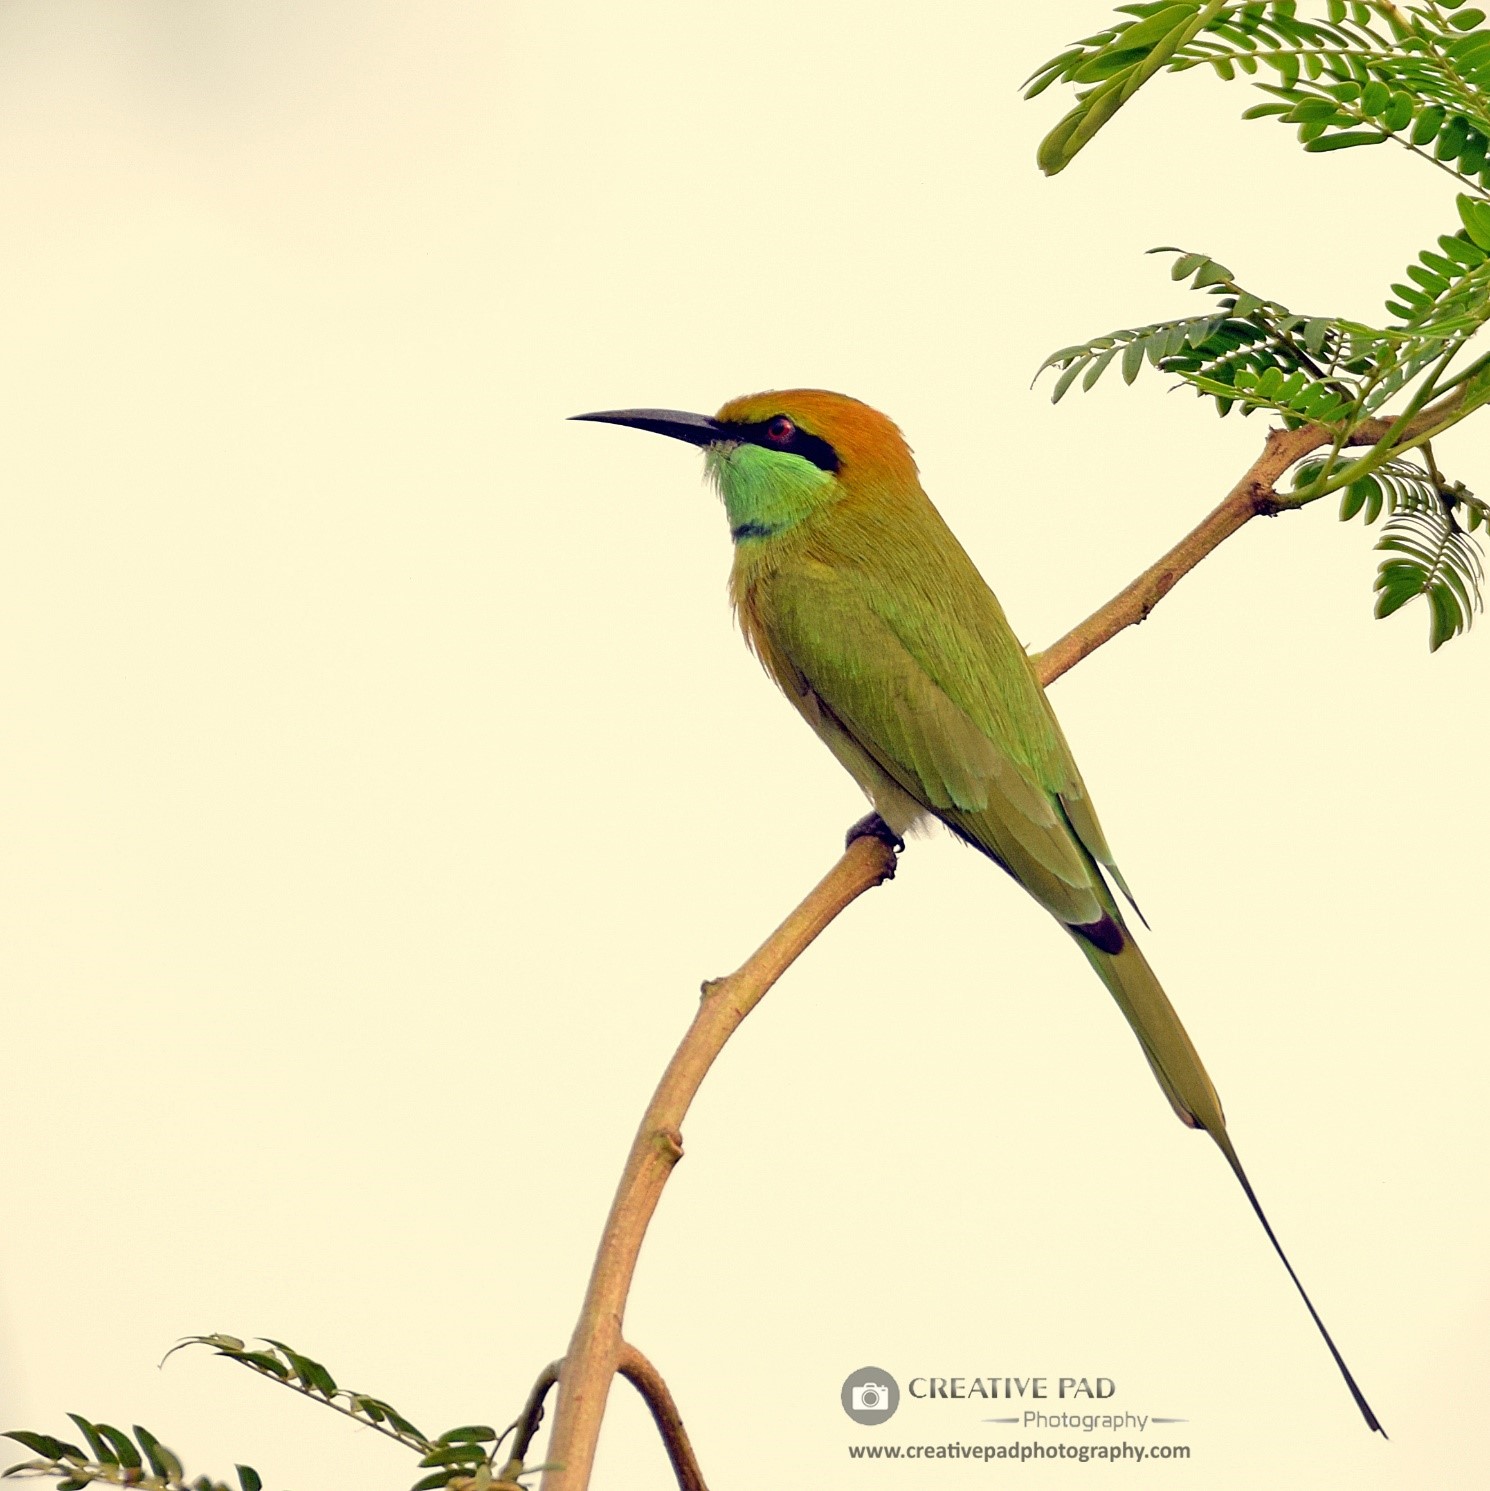
To start off, I had this bird placed in my frame in such a manner that the focus point was on the eye/face of the bird (for living beings, we always focus on their eyes/face). Then I locked focus by half-pressing the shutter button. And then I moved the camera slightly to the left to give some space on the left and put the bird on the right. And then pressed the shutter button all the way down to take the shot. Because I locked focus on the bird’s eye/face, the camera retained the focus even after I moved the camera and since I kept the shutter button half-pressed, the camera did not have to refocus.’
There is one problem with this technique, which is that sometimes at very shallow depth of field (like f1.8 of f1.4), you have to be really careful while making the movement of your camera. This is because at these f-stop numbers, the DOF is razor thin so you can end up not being in the focal plane that you originally intended to be in and that can cause the final shot to go out of focus. In such a case, you can use the traditional way of moving the focus point rather than your camera.