What does a Polarizing filter do? Before & After Comparisons
One of the most common questions asked by beginner photographers is – What does a polarizing filter do? Let’s find out!
Later on, we’ll also be seeing which is the best polarizing filter that you should buy.
But first of all let’s see the answer in brief with some before and after examples of shots that have utilized polarizing filter photography.
A Polarizing Filter does the following 4 things:
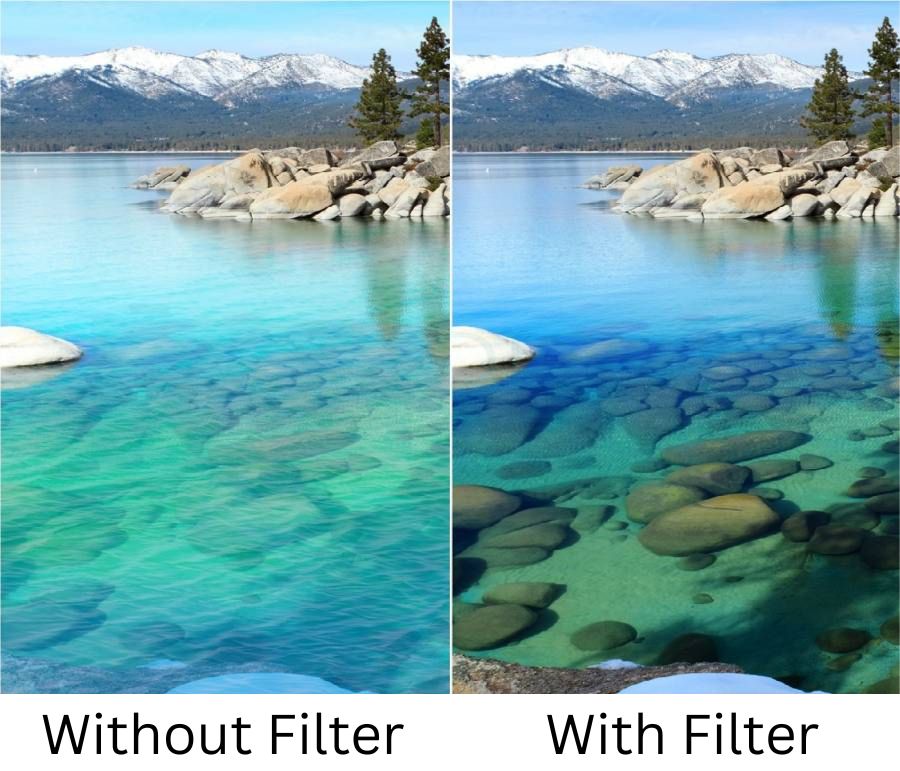
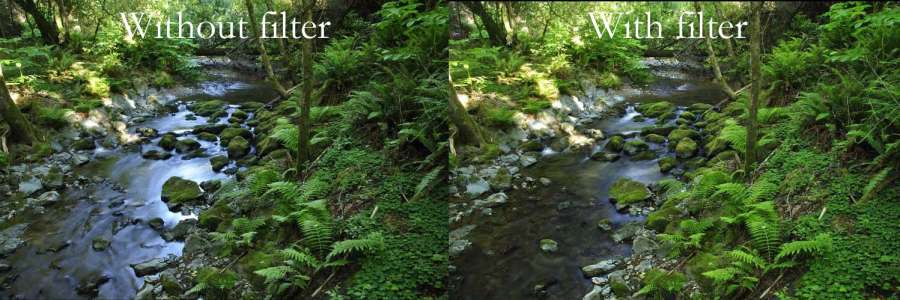
1. A polarizing filter reduces reflections and glare, especially in water bodies, like shown in the before/after images below:
A Video That Shows a Polarizing Filter in Action When it Comes to Cutting Out Reflections in Water
Let’s see a 20 second snippet from my Landscape Photography Course to see how it actually looks when you turn the Polarizing filter when facing a water body:
Let’s move on to the second point.
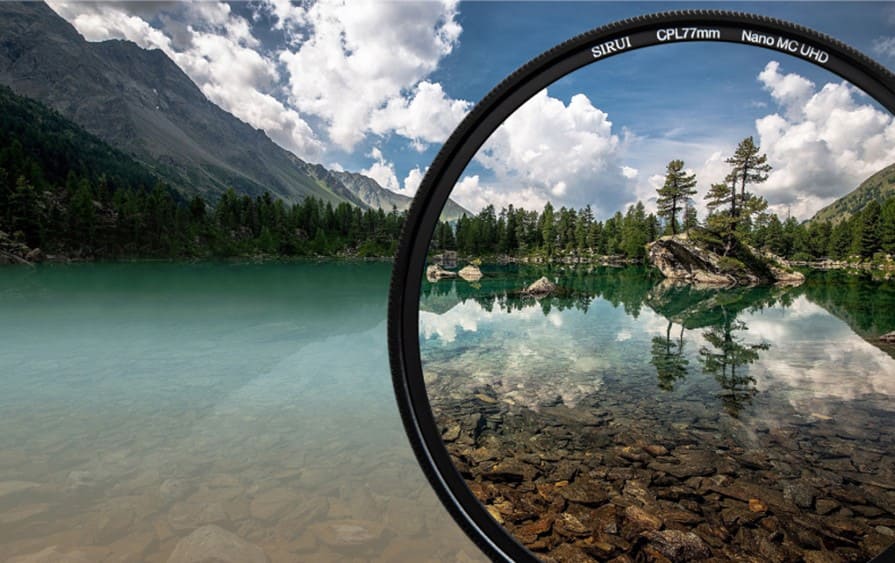
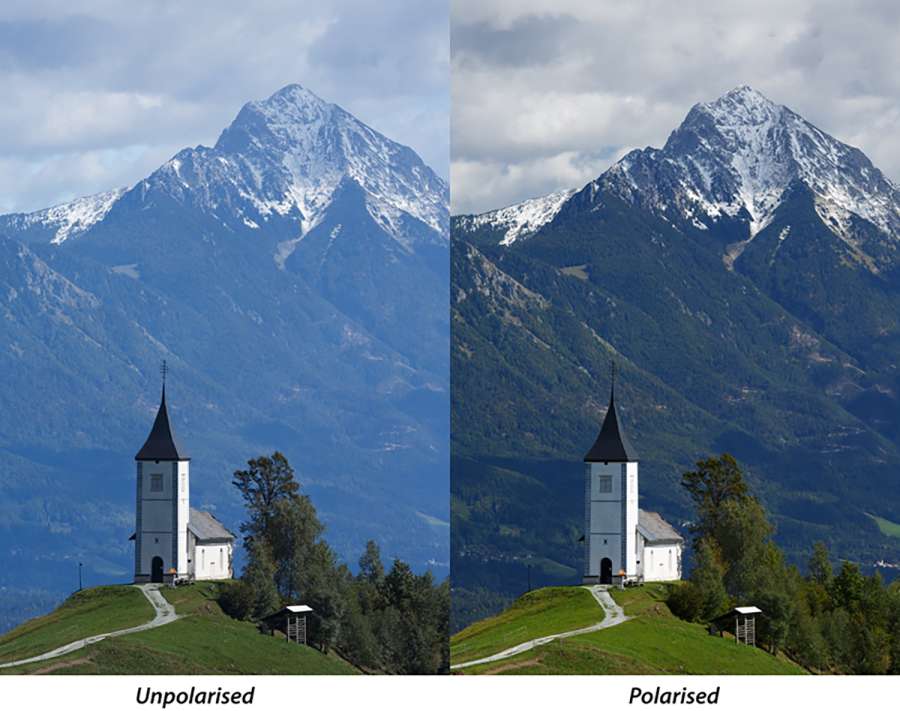
2. A Polarizing Filter cuts down haze (faded look) and improves contrast and clarity like shown in the image below:
Let’s see the third thing it does.
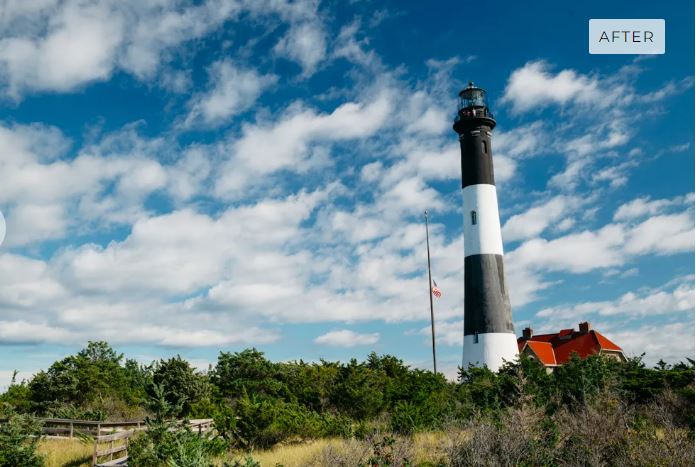
3. A Polarizing filter makes the Sky Bluer and Darker like shown in the before/after images below:

Let’s move on to the final point.
4. A polarizing filter cuts out reflections produced by glass like shown in the before/after image below:

Secondary benefits of using a Polarizing Filter
Protection to the lens
Another small benefit of using filters is the protection they give your lens. A clear UV filter is a good choice for protecting your lens from scratches and damage when you don’t want to use a polarizing filter.
Cutting down light
A polarizing filter also acts as a Neutral Density Filter that reduces the amount of light getting to the camera sensor, which can be a good thing if you need to cut the light down. Most of the polarizing filters stop around 2 stops of light.
Which Polarizing Filter Should You Buy?
We recommend the Tiffen 77mm Polarizing Filter for Beginners:

As you will see in the video below, buying a large filter is necessary even if you have a lens with a smaller mount. Because as shown in the video, you can always put a larger filter on a smaller lens using cheap step-down rings, but you won’t be able to put a small-sized filter on a larger lens. So buying a larger filter covers you no matter which lens you have. Make sure you watch the video below in order to understand this.
How to Mount and Use a Polarizing filter?
When you put a circular polarizing filter on the front of your lens, you can see how it affects your shot simply by rotating the front element of the filter. The polarizing effect in your shot will change as you rotate the element, and once you like the look of it, you simply take the shot.
When it comes to mounting the filter, you simply screw it in front of the lens. If the size of the filter and the size of the thread of the lens is not same, then you have to use step-up rings.
That’s why it’s always advisable to buy the biggest sized Polarizing filter (usually 77mm) and then use step rings to fit it on different lenses. Because if filter is smaller than the lens, then you can’t use it.
Let’s understand this process by looking at a video from my Landscape Photography for Beginners Course:
Types of Polarizing Filters
There are two main categories according to the shape of the filter – Circular, Square and Rectangular, like shown in the image below:
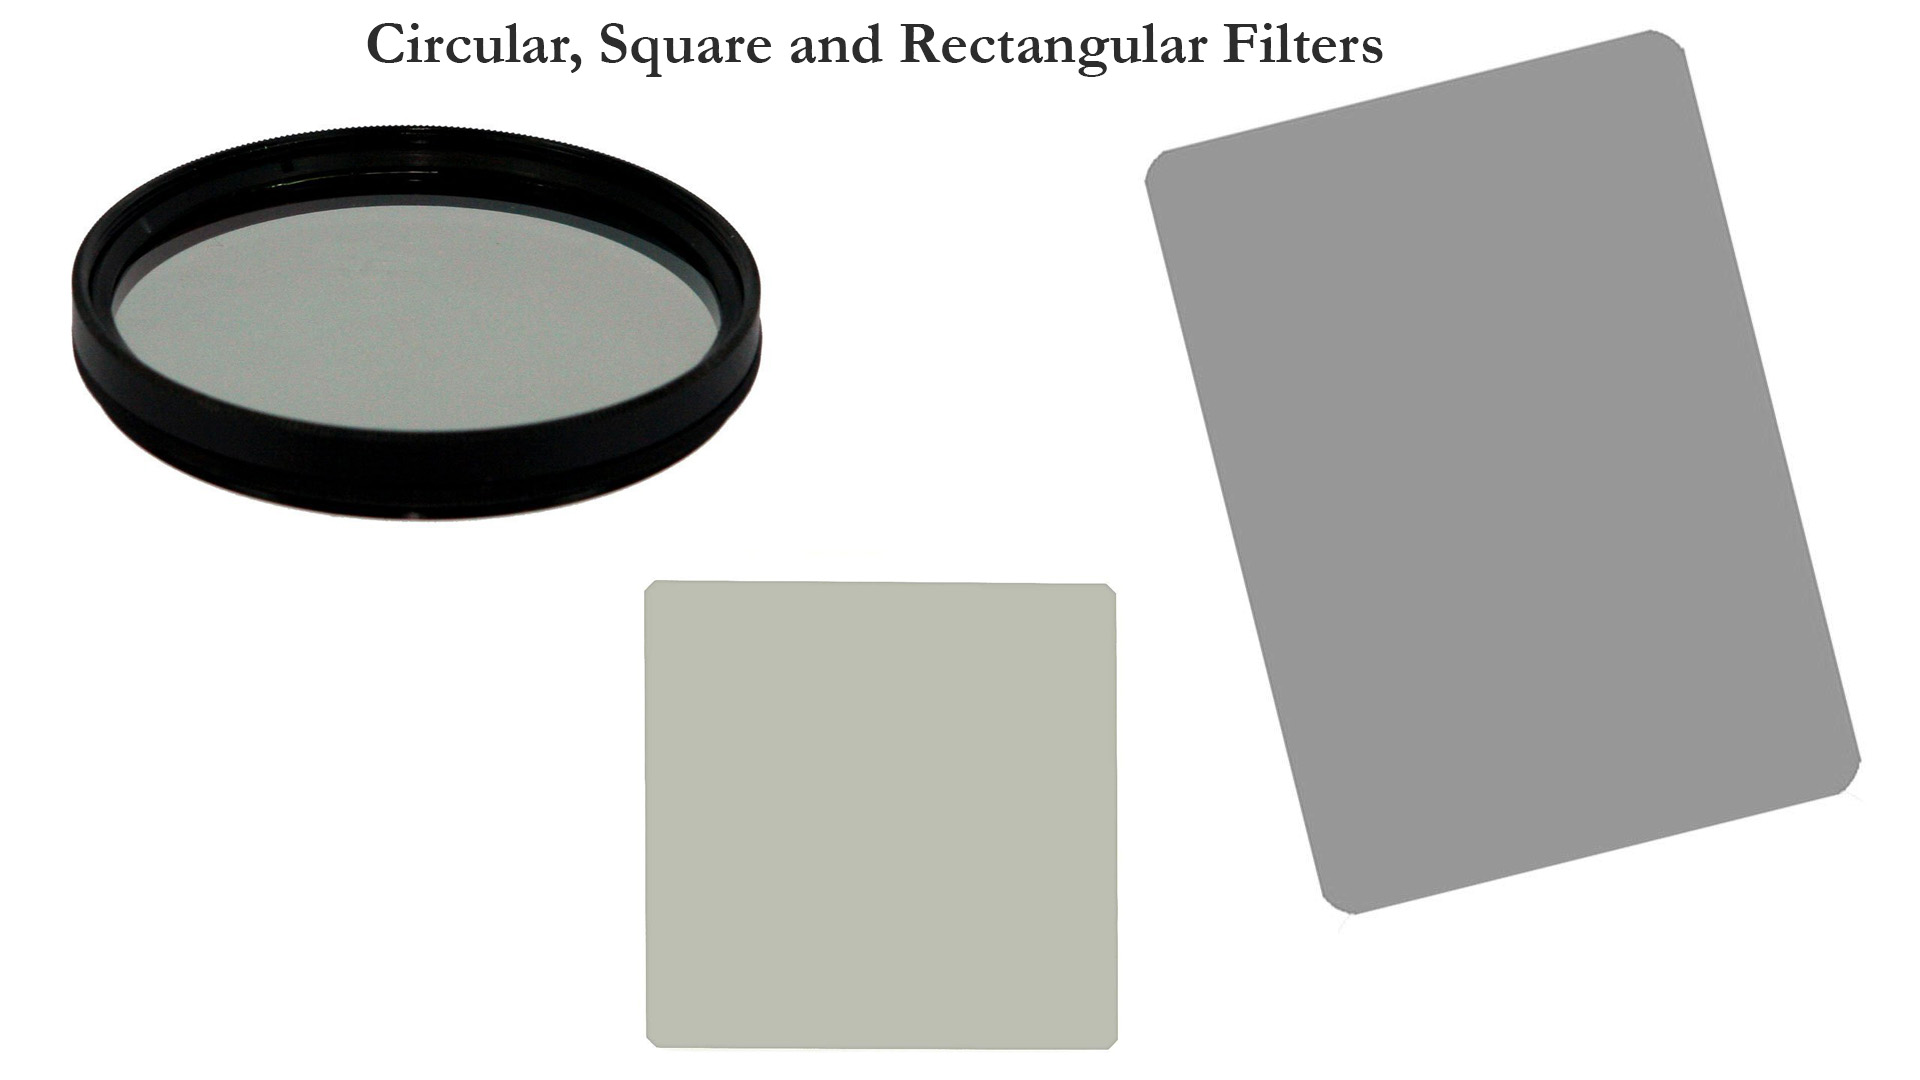
First of all, let’s get one misconception out of the way, which is, a Circular Polarizing Filter (CPL) does NOT refer to a circular shaped filter. A CPL refers to the type of mechanism (filter material) that the filter is developed from. The shape of a CPL can be circular or rectangular or square. The opposite of a CPL is a Linear Polarizing Filter, in which the filter mechanism works in a different way. But again, a LPL can be circuclar, square or rectangular in shape. LPL fliters are not popular because they cause some issues when when it comes to usgae with DSLRs. What these issues are is beyond the scope of this article since it can be a bit complex. But what you need to know is that when people talk about Polarizing filters, they usually mean CPL and not LPL.
Circular shaped filters can be screwed on in front of the lens just like we saw in the video above.
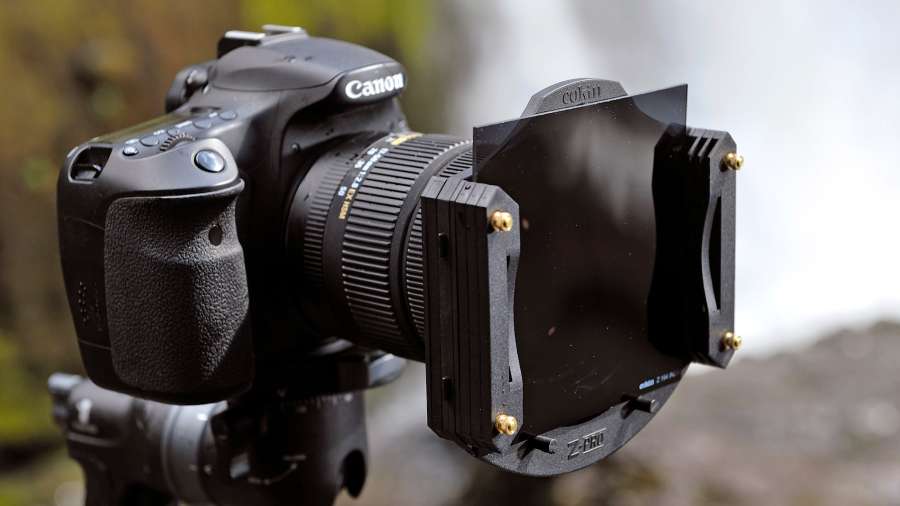
For square and rectangular filters you need to buy a filter holder which has slots and attaches in front of the lens. Then the filter is slotted in, like shown in the image below:
If you are a beginner, it’s highly advisable to go for circular shaped filters since you don’t need to buy a holder and they are easier to use. They are also more widely available.
When is the Polarizing Effect the Strongest?
Sun direction can affect your filter’s effectiveness, so try to keep the sun at a 90-degree angle to you – for instance at your side, not at your back or shooting directly into the sun.
Polarizing filters are only really effective on bright, sunny days, so you may find that your results differ depending on the lighting conditions.
When Not to Use a Polarizing filter
You should avoid using a Polarizing filter if you start to notice that the sky is coming out very dark in some areas, like shown in the image below:

This usually happens when you are using an ultra wide angle lens or shooting a wide panorama. That’s because the polarizing effect may be stronger in certain parts of the sky. Try to rotate the filter to correct this but if it still doesn’t work then it’s better to not to use it in these situations.
Final Thoughts about using Polarizing Filters
Polarizing filters are amazing when used for two things –
- Cutting out glare and reflections in water bodies and glass.
- And cutting down haze and improving colors and contrast when a shot looks faded.
Apart from these two benefits, a Polarizing filter is not really used much.
But one thing that really makes a Polarizing filter very important is that its effect cannot be replicated in editing.
For example, if you have glare or reflections in a water body, no editing software will help you correct that.
I hope this article helped you. Do check out my 5 hours long Landscape Photography course where I not only cover Polarizing filters but a host of other filters too. The course is available via Udemy. You can check out the promo video below to see what all it contains: